Calico Organizer
thingiverse
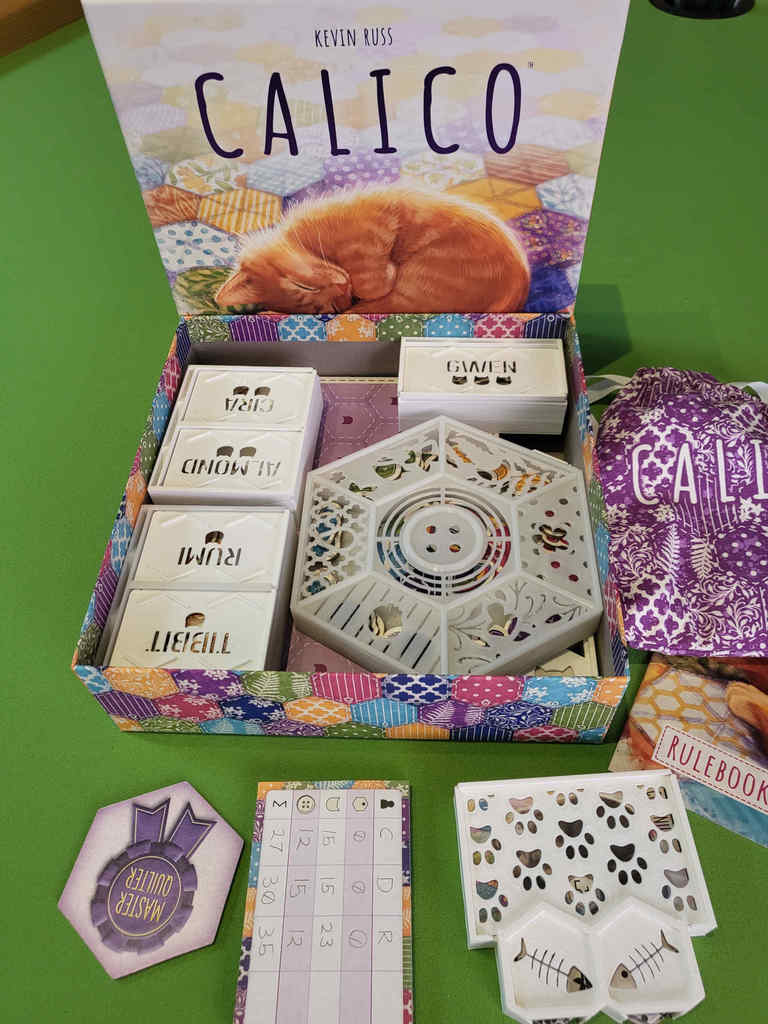
Calico belongs to that category of board game that is just delightful, so long as you survive the awful setup. This is where organizers come in. That is why I made this. As always, I tried to retain theming and table presence while easing setup and put away. It's my hope that printing this gets calico to your table more often and alleviates any bad feelings around sorting out all the Millie cats from the bag, or if you're lucky, spilling out the dozens of dime bags of cardboard pieces like the world's weirdest drug dealer. Anyway, here's how it works: Cat Trays: - The cat trays are reversible organizers that hold the cat tokens for the 1 dot, 2 dot, and 3 dot cats used in the game. If you flip the tray over, you will find the other side is an identical tray. Clever, eh? It saves box space. - Additionally, there is a slot in the back to hold the card displaying the cat being used and all the info needed. - There is also a raised border for the pattern tokens to be placed in the remaining lid, indicating what the cat wants. - 1 Cat Tray indicates the 3 dot cat trays, of which there are only 2. These have a different shape from the 1 and 2 dot cat trays that must contain 4 cats each. - 1 Cat Tray and 2 Cat Tray have three variants. --There is the "WSupports" variant that will print the entire tray, no gluing necessary, but will require printing supports. --There is the "NoRegister" variant that will print half of the tray, no support required (up to 45 degree overhangs). You will, however, have to glue the two halves together. --The remaining variant is like the previous one, but will print with registers that you can stick toothpicks in while gluing the two halves to keep everything easily aligned. - You will need to print 4 of the 2 Cat Tray parts and 2 of the 1 Cat Tray parts. If you print the single piece ones with supports required, you can, of course, half those numbers. - You must print all of the named cat lids. - I suggest using the default variants with the registers, apply glue (regular craft or school glue is fine) to the underside of one of the halves after printing two of them, and clamp them together to cure. Button Box: - You must print one each of the ButtonTray and ButtonLid - Place the Button tile in the center space of the button tray with the rainbow buttons. Pay attention to the placement of the lid before dropping in this tile, because the tile will indicate the colors of the buttons in the adjacent trays. Cat Card Tray: - Print one each of the CatCardTray and CatCardTrayLid - The cat card trays fits nicely into the space here. The pattern tiles have a space too, as they will be randomly distributed to the chosen cats Player Tray: - Print one PlayerTray and 2 PlayerTrayLids - The player tray lids slide in from either side The game packs away easily by following these steps: - Place all the patch tiles back into the bag - Return buttons, cats, cat cards, patterns, and player tokens to their trays and return their lids - Place the player boards back into the box - Place the Player Token Trays next to the boards - Place the Button Tray in the box - Place the Cat Trays in the box - Place the bag of patches on top of the button tray - Place the score sheet and Cat Card Tray in the remaining space - Replace the rulebook and box it up
With this file you will be able to print Calico Organizer with your 3D printer. Click on the button and save the file on your computer to work, edit or customize your design. You can also find more 3D designs for printers on Calico Organizer.