Caliper-style Breadboard Jumper Jig
prusaprinters
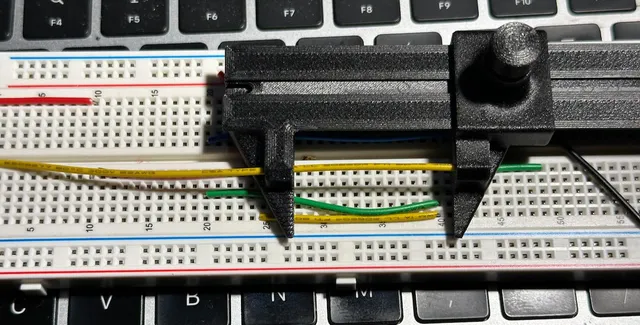
Inspired by other similar devices… A simple jig for making breadboard jumpers from 22G solid copper wire. Print the body and cap as presented - rotate the slider so that the inside surface of the caliper is down - you will need a small amount of support for riser for the screw/knob. Simply measure between two breadboard holes, slide wire into the holes on the caliper tips and cut at the stop. Then strip and bend using one of the two bending holes at the end of the body of the caliper. You will need one M3 heat-set insert (thin wall type- OD 4.5mm max), one M3x14mm cap head screw, some cyanoacrylate glue to glue the cap on the screw and if desired an end-stop screw - M2.5x6mm. Assembly is self explanatory. The tolerances are tight by design - you will need flow calibrated well. The slider will be snug but should easily loosen up with some breaking in sliding. Enjoy!
With this file you will be able to print Caliper-style Breadboard Jumper Jig with your 3D printer. Click on the button and save the file on your computer to work, edit or customize your design. You can also find more 3D designs for printers on Caliper-style Breadboard Jumper Jig.