CAME TOP-432NA replacement housing
prusaprinters
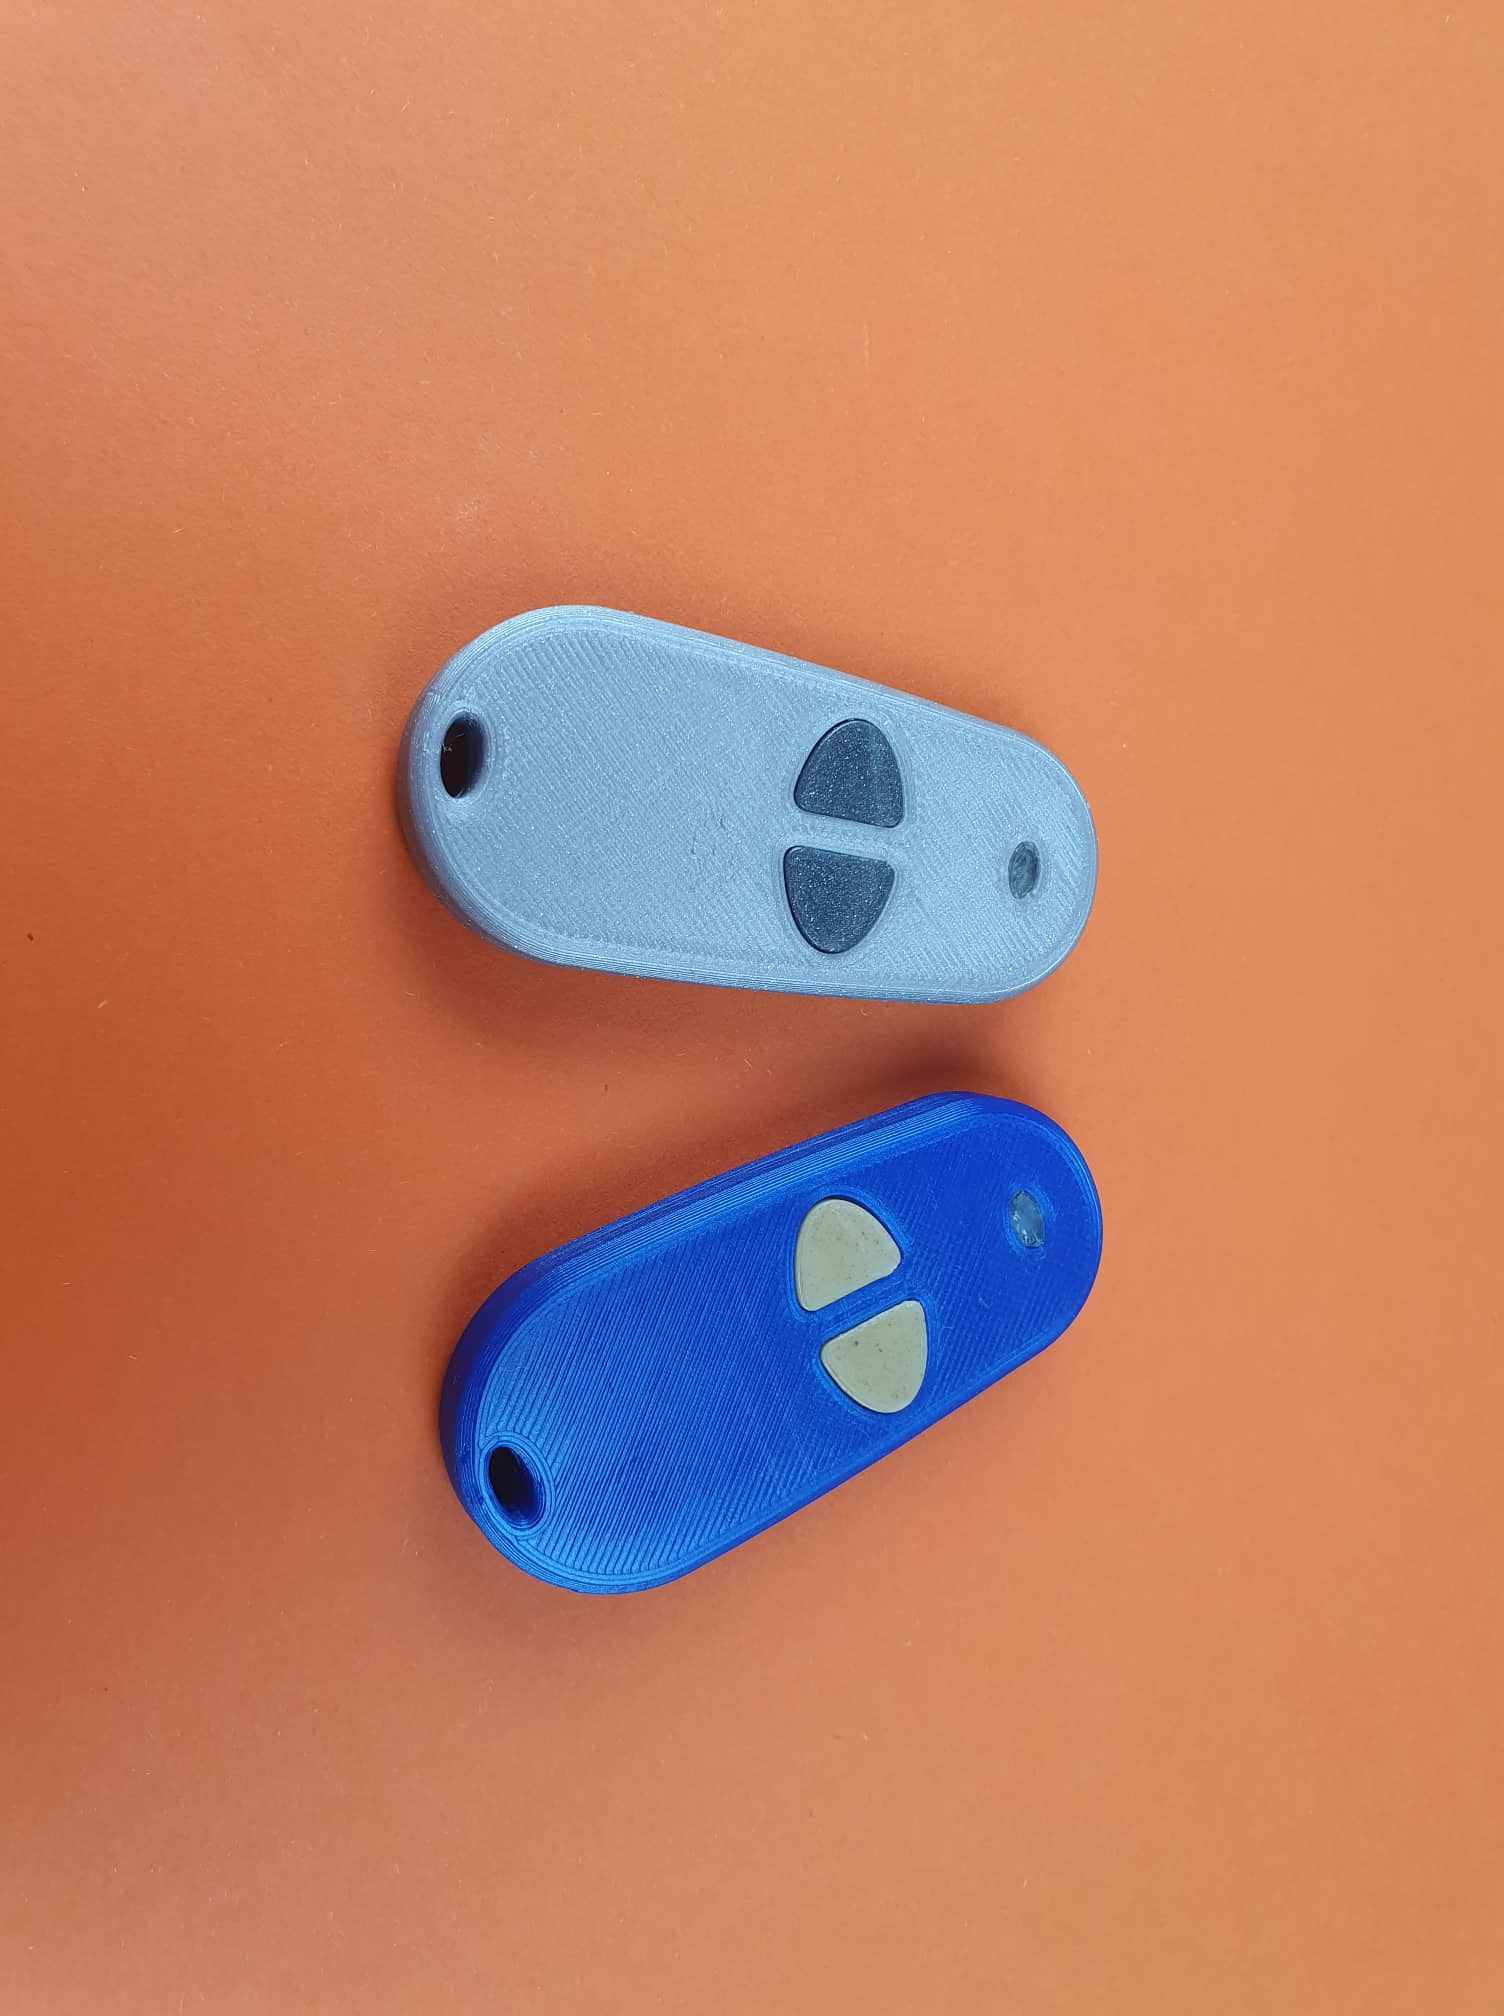
<p>After some time, my CAME TOP-432NA remote controllers started to fall apart. Since the electronics inside were fine I decided to 3d print a new housing for them. </p><p>I made 2 versions because I had 2 versions of the controller mainly differing in the battery holders. </p><figure class="image image-style-align-center image_resized" style="width:75%;"><img src="https://media.printables.com/media/prints/239712/rich_content/b9c4ea8b-259d-4ff4-aa35-32fda623c9bb/image.png#%7B%22uuid%22%3A%22de7f6e45-9048-4678-b413-9a7c04d70e99%22%2C%22w%22%3A825%2C%22h%22%3A669%7D"></figure><figure class="image image-style-align-center image_resized" style="width:75%;"><img src="https://media.printables.com/media/prints/239712/rich_content/fbad085d-8c85-447c-bc7a-06a3a57fecf8/image.png#%7B%22uuid%22%3A%22293519f5-dd44-49c3-be83-deabfabe3c39%22%2C%22w%22%3A885%2C%22h%22%3A721%7D"></figure><p> </p><p>The two parts are held together by one m1.6 x 4.5mm screw (slightly different screw sizes and lengths may work as well). You may have to enlarge the screw hole a little bit, but be careful to not overdo it. </p><p>The buttons are a combination of flexible and non-flexible filament. The bottom part is printed with flexible filament and the buttons are printed out of whatever filament you want. You can do this by making a filament change after around 0.5 mm (Like in the 3mf files that are included). After you swap the filaments I would recommend manually lowering the nozzle temperature to suit the second filament better. Be careful when removing the buttons from the print bed, because the two filaments can come apart if you stress the part too much. </p><p>(It may be possible to just use regular filament for the whole part but you may have to cut the buttons part into individual buttons (I haven’t tried it)) </p><figure class="image image-style-align-center image_resized" style="width:75%;"><img src="https://media.printables.com/media/prints/239712/rich_content/c890d07b-c1e3-4e81-b014-6622f65a25e2/image.png#%7B%22uuid%22%3A%22a79d39e0-c3fd-43f6-94e3-07f95cbe3a8c%22%2C%22w%22%3A1100%2C%22h%22%3A894%7D"></figure><figure class="image image-style-align-center image_resized" style="width:75%;"><img src="https://media.printables.com/media/prints/239712/rich_content/38bd36f9-21f6-47f4-8203-7bc9bc31a11e/image.png#%7B%22uuid%22%3A%2286904b7e-036b-4d0a-afa8-e95524c9578d%22%2C%22w%22%3A258%2C%22h%22%3A212%7D"></figure><figure class="image image-style-align-center image_resized" style="width:75%;"><img src="https://media.printables.com/media/prints/239712/rich_content/6acb0b2d-0c10-4605-a33c-9a8edca2ed89/image.png#%7B%22uuid%22%3A%22387f63f8-a61f-478c-9376-506fd2030bef%22%2C%22w%22%3A267%2C%22h%22%3A232%7D"></figure><p>The top parts has two slots to hold the buttons in place, no glue should be needed for that. Just insert the flaps of the buttons into the slots (It’s a lot easier with tweezers). The buttons may require some cleaning up to not get stuck, but it should be fine. </p><figure class="image image-style-align-center image_resized" style="width:75%;"><img src="https://media.printables.com/media/prints/239712/rich_content/248b3166-eef4-4950-bbe9-456c81ad780b/image.png#%7B%22uuid%22%3A%22650b1e77-0ea0-4801-9836-eb8e981f78e6%22%2C%22w%22%3A693%2C%22h%22%3A711%7D"></figure><p>The led cover should be printed with a transparent filament so you can see the led flashing. I enabled ironing in the slicer to make to top of the cover smoother. The part may require some cleaning up but afterwards should fit into its hole on the top cover. You can use a bit of glue from the back to hold it in. </p><figure class="image image-style-align-center image_resized" style="width:75%;"><img src="https://media.printables.com/media/prints/239712/rich_content/2567ab12-a0b0-4790-a5a3-0652b68f00b1/image.png#%7B%22uuid%22%3A%221cc51d3f-8fed-4bc3-8b2d-7e633d09f295%22%2C%22w%22%3A445%2C%22h%22%3A337%7D"></figure><p>After you put the buttons and the led cover in the top part you can put the remote controller board int the bottom part and screw the top and bottom part together.</p><figure class="image image-style-align-center image_resized" style="width:75%;"><img src="https://media.printables.com/media/prints/239712/rich_content/600fda40-e10a-4a3d-8685-ad9622b86bf5/image.png#%7B%22uuid%22%3A%227675f562-799b-44cc-b031-721188d89770%22%2C%22w%22%3A728%2C%22h%22%3A743%7D"></figure><p>Filaments I used:</p><p>Version 1: </p><ul><li>Fillamentum PLA Extrafill Noble Blue (Top and Bottom)</li><li>Fillamentum PLA Extrafill Crystal Clear (Led cover)</li><li>Fillamentum Flexfill TPU 92A and Fillamentum PLA Mukha (Buttons)</li></ul><p>Version 2: </p><ul><li>Prusament PLA Galaxy silver (Top and Bottom)</li><li>Fillamentum PLA Extrafill Crystal Clear (Led cover)</li><li>Fillamentum Flexfill TPU 92A and Fillamentum PLA Vertigo Grey (Buttons)</li></ul><p> </p>
With this file you will be able to print CAME TOP-432NA replacement housing with your 3D printer. Click on the button and save the file on your computer to work, edit or customize your design. You can also find more 3D designs for printers on CAME TOP-432NA replacement housing.