Camera Mount for USB Webcam v2
thingiverse
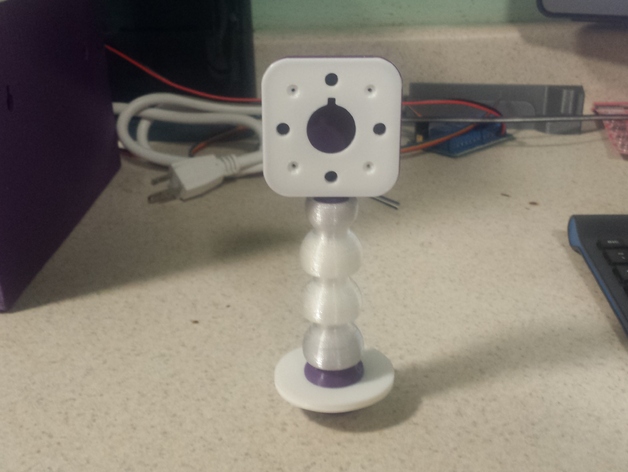
This design has been superseded by: http://www.thingiverse.com/thing:1386744 I originally developed a chassis for an $8 Fosmon webcam to be mounted on my Rostock Max: http://www.thingiverse.com/thing:1349752 However, while this solution worked, the quality really wasn't that great, and I began searching for something else. I found a number of HD board cams on Amazon that had similar mounting formats, and purchased one that I liked that has a 180 degree fisheye lens and MJPEG compatibility: http://www.amazon.com/180degree-Fisheye-1080p-Angle-Camera/dp/B00LQ854AG I redesigned my mounting system to use this board camera. Additionally, since this camera comes with just the board, USB cable, and no other hardware, I had to design something to replace the metal gooseneck that came with the Fosmon cheap camera. The result is a ball and socket system with a large channel to contain the USB cable and additional wire to power LEDs. You will also need four wood screws to attach the front piece to the back. I used 1/2" #2 brass wood screws, available at Amazon: http://www.amazon.com/gp/product/B001387OQG You will also need some soldering skill. The webcam comes with a USB cable and a connector that is really too large, and can't easily pass through the channel anyway. I just cut off the connector from the USB cable, desolder the connector from the camera board, and after pushing the usb wire through I just soldered it to the board. I also placed holes in Camera_Front.stl for the purpose of mounting standard 5mm LEDs. The LEDs should friction fit firmly without a need for glue. EDIT: I think I am done with this design, since I've made a lot of changes to the parts in the few short days since I did this. I will be combining everything together to create version 3 within the next few days, and that should be a system that can be upgraded with new parts and features. I'm not going to just replace this item, since some people might find the TPU ball joints to be interesting. Print Settings Printer Brand: SeeMeCNC Printer: Rostock MAX Rafts: Doesn't Matter Supports: Doesn't Matter Infill: 100% Notes: All of the parts except for BallSocket.stl are printed in PLA, with whatever settings work for you. 100% infill is best. Depending on your printer, you may have some difficulty with the threaded connector. If the nut doesn't fit easily and grip firmly, try flipping the nut over and trying it that way. If that doesn't solve it, just scale it slightly and try again. For my Rostock Max, the base nut fits the camera base like a glove. BallSocket.stl can be tricky. I printed these using Alchement TPU, a flexible filament like NinjaFlex that costs a hell of a lot less. This stuff is a pain in the ass to use with an EZStruder and a Bowden tube, but just slow your print speed WAY down and you should be fine. I ran it at 10mm/sec, with a 190 degree hot end and a 60 degree print bed. Initially I was able to print directly on the glass plate, but I had a few adhesion failures and started using glue stick. Print however many of the TPU Ball Sockets you need to get the camera mounting you like. One piece makes for a short camera with a few degrees of adjustability, and with each ball socket added it becomes taller and more flexible. Check out the photos above. I have also included a "tighter" version of the ball socket which might offer a better fit for some people. Try it out, and tell me which one you like better. Each standard ball socket is good for about 35 degrees of motion in any direction. The "tighter" ball sockets are good for about 30 degrees. Excessively thick cables run inside of the joints can reduce that flexibility somewhat. YMMV. Post-Printing You're going to need to sand or file the PLA balls to smooth them out and make it easier to insert into the TPU ball sockets. Personally, I used the lazy method of hitting them with the hot air gun at 300 degrees on my soldering rework station. Not the prettiest result, but it worked.
With this file you will be able to print Camera Mount for USB Webcam v2 with your 3D printer. Click on the button and save the file on your computer to work, edit or customize your design. You can also find more 3D designs for printers on Camera Mount for USB Webcam v2.