Camera Obscura for Canon PowerShot ELPH115IS
prusaprinters
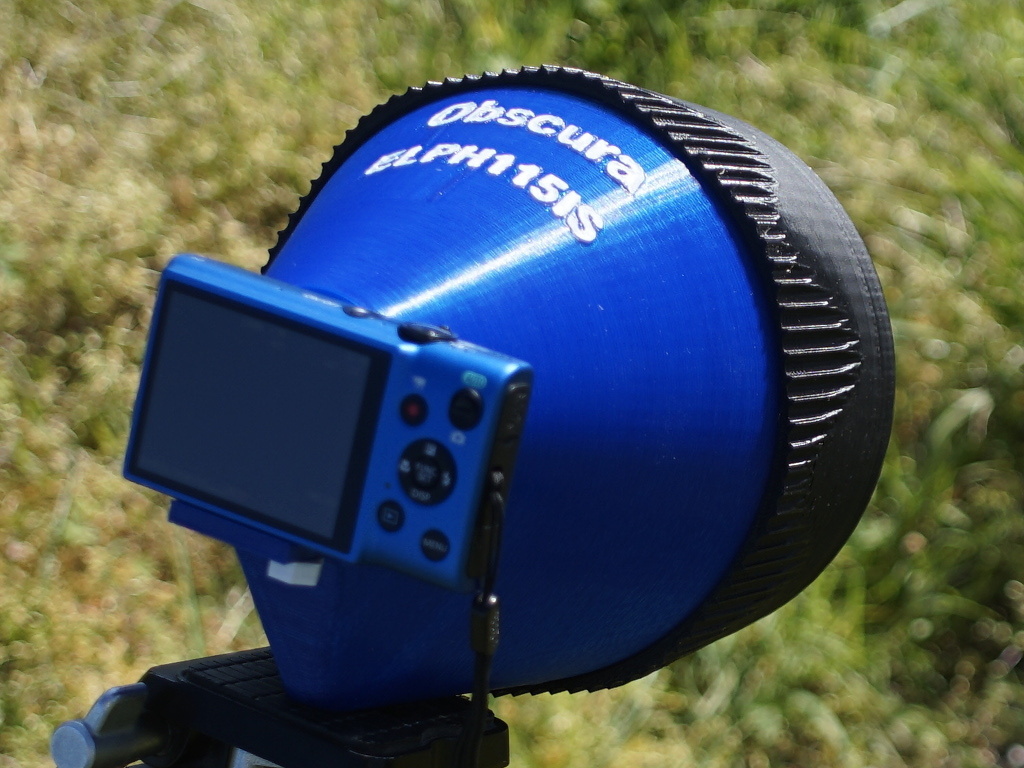
<p>Just in time for me to use it for <a href="http://pinholeday.org/gallery/2016/index.php?id=819">Worldwide Pinhole Photography Day</a>, here's a rather large attachment that allows a Canon PowerShot ELPH 115 IS to be used to capture pinhole images. To be more precise, it allows that little Canon to capture whatever image is projected onto the 150mm diagonal screen built-into the unit, and the front section described here makes that screen the target of a pinhole obscura.</p> <p>Now you're probably wondering why use that Canon compact. Well, pinhole resolution is fundamentally limited by the size of the image, so this big screen (roughly the size of a 4x5 film sheet) offers much better resolution than you can get directly using a pinhole with a small digital sensor. However, this particular Canon has the extra benefit that despite being a cheap and tiny 16MP camera, it can run CHDK -- which means it can be programmed to do an HDR capture sequence that can easily handle the huge dynamic range caused by light falloff in an ultrawide pinhole image. The photos of the pond, dandelions, and my 101-year-old aunt were all HDR sequences done with this rig.</p> <h3>Print Settings</h3> <p><strong>Printer Brand:</strong></p> <p>MakerGear</p> <p><strong>Printer:</strong></p> <p>M2</p> <p><strong>Rafts:</strong></p> <p>No</p> <p><strong>Supports:</strong></p> <p>No</p> <p><strong>Resolution:</strong></p> <p>0.25mm</p> <p><strong>Infill:</strong></p> <p>only where needed</p> <p><strong>Notes:</strong></p> <p>The back took just under 3 hours to print in translucent blue PLA that roughly matches the blue color of the Canon PowerShot that mounts on it. The 75mm focal length front also took about 3 hours to print, but in black PLA. Both the front and back should be done with at least two layers of outer shell; I tried using 1 layer, but rigidity simply wasn't good enough and lightproofing would have been more difficult. The screw that fits the tripod socket of the ELPH 115 IS takes very little time to print (I used white PLA), but it is a separate print to ensure the threads are as nice as possible.</p> <h3>Post-Printing</h3> <p><strong>Putting it all together</strong></p> <p>Translucent PLA is a very bad choice indeed for camera parts that are supposed to be opaque. However, this is handled by a couple of coats of flat black latex paint on the inside. This creates an effective light seal, but leaves the body with a very attractive translucent sheen. That said, I do see a tiny bit of blue leakage where direct sun is involved, so maybe it's time to give a 3rd coat? The text label on the body should also be painted white so it will stand-out better and be more readable. The front and screw need no painting, although again there is no reason you couldn't paint the inside of the front... and I would have if the PLA black used had not been so opaque by itself.</p> <p>Once those parts are done, you need two other things before you screw the unit together: an appropriate screen for the obscura and a pinhole.</p> <p>The screen used here is simply some waxed tracing paper. The paper was cut to fit over the mask on the 3D-printed back and then held in place using blue painter's tape to hold it in place by the edges. This screen gives a very heavy texture, which reduces resolution somewhat; a thin plastic diffuser sheet would produce better images.</p> <p>The pinhole can be made any number of ways, but precision counts. I tested using aluminum duct tape with a pinhole, but the hole produced was sloppy. Instead, I cut apart a Dr. Pepper soda can to get a piece of thin aluminum (which is still much more solid than the duct tape). I used my CNC engraver to drill a roughly 0.4mm hole as the pinhole (overkill, but I had the CNC loaded with an appropriate bit anyway); it produced a nicely circular hole with a clean edge. I then sanded both sides of the aluminum scrap to remove any coatings and further ensure the pinhole edge was clean. Finally, I used a Q-tip to brush Aluminum Black on the pinhole metal, producing a good approximation to a matte-black anodized finish. Finally, I used blue painter's tape to tape it into position from the inside of the front.</p> <p>Once all the parts are done, simply screw the front all the way onto the back. It can be a little tricky to get the thread started, but it works pretty smoothly and securely. Finally, mount the Canon PowerShot ELPH155IS on the back and use the printed screw to lock it there by its tripod socket.</p> <p><strong>Using the camera</strong></p> <p>Using the camera is pretty easy. The pinhole gives a field of view roughly comparable to a 24mm ultrawide lens on a full-frame DSLR, and everything is in focus (sort-of), so don't be afraid to get close to your subject. Remember that the PowerShot is always photographing the screen, so leave it in close-up mode no matter what distance the real subject is at. Simply turn the PowerShot on, frame your shot using the rear LCD, and take a photo... in theory.</p> <p>In practice, the metering will get you a shot that is at least 3 stops underexposed because the pinhole image is much brighter in the center -- and the camera only allows +/-2 stop exposure compensation. However, this is where the ability to use CHDK comes in handy. You can get CHDK for free from <a href="http://chdk.wikia.com/wiki/CHDK">http://chdk.wikia.com/wiki/CHDK</a> . Not only does it provide for manual exposure overrides, but you can also run Lua scripts for HDR (high dynamic range) capture that can get good detail everywhere, and then you can even-out the vignetting in postprocessing. For the examples here, I used a simple script to capture 3-5 image HDR sequences and then did a very crude tone mapping using layers in GIMP.</p> <p>Keep in mind that the pinhole is producing a very dark image, so expect long exposures. The Obscura has a tripod socket that can be used to mount it for long exposures -- although I found the tripod socket had a little play in use, so be careful about trusting it to hold the camera firmly. Bracing the camera works too; sometimes hand holding works, but expect some motion blur.</p> <p>Long exposures tend to eat batteries, and shooting HDR sequences can fill memory cards quickly. Note that the camera mount to the Obscura allows the SD card/battery compartment door to be opened with the camera attached, and you can swap memory cards that way, but you can't get the battery out while the camera is mounted on the Obscura.</p> <h3>How I Designed This</h3> <p>This was designed using OpenSCAD. First the minimum focus distance was determined -- then the coverage. The dimensions were rounded-up to approximate a 4x5 screen. In fact, the Obscura back can be used with other fronts to mount not only pinholes of various focal lengths, but also standard lenses intended to cover the 4x5 format.</p> Category: Camera
With this file you will be able to print Camera Obscura for Canon PowerShot ELPH115IS with your 3D printer. Click on the button and save the file on your computer to work, edit or customize your design. You can also find more 3D designs for printers on Camera Obscura for Canon PowerShot ELPH115IS.