Canon EF-S 18-135 Lens Hoods
thingiverse
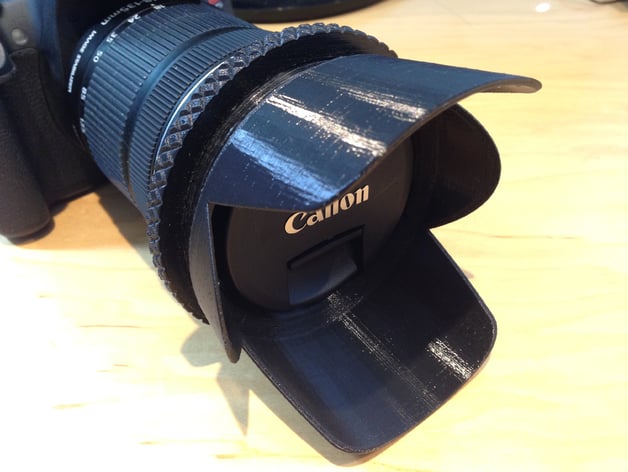
Full and Tulip lens hoods for the Cannon EF-S 18-135 lens. There are several key features that differentiate these hoods from others: The hood does not use the threads that the filter attaches so. This means that you can attach the lens cover without having to remove the hood. The hood attaches to the outside ring of this specific lens, and locks into place using a locking ring. The hood attaches very solidly and won't rotate around or come loose. The tulip shape is real, derived from the optics of the lens, and not just some nice looking but arbitrary shape. This means that the hood has maximum light blocking without getting into your shot. Instructions While this lens hood looks simple, it will stress your ability to create a good print. Your printer must be nicely tuned, or it will not print these hoods well. I am talking about filament diameter, extruder temperature, and print bed adhesion. You've been warned! :) I printed these using 0.1 mm layers on a printer with a 0.4 mm nozzle. You don't want to go with thicker layers, or the threads and other features of the hood will not print well. Use 100% infill, with one (total) shell. The walls of this hood are about 2 mm thick, and you need strength. Use 100% on the ring as well. Once you print the hood, and are waiting for the ring to print, you will be tempted to fidget with the hood and press in on the locking tabs. DON'T! You will break them, especially if you printed in PLA. These tabs have just enough flex to do the job, but not enough flex to survive someone pressing on them. When you have both pieces, carefully press in on both locking tabs while screwing the locking ring on. This can be a difficult process, but stick with it and you'll get it on. Fortunately, once the ring is on you never have to remove it again. To install the hood on the camera, rotate the hood so it is 90 degrees off from where it's final position should be. Put it on the lens, and rotate it into the correct position. Then rotate the locking ring so that the locking tabs are pushed into position. There are four indentations on the bottom side (near the threads) that you can use to align the hood with the red mark on the side of the lens. As with lens filters, a light touch on the locking ring works better than gripping it tightly. If you grip it tightly, the ring warps a tiny bit and it becomes hard to turn. Printing the ring with 100% infill will help this, but not eliminate it.
With this file you will be able to print Canon EF-S 18-135 Lens Hoods with your 3D printer. Click on the button and save the file on your computer to work, edit or customize your design. You can also find more 3D designs for printers on Canon EF-S 18-135 Lens Hoods.