Canopy for X Frame Quadcopter
prusaprinters
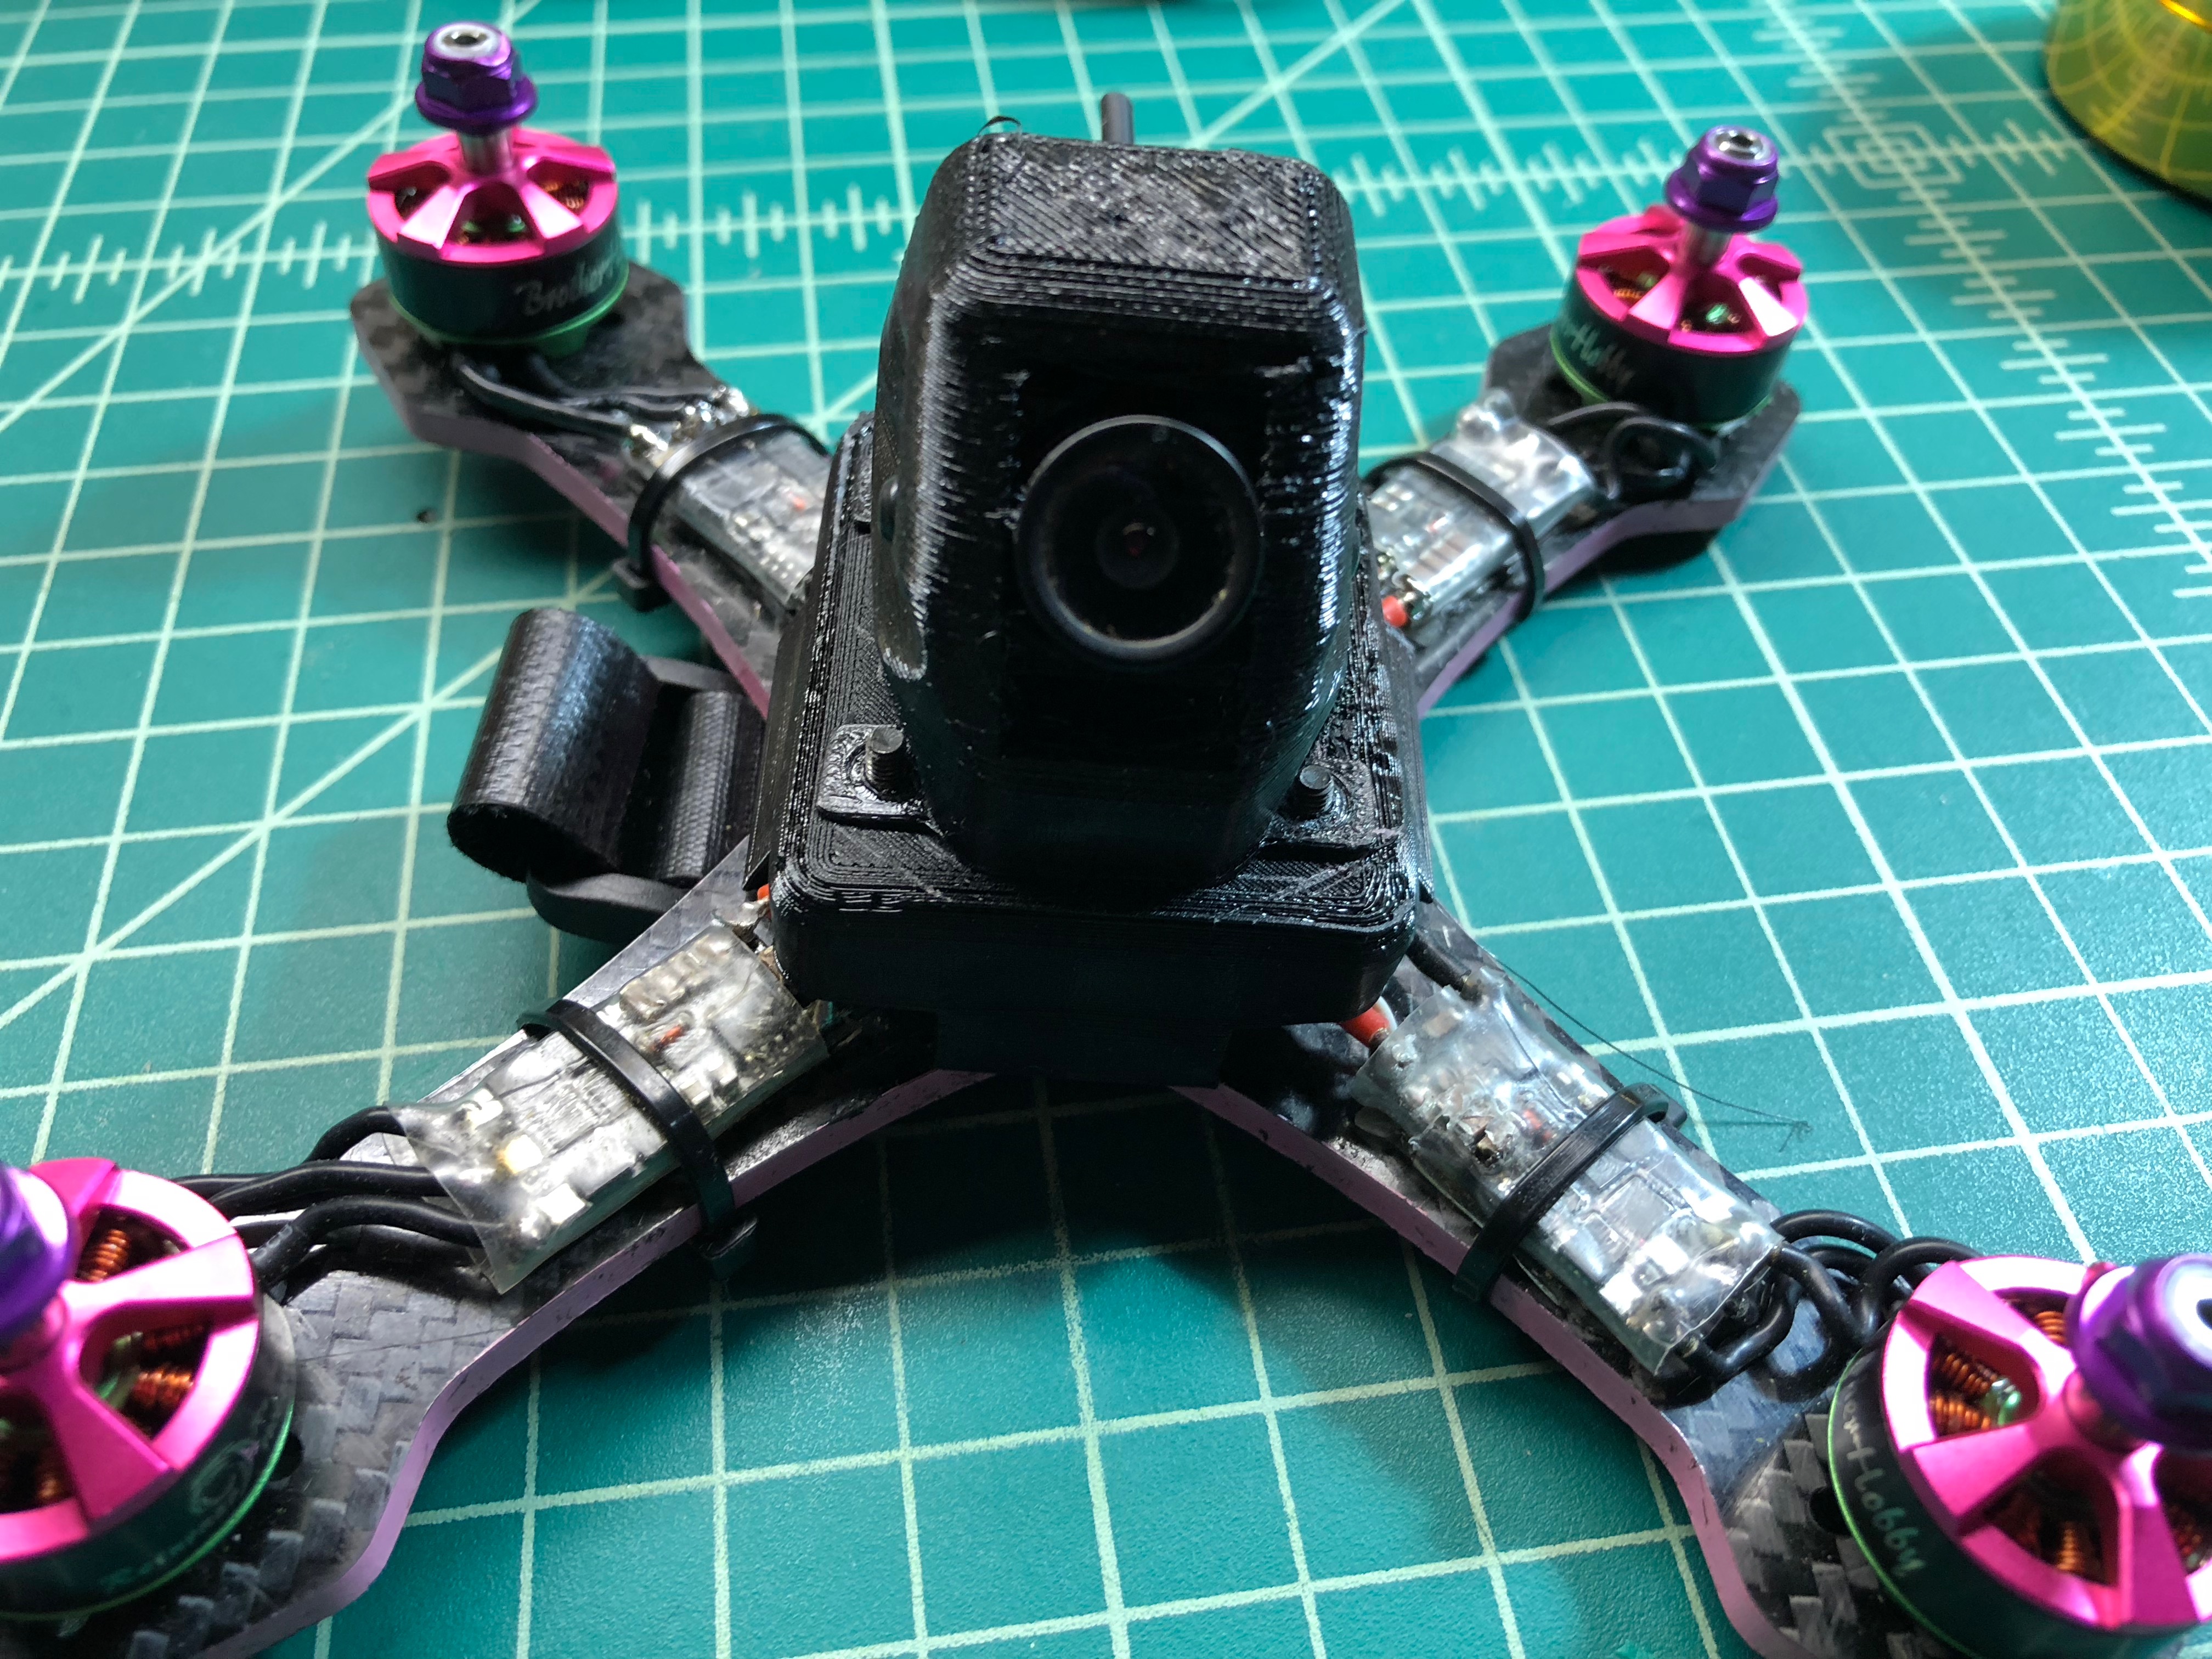
<p>I designed this canopy at the request of a local FPV pilot. It is intended to be printed with a flexible filament (see print settings for more info). The canopy is designed for an X style racing frame. and should work regardless of prop size (4" or 5"). It should work on just about any frame. This canopy comes in two parts:</p> <p>Part 1: pod_base.stl - this base will fit over a single stack FC/PDB/ESC. It has notches cut out of the corners so wires can fit, and an ESC plug can route out the back.</p> <p>Part 2: pod_camera.stl - this will fit a runcam swift or similar size camera. Since the sides are flexible, it should accommodate a fairly wide range of cameras. The runcam swift is approximately 24x24mm square, so anything around that size (give or take a few mm) should work. The canopy is also designed to hold an Eachine VTX03. It should fit pretty snug in place and still provide access to press the button.</p> <p>Instructions:</p> <ol> <li>Mount your PDB up with a small spacer. Aim for about 16mm in total height you should be fine. You can go smaller or larger, but the pod base may not fit as well. When mounting your PDB, I recommend using 25mm m3 screws. That length should give you enough room for the base and the canopy, with a little room on top for nylocks/lock nuts. </li> </ol> <ol> <li>Make sure you solder all the wires you are going to need (ESC, Battery Connector, Motors, Receiver, Video Transmitter, Camera). </li> </ol> <ol> <li>Slide the canopy over the screws. Tuck in all your wires and anything else (such as your radio receiver) so it stays under the canopy. Route the wires for the video transmitter and fpv camera, as well as anything else you might be putting in the canopy.</li> </ol> <ol> <li>I recommend putting some glue on the Eachine vtx03 where the antenna is, before placing it in the canopy. This will help ensure it stays on. The vtx03 should stay seated, but you may also want to glue it in place with some hot glue or Shoegoo. </li> </ol> <ol> <li>Screw the FPV camera in from the sides. Adjust the angle. You should be able to angle it up to 60" or so with the cut out. If the screws are a bit loose, you may be able to use some spacers to help. </li> </ol> <ol> <li>Place the canopy on top of the base. The screws should line up. Secure the canopy with m3 lock nuts.<br/> Enjoy!</li> </ol> <h3>Print instructions</h3><h3>Category: R/C Vehicles Print Settings</h3> <p><strong>Printer:</strong> Reach 3d</p> <p><strong>Rafts:</strong> No</p> <p><strong>Supports:</strong> No</p> <p><strong>Resolution:</strong> .20</p> <p><strong>Infill:</strong> 20%</p> <p><strong>Notes:</strong></p> <p>Use a flexible filament. I recommend Sainsmart TPU. I was able to print both the base and canopy fine with no supports.</p> <p>You will need to flip the base over in your slicer (rotate 180).</p> <p>Print the canopy right side up. Without supports, the inside under the top it might look a little droopy as the printer tries to bridge. However, it should look fine on the outside and it should hold up fine to crashes. The sides are quite thin, but most of the impact in a crash is probably going to be from the top.</p>
With this file you will be able to print Canopy for X Frame Quadcopter with your 3D printer. Click on the button and save the file on your computer to work, edit or customize your design. You can also find more 3D designs for printers on Canopy for X Frame Quadcopter.