Canvas Chair Spare Parts
thingiverse
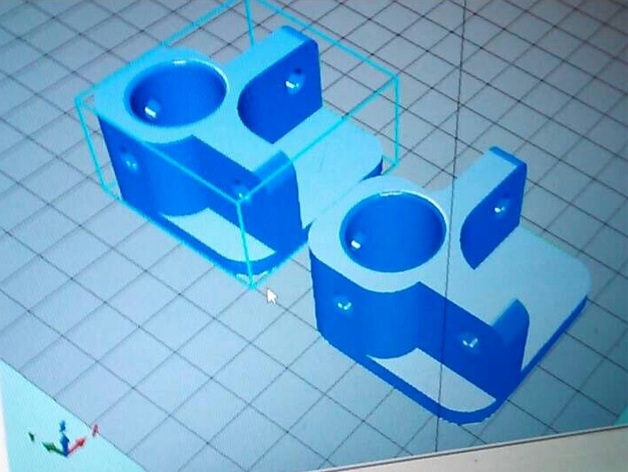
Spare parts of a canvas chair. Includes the Foot Piece and the Rear Sliding piece. Here are some other pieces for this style chair that you may need: Back Support from CodeCreationshttp://www.thingiverse.com/thing:21805 Folding Chair Hinge from Aggerhttp://www.thingiverse.com/thing:113992 Instructions I took the dimensions off of the original broken piece. Printing was done in ABS with 50% infill and no supports. Foot Piece Installation: (Part without the Big Hole) Hardware needed: (2) 6-32 x 1-1/4 Machine Screws and (2-4) 6-32 Hex Nuts. May need (2) 6-32 x 3/4 Machine Screws OR Small Wood Screws for rear foot piece. Step 1: Remove existing plastic ware with pliers Step 2: Remove inset rivet by cutting one end off.(Difficult without proper tools) Step 3: Follow the existing pattern for placement of inner and outer rods. Step 4: Insert one Machine Screw per leg and one hex net. You can add washers, but for me it wasn't necessary. Additionally, you may want to add loctite, or glue, to the hex nut, but be sure there is still rotation of the chair leg. Step 5: If it is a rear foot piece, insert the upright leg, and secure with small wood screw, or drill a hole in the bottom of the foot and use pliers to pull a (SHORTER) machine screw tight to the part with an inserted Hex nut. Rear Sliding Piece Installation: (Part with the Big Hole) Hardware needed: (2) 6-32 x 1-1/4 Machine Screws and (2) 6-32 Hex Nuts Step 1: Unscrew the top of the the canvas chair secured from the back(phillips for me). Remove the plastic end cap, arm rest, and seat connection. (You may have to fold the chair slightly) Step 2: Remove existing plastic ware with pliers Step 3: Remove inset rivet by cutting one end off.(Difficult without proper tools) Step 4: Slide the piece down the exposed up-right and follow the existing pattern for placement of inner and outer rods. Step 5: Insert one Machine Screw per leg and one hex net. Washers optional. Additionally, you may want to add loctite, or glue, to the hex nut, but be sure there is still rotation of the chair leg. Step 6: Fold the chair slightly and return the bottom canvas connection, the arm connection, and then the top end cap and lastly the back sleeve. Secure with the screw that was originally removed.
With this file you will be able to print Canvas Chair Spare Parts with your 3D printer. Click on the button and save the file on your computer to work, edit or customize your design. You can also find more 3D designs for printers on Canvas Chair Spare Parts.