Capacitive Touch Macro Keypad
prusaprinters
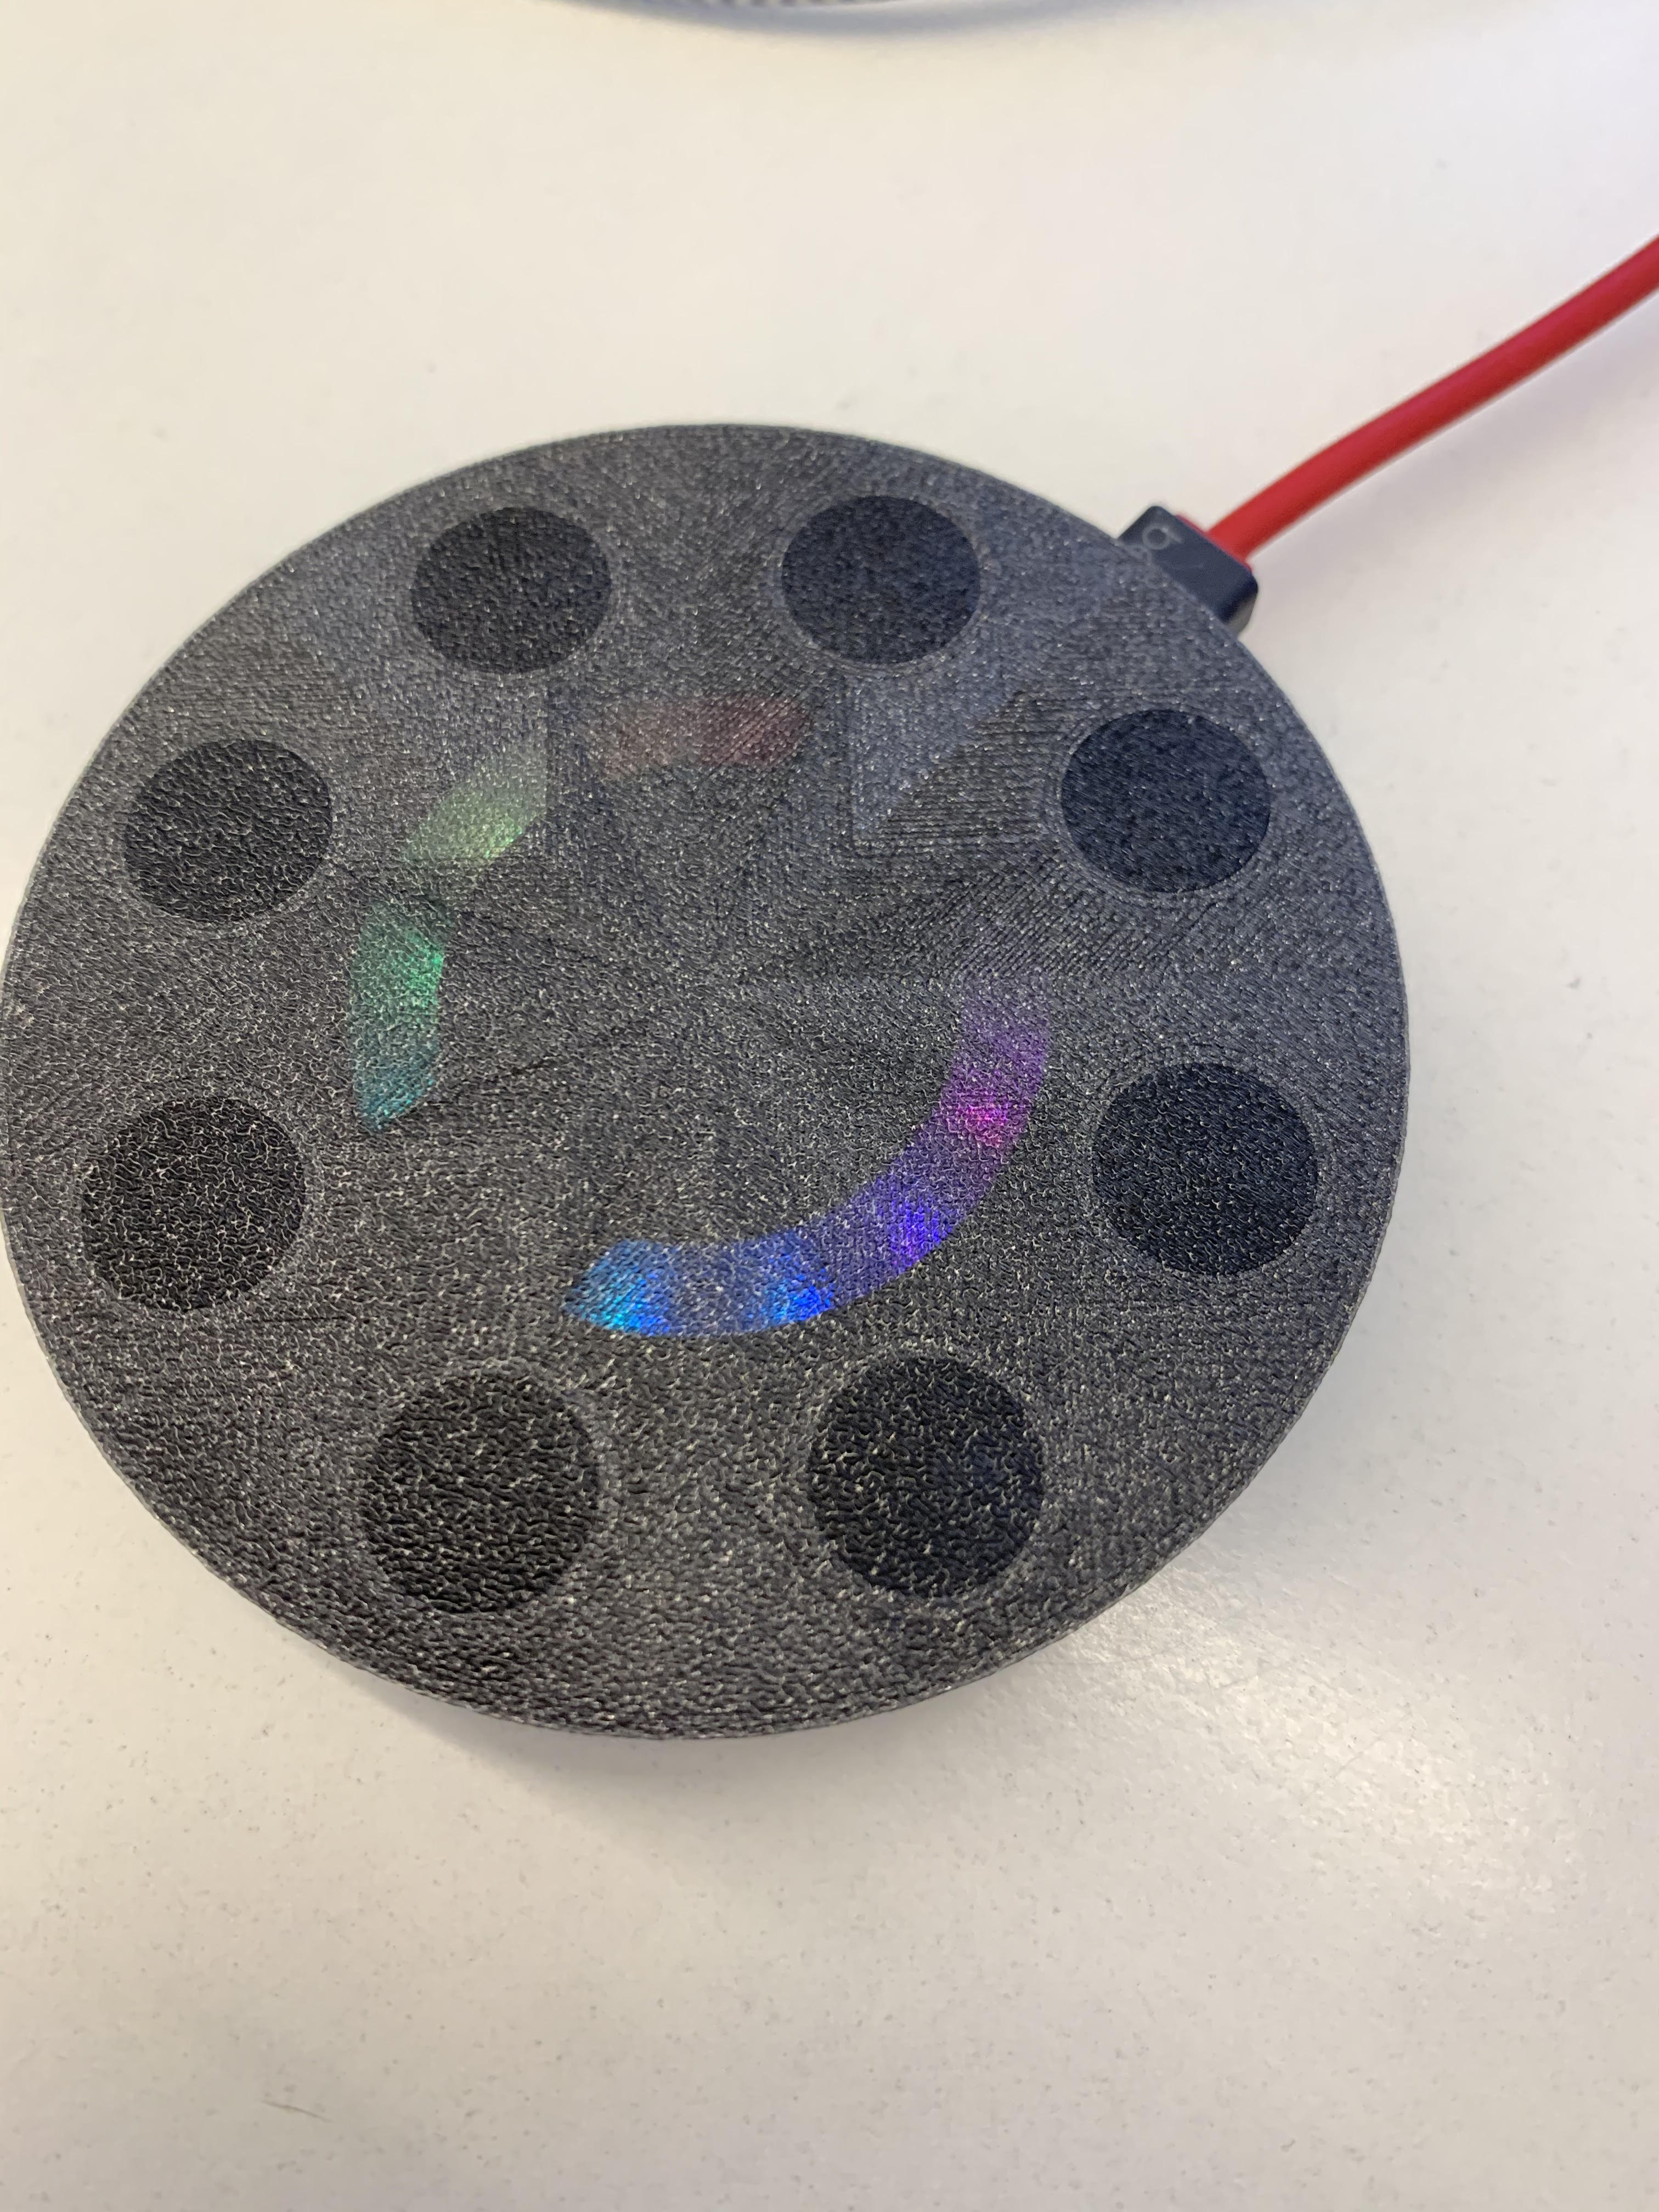
<p>This is a multi-material print that uses a conductive filament and an insulating filament. All you need is an Adafruit circuit playground and 8 screws. I have also included some basic code to help you get started (adapted from Carter Nelson's code, link below).<br/> <a href="https://www.arduino.cc/en/Reference/MouseKeyboard">https://www.arduino.cc/en/Reference/MouseKeyboard</a></p> <p>It won't let me upload the .ino file so here is a copy of my code:</p> <p>////////////////////////////////////////////////////////////////////////////<br/> // Circuit Playground Capacitive Touch Tones<br/> //<br/> // Send keyboard and mouse events for each touch pad.<br/> // <a href="https://www.arduino.cc/en/Reference/MouseKeyboard">https://www.arduino.cc/en/Reference/MouseKeyboard</a><br/> //<br/> // Author: Carter Nelson<br/> // MIT License (<a href="https://opensource.org/licenses/MIT">https://opensource.org/licenses/MIT</a>)</p> <h3>include <Adafruit_CircuitPlayground.h></h3> <h3>include <Keyboard.h></h3> <h3>define CAP_THRESHOLD 100</h3> <h3>define DEBOUNCE 250</h3> <p>uint8_t pads[] = {3, 2, 0, 1, 12, 6, 9, 10};<br/> uint8_t numberOfPads = sizeof(pads)/sizeof(uint8_t);</p> <p>boolean emulatorActive = false;</p> <p>uint32_t colors[] = {<br/> 0xFF0000,<br/> 0xff9900,<br/> 0xccff00,<br/> 0x33ff00,<br/> 0x00ff66,<br/> 0x00ffff,<br/> 0x0066ff,<br/> 0x3300ff,<br/> 0xff0099,<br/> 0x000000<br/> };</p> <p>int colorIndex;<br/> int startIndex;</p> <p>void action1(){<br/> ctrlalt('q');<br/> }<br/> void action2(){<br/> ctrlalt('w');<br/> }<br/> void action3(){<br/> ctrlalt('e');<br/> }<br/> void action4(){<br/> ctrlalt('r');<br/> }<br/> void action5(){<br/> ctrlalt('t');<br/> }<br/> void action6(){<br/> ctrlalt('y');<br/> }<br/> void action7(){<br/> ctrlalt('u');<br/> }<br/> void action8(){<br/> ctrlalt(8);<br/> }</p> <p>void ctrlalt(int x){<br/> Keyboard.press(KEY_LEFT_CTRL);<br/> Keyboard.press(KEY_LEFT_ALT);<br/> Keyboard.press(char(x));<br/> delay(100);<br/> Keyboard.releaseAll();<br/> }</p> <p>////////////////////////////////////////////////////////////////////////////<br/> void takeAction(uint8_t pad) {<br/> Serial.print("PAD "); Serial.println(pad);<br/> switch (pad) {<br/> case 3:<br/> action1();<br/> break;<br/> case 2:<br/> action2();<br/> break;<br/> case 0:<br/> action3();<br/> break;<br/> case 1:<br/> action4();<br/> break;<br/> case 12:<br/> action5();<br/> break;<br/> case 6:<br/> action6();<br/> break;<br/> case 9:<br/> action7();<br/> break;<br/> case 10:<br/> action8();<br/> break;<br/> default:<br/> Serial.println("Error");<br/> }<br/> }</p> <p>////////////////////////////////////////////////////////////////////////////<br/> boolean capButton(uint8_t pad) {<br/> // Check if capacitive touch exceeds threshold.<br/> if (CircuitPlayground.readCap(pad) > CAP_THRESHOLD) {<br/> return true;<br/> } else {<br/> return false;<br/> }<br/> }</p> <p>////////////////////////////////////////////////////////////////////////////<br/> void sendKey(char key) {<br/> Keyboard.press(key);<br/> Keyboard.releaseAll();<br/> }</p> <p>////////////////////////////////////////////////////////////////////////////<br/> void setup() {<br/> CircuitPlayground.begin();</p> <p>// Make it bright!<br/> CircuitPlayground.setBrightness(255);</p> <p>// Start at the beginning<br/> startIndex = 0;</p> <p>// Initialize serial.<br/> Serial.begin(9600);</p> <p>// Initialize Circuit Playground library.<br/> CircuitPlayground.begin();<br/> }</p> <p>////////////////////////////////////////////////////////////////////////////<br/> void loop() {<br/> // Indicate emulator status on red LED.<br/> CircuitPlayground.redLED(emulatorActive);<br/> CircuitPlayground.clearPixels();</p> <p>// Loop through each pixel, setting their colors<br/> colorIndex = startIndex;<br/> for (int pixel=0; pixel<10; pixel++) {<br/> CircuitPlayground.setPixelColor(pixel, colors[colorIndex]);<br/> colorIndex++;<br/> if (colorIndex > 9) colorIndex = 0;<br/> }</p> <p>// Increment start index into color array<br/> startIndex++;</p> <p>// Check value and reset if necessary<br/> if (startIndex > 9) startIndex = 0;</p> <p>//Checks the pads 20x for every Neopixel update<br/> int tickRate = 20;<br/> for (int i = 0; i < tickRate; i++){<br/> // Check slide switch.<br/> if (!CircuitPlayground.slideSwitch()) {</p> <pre><code> //-----------| EMULATOR OFF |------------- if (emulatorActive) { Keyboard.end(); emulatorActive = false; } } else { //-----------| EMULATOR ON |------------- if (!emulatorActive) { Keyboard.begin(); emulatorActive = true; } // Loop over every pad. for (int i=0; i<numberOfPads; i++) { // Check if pad is touched. if (capButton(pads[i])) { // Do something. takeAction(pads[i]); // But not too often. delay(DEBOUNCE); } } } </code></pre> <p>}<br/> }</p>
With this file you will be able to print Capacitive Touch Macro Keypad with your 3D printer. Click on the button and save the file on your computer to work, edit or customize your design. You can also find more 3D designs for printers on Capacitive Touch Macro Keypad.