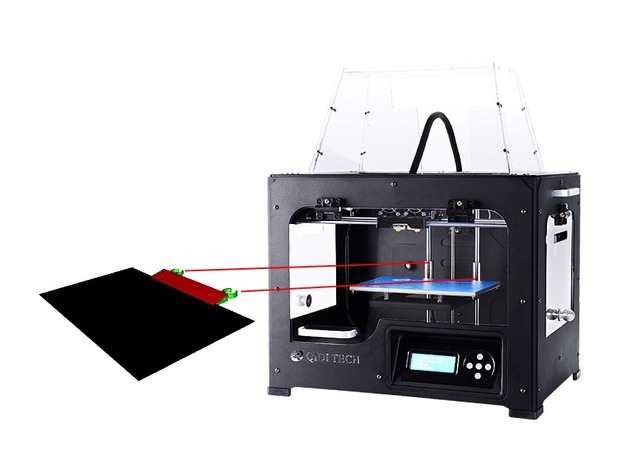
Carbon build plate holder / clamp
thingiverse
Additional parts: -Two or three M3 screws (length 10mm) and nuts (aliexpress, $2) -A carbon sheet 200x300x0.5mm (aliexpress, $10) -Silicone remover (e.g. acetone) to initially remove silicon from the carbon sheet Put the two printed parts and the carbon sheet together as shown in picture three, then put two or three screws through the holes and tighten the structure with the nuts firmly (the upper part should bend). Put the clamps around the z-axis bearings of the printer and push everything down softly until the carbon sheet is perfectly aligned to the heated bed. Level the print head again and you're ready to print on carbon. As there are only two clamps connecting to the z-axis bearings it is fast to install, and to remove the build plate after a print (no need to wait for the heated bed to cool down in order to remove a part). While there are only two clamps it is still perfectly stable. All parts (incl. screws) are out of reach of the print head, no matter how you mount it - crashing the print head is impossible. Print Settings Printer: Qidi Avatar IV Rafts: No Supports: No Resolution: 0.2mm layer height Infill: 100% Notes: Printed with ABS. PETG and Nylon should be ok as well. PLA will not work as it is too brittle. Post-Printing Printing on carbon I printed on carbon with ABS, PLA (0.1mm and 0.2mm layer height) and PETG (0.4mm layer height), without any extra glue or hairspray: -ABS needs additional support to prevent warping. I usually print a large square of 0.1mm or 0.2mm height together with the part. That square is easily removable. -PLA needs support for proper adhesion. I uses the same support as ABS. -PETG doesn't need any extra support. -All parts get loose when cooling down. I have this setup for a few months now, without any problems. Others I would recommend to remove the blue build material that came with the printer from the heated bed, as this will minimize heating time (You must remove the heated bed to do this. Use heat to soften the glue, then peel the blue material, and then use a rubber (those for pencils) to remove all remaining glue spots from the aluminum - it'll take at least 2 hours for everything). Otherwise just keep it. It is possible to use a carbon sheet of different dimensions, however 300x200x0.5 is cheap and easy to get at aliexpress. And you can grab it with your hands without touching the print area. How I Designed This Created with IceSL clamp.lua added, can be rendered in IceSL (requires a GPU with full OpenGL 4.3 support) It is similar to OpenSCAD with one difference: The code is rendered to a 3D model in real time. Source:https://members.loria.fr/Sylvain.Lefebvre/icesl/
With this file you will be able to print Carbon build plate holder / clamp with your 3D printer. Click on the button and save the file on your computer to work, edit or customize your design. You can also find more 3D designs for printers on Carbon build plate holder / clamp.