Case for DSO138 - Remixed to fit new PCB mounting hole pattern
thingiverse
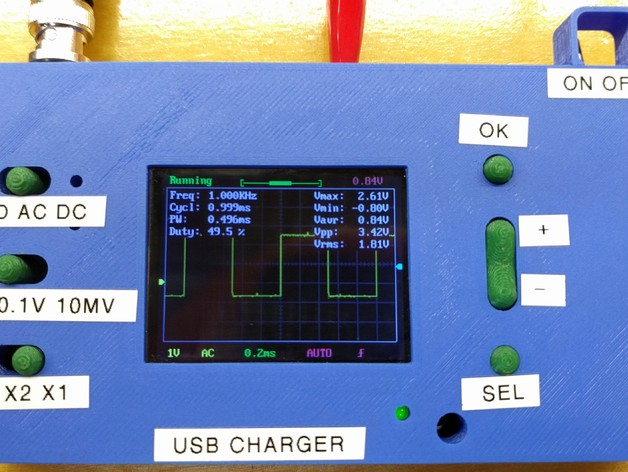
This update comes straight from Egil's exceptional case design. Upgrades made since December 16th include increasing clearance on button inserts and decreasing height of tact switch standoffs at top. All buttons have been decreased by .4mm in diameter - they should fit without filing or sanding from your printer, assuming your setup is like mine; if you need more room, simply edit the variable "buttonclearance = 0.2;" in the SCAD file. Original issue: The PCB holes did not match my Banggood PCB received in Dec 2015. They're off by 1mm towards the edge in X dimension and .5mm left from where they should be; see pictures below showing original misalignment with my PCB. Source SCAD has corrected hole locations, along with files. This case now features symmetrical PCB mounting holes centered 5MM from edges of PCB, as opposed to the previous version's holes that were closer to the corners by about 1MM. A few other updates include addition of front USB port for charging lithium-ion battery via a small PCB and converter. Banggood sells a stepup dc-dc converter that boosts voltage up to 9V from your lithium-ion pack. I also found an under/over voltage protection board that's critical when charging packs with built-in protection. Space allows all electronics just to fit, but it can be enlarged by using the source in SCAD. The countersink was too small for my 3mm screws so its width and depth were increased - now the 3MM screws sit flush without issue. Higher thread engagement of 2.5MM means shorter screw options; if you want more grip, simply swap them out. Flat Socket Head Screws used: A2 SS - 3M x .5 x 10MM, purchased at various sources including Easybotics and hilo90mhz.com. Parts are Banggood DSO138 converter (1), TP4056 battery charger module with mini-USB interface, as well as the Walkera Mini CP Genius single-cell lithium-ion battery. Post-print wiring pictures are available on Google Photos. For those wanting more protection without using built-in chipboard on their pack or who'd rather have 2 AA's for simplicity in space provided - consider purchasing 9V rechargeable USB batteries at a slightly higher price but less setup needed!
With this file you will be able to print Case for DSO138 - Remixed to fit new PCB mounting hole pattern with your 3D printer. Click on the button and save the file on your computer to work, edit or customize your design. You can also find more 3D designs for printers on Case for DSO138 - Remixed to fit new PCB mounting hole pattern.