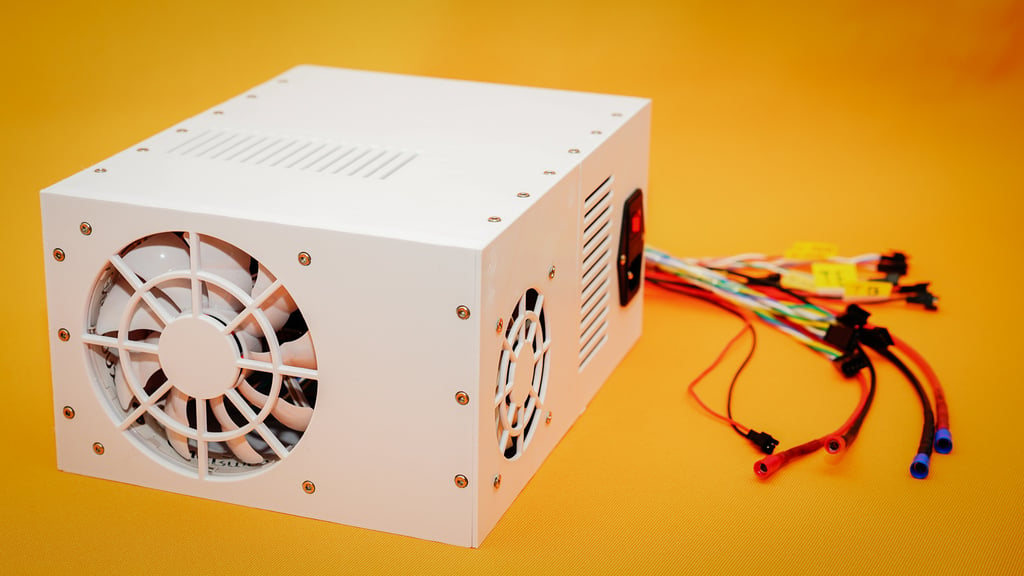
Case for MKS Gen L, Meanwell LRS 350-24 or Stock Ender 3 PSU, 2 MOSFETS, Raspberry PI 3 and buck converters
thingiverse
UPDATE 29.April 2019: 1. I am happy to announce the release of every part as a Fusion 360 and STEP file for your own customizations. Please modify the case as you wish, but: Please post the remixed file here on thingiverse. I attached two ZIP-Files, which contains all the files. 2. I added 3 new files for a rear mounted Power Supply Mains Connection. I did not print them yet, so please remember that this is still a work in progress and you may encounter issues. If you want to use the rear mounted version, you will have to print the "back panel rear mounted" and either of "PSU Back Side Rear mounted" for the meanwell PSU OR "Ender PSU Back Side Rear Mounted" for a ender 3 power supply (non-pro). UPDATE 19.April 2019: Not really an update, but a liitle bit of clarification: With this case you'll have to open your power supply and attach it without the the lid to the PSU Side Panels. I don't think it is an issue, and since you have to rewire all the components anyway you should know about the handling of electronic components. Always make sure you take all safety precautions, when you deal with high voltages! UPDATE 15.April 2019: Added STEP and F3D Files for both top panels for those of you who wants to implement a display or some other things to the top. UPDATE 06.April 2019: Updated Side Front V1 -> V2! Fixed a mesh error, the standoffs were not connected to the main body. UPDATE 01.April 2019: Added new PSU Side Panels for the stock Ender 3 (not pro!) Power Supply. So if you own an ender 3 you have to print the "Ender PSU Front Side" and "Ender PSU Back Side" Panels. If you own an Ender 3 PRO (or a meanwell LRS 350-24 for another Printer) you will have to use "PSU Front Side" and "PSU Back Side". The ender 3 panel only fits a 60mm fan! The meanwell uses an 80mm! Original Release Notes: I designed this case to separate all electronics (except the stepper motors and heaters of course...) from my ender 3 pro. I wanted good cooling for my TMC2208, a nice look and a near silent operation. This will fit the following components: - Meanwell [LRS350-24](https://www.amazon.de/Mean-LRS-350-24-Netzteil-Ultraflach-Einbau-Metallgeh%C3%A4use/dp/B07F45JCQP/ref=sr_1_fkmrnull_1?__mk_de_DE=%C3%85M%C3%85%C5%BD%C3%95%C3%91&keywords=Meanwell+LRS350-24&qid=1552679344&s=diy&sr=1-1-fkmrnull) (the PSU of the ender 3 pro, and a good update for other 24V Printers) - [MKS GEN L](https://www.amazon.de/s?k=MKS+GEN+L&i=diy&__mk_de_DE=%C3%85M%C3%85%C5%BD%C3%95%C3%91&ref=nb_sb_noss_2) with Stepper Drivers of your choice (I highly recommend [TMC 2208](https://www.amazon.de/s?k=tmc2208&__mk_de_DE=%C3%85M%C3%85%C5%BD%C3%95%C3%91&crid=SP71AECFR0JU&sprefix=TMC%2Caps%2C152&ref=nb_sb_ss_i_1_3) or similar) - [Raspberry PI 3 B+](https://www.amazon.de/s?k=raspberry+pi+3+b%2B&__mk_de_DE=%C3%85M%C3%85%C5%BD%C3%95%C3%91&ref=nb_sb_noss) - 2 MOSFETs - I used ["3D FREUNDE MOS"](https://www.amazon.de/3D-FREUNDE-Entlastung-Mainboards-Heizbetts/dp/B07BZYFQKF/ref=sr_1_2?__mk_de_DE=%C3%85M%C3%85%C5%BD%C3%95%C3%91&keywords=MOSFET&qid=1552679493&s=gateway&sr=8-2&th=1) - with a size of 60x70mm and a holespacing of 53x63mm - 2 x 80mm fans (Arctic Silent F8 or similar) - 12V - 1 x 120mm fan - I used an enermax I had lying around with nice built in LEDs, but you can go for noctua or any other silent fan, there is so much airflow in this case... - 2 x [buck converter](https://www.amazon.de/gp/product/B01MQGMOKI/ref=ppx_yo_dt_b_asin_title_o06_s00?ie=UTF8&psc=1) for the fans 24V to 12V with max 8mm height and smaller than 40x20mm The following features are not included: - A Display. I am using octoprint and had an old android phone laying around, which is now attached to the frame of my ender 3. What you need: - A lot of Time - but every part can be printed in a < 6h session, so you don't have to run your printer over night. - A good mix of [M3 bolts and nuts](https://www.amazon.de/s?k=M3+DIN912&__mk_de_DE=%C3%85M%C3%85%C5%BD%C3%95%C3%91&ref=nb_sb_noss), different lengths from 8mm to 20mm - A short angled (!) USB Cable (USB A to USB B) like [this](https://www.amazon.de/gp/product/B01HGNYH34/ref=ppx_yo_dt_b_asin_title_o06_s00?ie=UTF8&psc=1) - Silicon wire in different gauges: - [12AWG](https://www.amazon.de/s?k=Silikon+12+AWG&__mk_de_DE=%C3%85M%C3%85%C5%BD%C3%95%C3%91&ref=nb_sb_noss) for [PSU -> both MOSFET] and [MOSFET1 -> Bed Heater] - [16AWG](https://www.amazon.de/s?k=Silikon+16+AWG&__mk_de_DE=%C3%85M%C3%85%C5%BD%C3%95%C3%91&ref=nb_sb_noss) for [PSU -> MKS GEN L] and [MOSFET2 -> Extruder Heater] - [22AWG](https://www.amazon.de/Elektrischer-Silikondraht-verschiedene-Elektronischer-Anschlussdraht/dp/B07G72DRKC/ref=sr_1_6?__mk_de_DE=%C3%85M%C3%85%C5%BD%C3%95%C3%91&keywords=Silikon+22+AWG&qid=1552679011&s=gateway&sr=8-6) for everything else - Different crimping tools and connectors, because the cables from your printer are not long enough, so you have to crimp your own: - A set of [JST-XH](https://www.amazon.de/gp/product/B01MY8FLMV/ref=ppx_yo_dt_b_asin_title_o02_s00?ie=UTF8&psc=1) male connectors ([Dupont Crimping Tool](https://www.amazon.de/s?k=SN-28B&i=electronics&__mk_de_DE=%C3%85M%C3%85%C5%BD%C3%95%C3%91&ref=nb_sb_noss_2)) - These are for connecting the wires to the MKS_GEN_L - A set of [JST-SM male and female connectors](https://www.amazon.de/gp/product/B0716JMHNJ/ref=ppx_yo_dt_b_asin_title_o05_s00?ie=UTF8&psc=1) (Dupont Crimping Tool) - These are for the ends of your new cables (female) and for the old printer cables (male) - A set of [standard crimp connectors in blue and red](https://www.amazon.de/gp/product/B07HHZKWZL/ref=ppx_yo_dt_b_asin_title_o04_s00?ie=UTF8&psc=1) (I know, for 12AWG you should use yellow, do so if you like, but it also depends on your existing wire gauges of your bed heater - I double checked my blue ones, and they fitted perfectly for my 12 AWG) - IF you are good at soldering you could use XT60 connectors for connecting your heaters, but I am awfully bad at soldering, so I used crimp connectors and they are totally fine in terms of ampage rating for my 220W bed on my ender 3, which is little over 9 amps at 24V - a soldering iron for the buck converters - a multimeter for double checking your wiring (resistance, shorts and connection) and for setting up your stepper voltage and buck converters - wire stripping tool Assembly: - Print the PSU Panels and watch youtube videos on how to set up your MKS GEN L and TMC-Drivers ("Teaching Tech" and "Yemoja makerRefuge"), then "how to crimp - videos" - Fit them to your the LRS350-24 and the first 80mm fan inside the PSU Front Panel. Rewire the existing connector in the PSU to connect to the 80mm fan. Print the bottom panels and the stands while you are doing so - Assemble the bottom panels, connect the PSU to both mosfets (12AWG with ring crimp terminals) and the MKS(16AWG with ring terminals (PSU) and standard end crimps), after you attached the bottom panels to the PSU panels. - Print front panel, attach 120mm fan blowing in the case and rewire it with a JST-SM male 2 pin, but don't connect the front panel to the rest yet. - Print back panel, attach 80mm fan blowing out of the case and rewire it with a JST-SM male 2 pin - Print side panels, connect them, insert buck converters after soldering, I did it this way: - Connect inputs to 24V rail (either put wires to the nearest mosfet inputs or use the 24V output of the MKS) - One converter is for the extruder fan - I installed a noctua, so I needed steady 12V - connect a 60cm cable to the output and put a female JST-SM 2 pin on the end. (If you have a stock extruder fan in 24V you don't need to connect it to a buck converter, use a connection to the 24V Rail instead). - The other converter is for the front and back fan, I adjusted them to run silent (around 10V) - connect cables to the output long enough to reach your rewired fan cables, put JST-SM 2 pin female connectors on them and connect them to your fans. - Now prepare your wiring: - 1 Red and 1 Black 12 AWG with a ring crimp terminal on one side and a plug crimp terminal on the other side (Ring Terminal goes into the bedheating mosfet). Put a correspondig crimp connector on your bed heater cable. - 1 Red and 1 Black 16 AWG with the same crimping (Extruder Heater MOSFET -> Extruder Heater) - 4 x 4-wire-cable 22AWG for your Stepper Drivers to Stepper Motor Cables (Use JST-XH and JST-SM). - 3 x 2-wire cables for your endstop switches (also JST-XH and JST SM) - 2 x 2-wire cables for your thermistors (bed and extruder) - 1 x 2-wire cable for your part cooling fan - Double check your wiring with a multimeter! - Find a good path for your Raspberry Power Cable and secure it to the stands and the cable holders on the bottom. - Print the top panels - Patch your Raspberry Pi with Octoprint and your MKS GEN L with Marlin (detailed explanation for the ender 3 in the Youtube-channel of "Yemoja makerRefuge"). - Install both the Raspi and the MKS with the stands to the bottom plate. - Double check your wiring with a multimeter! - Check if your PSU is set to the correct voltage! - Connect to Power - Use a multimeter to dial in your buck converters - Use a multimeter to dial in your stepper drivers - Disconnect from Power - Use your wires to connect everything and lead the wires through the holes in the back panel. Attach front, back and side panels to the case (Do not close the top yet...) - Double check your wiring with a multimeter! - Connect to power and check fan speeds, if necessary tune your buck converters again. - Shut down and connect all your wires to your rewired printer wires. - Put extruder manually in a middle position (X, Y and Z). - Power up and do not home ! - Use octoprint to check your axis! - X/Y right arrow should move your extruder to the right - X/Y up arrow should move your bed to the front! (Yes to the front. In relation to the bed your nozzle is moving back) - Z up arrow should move the extruder up - Note down, if an axis is moving in the wrong direction - Check if octoprint shows you the room temperature on both bed and extruder - IF Yes, set extruder to a low temperature (maybe 50C or so) - Check if it is heating and stopping at 50C - IF Yes, set extruder to 200C - IF OK, extrude and check if your extruder is turning into the right direction. - Check bed heating - Check if crimp connections between your cables and printer cables stay cool - Power down - If necessary reverse wrong axis in marlin, flash again and check again - If everything is working, screw the top panels on the case - Do a bed leveling before your first print. Have fun with your new silent Ender 3 or whatever printer you are using :-)
With this file you will be able to print Case for MKS Gen L, Meanwell LRS 350-24 or Stock Ender 3 PSU, 2 MOSFETS, Raspberry PI 3 and buck converters with your 3D printer. Click on the button and save the file on your computer to work, edit or customize your design. You can also find more 3D designs for printers on Case for MKS Gen L, Meanwell LRS 350-24 or Stock Ender 3 PSU, 2 MOSFETS, Raspberry PI 3 and buck converters.