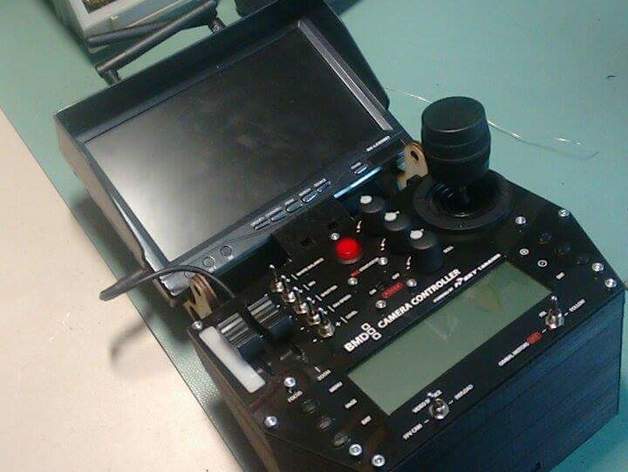
Case for Taranis based Camera Controller v1.1
thingiverse
I decided to design a custom housing to control the gimbal for my drone, ensuring it meets the specific needs of a camera operator. The top plate is precision-cut from wood or POM, and I highly recommend using POM for its sleek look and feel. Some components I created or modified to integrate with this housing include: * A FPV camera mount that allows for a secondary small camera under the gimbal attachment, perfect for slow-motion recording or alternate camera configurations. (https://www.thingiverse.com/thing:1343766) * A Boscam 5802 mount that enables attaching the screen directly to the housing and includes an internal power supply. This design is based on Thing 1069007. * I also incorporated elements from my other designs, such as a FPV camera mount for the Sony RX100 IV and a servo mount for manual focus control. During assembly, I realized the original Taranis buttons weren't ideal, so I designed new ones that fit perfectly into the cut-out holes of the top plate. They provide a satisfying feel when used. I employed a lasercutter to create the top plate from POM. While other materials like plywood or acrylic glass can be used, POM is recommended for its aesthetic appeal. To enhance contrast, I engraved and painted the plate. Note: Due to printing issues with my housing, I adjusted the top plate to ensure a precise fit. The updated design will be available in EPS format, allowing you to customize it as needed. Additional information about this project can be found on an online forum (https://fpv-community.de/showthread.php?72904-Kamera-und-Gimabl-Steuerung-auf-Basis-von-Taranis). To enhance functionality, I added an expansion port and controller. For the expansion controller, I used a different design. Please refer to Thing 1832030 for more details. Note: This is a work-in-progress project, and I'll continue updating it as necessary. Print Settings: * Printer Brand: Ultimaker * Printer: Ultimaker Original * Rafts: Yes * Supports: Yes * Infill: 100% (for maximum stability) Notes: I printed the housing from bottom to top with a 100% infill. Initially, I tried printing with 15% infill to save time but later experienced structural issues due to weight. To ensure durability, I tightened screws and attached a wooden support that also serves as a neck strap attachment point. I made adjustments to the antenna mount position and increased mounting hole thickness for added durability. During printing, I encountered difficulties with the battery cover design. It kept breaking, so I printed it upright and uploaded an updated STL file with a 0.1 mm thick shell on top. This allowed me to add support and prevent the printer from faltering during the print process. I also redesigned the mounting plate for the Boscam screen, which had broken apart due to excessive force. The new design includes 100% infill and is now stronger than before. The housing comes with two faceplates: one for small compact cameras like the Sony RX100 and another designed specifically for the Black Magic Micro. Initially, I used a Sony camera but later switched to the Black Magic during this project. In the EPS files, you'll find spare designs for internal parts, placeholders for switches, and even some leftover switch designs from previous projects. Additionally, I've included a layout for the wooden support, which I developed less extensively than other components. While it fits, there are small gaps (around 1-2 mm) due to its 5 mm plywood construction. The large holes are designed for larger antennas. I added an extension port with one switch/channel not yet utilized, allowing access from outside and enabling future expansion controllers for various tasks, features, or payloads (e.g., motion tracking or combined auto focus and shutter release). The expansion port will utilize a Sub-D 15 Connector. For more details, please refer to Thing 1832030.
With this file you will be able to print Case for Taranis based Camera Controller v1.1 with your 3D printer. Click on the button and save the file on your computer to work, edit or customize your design. You can also find more 3D designs for printers on Case for Taranis based Camera Controller v1.1.
