Cast Metal Lettering Effect - Fake Cast Lettering Mold Proof of Concept
prusaprinters
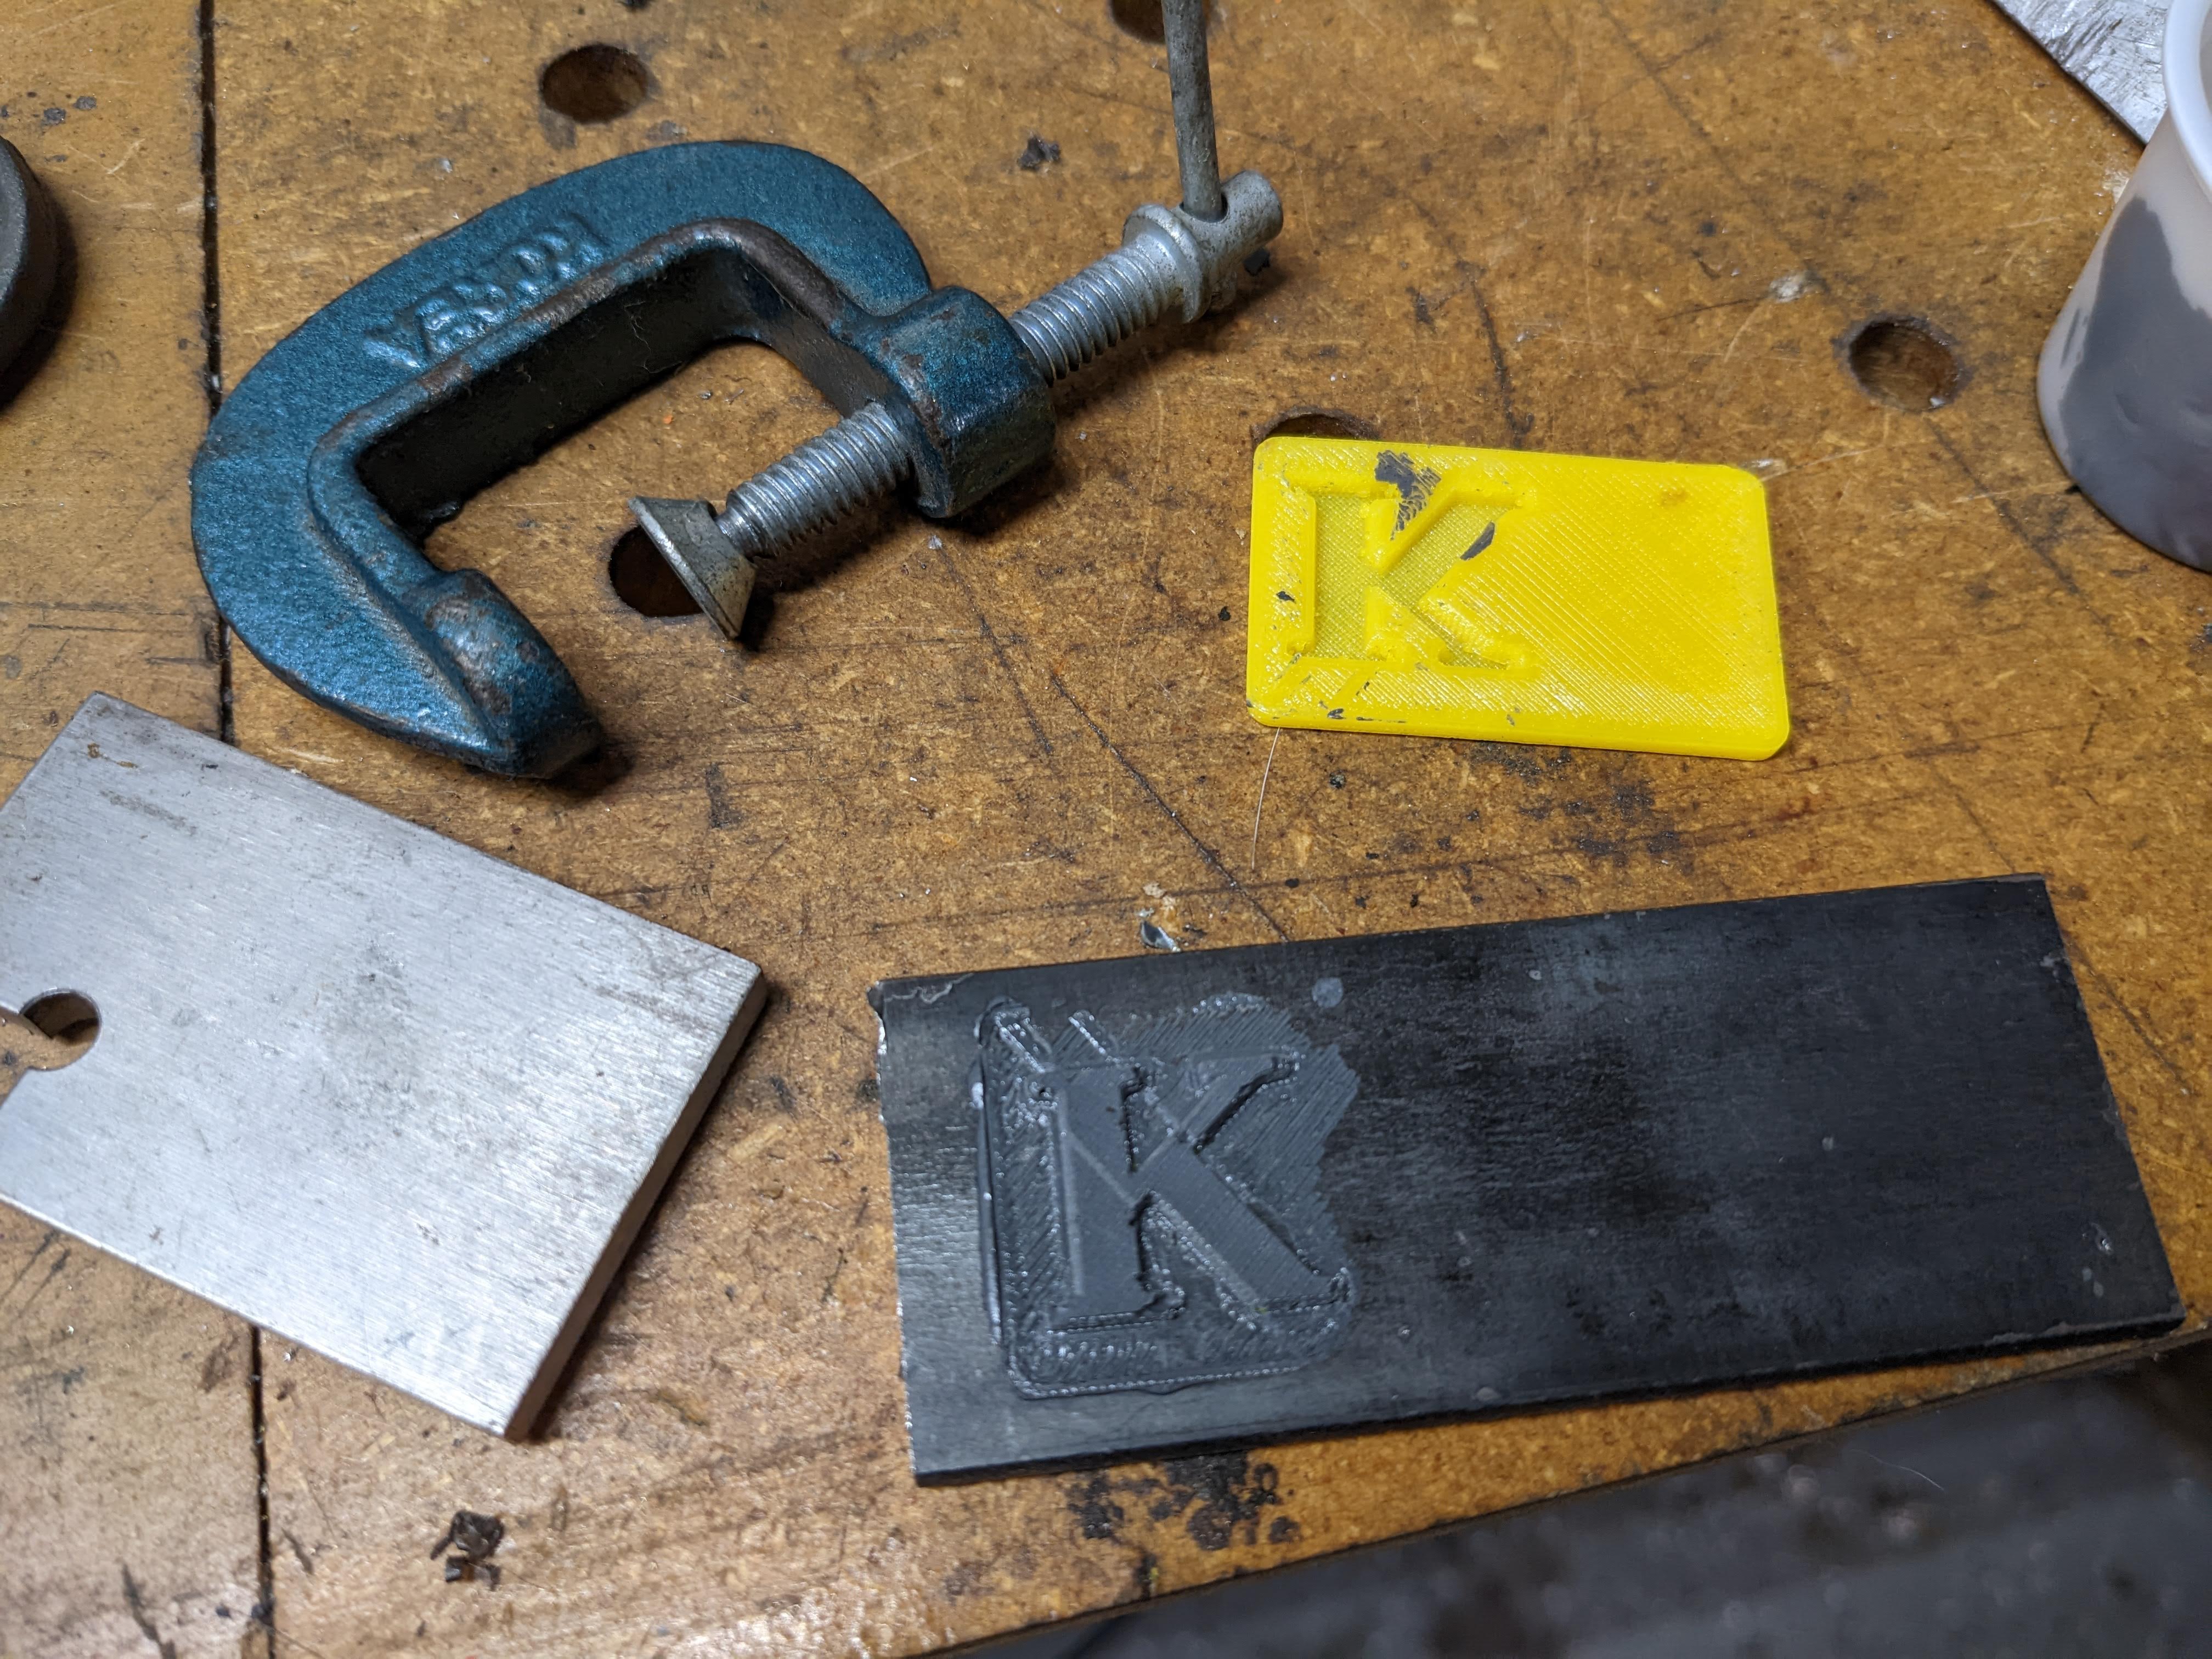
<p>First - full credit to <i>Pask Makes</i> for coming up with this idea. See the linked video for a full explanation, but in brief it works like this :</p><ul><li>Create a negative mold of the lettering you want</li><li>Fill the mold with epoxy and clamp it to the item you want to add the lettering to</li><li>Allow the epoxy to set, remove the mold</li><li>Sand, paint, etc. as desired</li></ul><figure class="media"><oembed url="https://youtu.be/wTp68S9oG9M"></oembed></figure><p>As noted above, the example in the video was hand carved into a piece of plastic. He mentions the possibility of using 3D printing instead (but does not try that), so of course I had to see if a 3D printed mold would work.</p><p>My hope was that a TPU (flex) type filament would have sufficient resolution for the purpose, and would remove easily from the set epoxy. This proved to be the case.</p><h4>Notes on the CAD</h4><p>The example print I provide here is useful only for test purposes (unless you happen to need a letter K), so anyone actually applying this technique will want to create their own custom mold in their CAD software of choice. There is no one best way to create the mold in CAD, but I will explain briefly how I did it in OnShape as a general guide to what worked for me :</p><p>First, note that I included a blank area in the final mold - the idea is that this “tab” will remain free of epoxy, and will serve as a grip for removing the mold after the epoxy sets. I found that this worked very well - it was easy to lift up that section with a fingernail, and then grip it with pliers for removal. I had no trouble pulling the mold off the lettering.</p><p>For creating the CAD model, here are the basic steps I used :</p><ul><li>Create a “slab” large enough to contain the desired lettering, with additional space fora removal tab</li><li>Create raised lettering on the slab in the size and style you want</li><li>Add “draft” to the lettering (I used 15° draft) - both to help with mold removal and to add a “cast” look</li><li>Create a second “slab” on top of the first, and then use a boolean operation to remove the lettering from the new slab to create a negative mold</li><li>Add additional fillets, etc. as desired.</li></ul><p>Note that the above method first creates “regular” text that will look like the final result you want, and then creates a mold of that text which will be “mirror text” which in turn creates regular text when molded.</p><p>There is room for a lot more experimentation here, so anyone who actually wants to apply this technique will want to do additional small scale experiments to determine the best CAD design for both practical and esthetic purposes.</p><p> </p><h4>Use Instructions</h4><p>See the video for details on how to apply the lettering. In addition, the included pictures show how I applied the epoxy, clamped the mold for setting, and the final result. Since this was just a test piece, I did not bother to sand and paint.</p><p> </p><h4>Print Instructions</h4><p>Print in TPU (flex) filament using the 3mf files provided. Note that I printed twp copies at the same time for test purposes, but of course you can change this to meet your requirements. I printed in 0.2mm layer height on a textured PEI bed.</p><p>My print came out fairly well, but I had to do some post processing to remove some “blebs” and stringing - a very sharp (new blade) razor knife is recommended for this purpose.</p><h4>CAD</h4><p>The OnShape 3D CAD files for this are here :</p><p><a href="https://cad.onshape.com/documents/266c8ffd55a0e683566c73de/w/cff74e55724d27df0ca20c5c/e/543610f9ff8576796d85e938">https://cad.onshape.com/documents/266c8ffd55a0e683566c73de/w/cff74e55724d27df0ca20c5c/e/543610f9ff8576796d85e938</a></p><p> </p><p> </p>
With this file you will be able to print Cast Metal Lettering Effect - Fake Cast Lettering Mold Proof of Concept with your 3D printer. Click on the button and save the file on your computer to work, edit or customize your design. You can also find more 3D designs for printers on Cast Metal Lettering Effect - Fake Cast Lettering Mold Proof of Concept.