Casting Molds for 2.5lb, 5lb, and 10lb Concrete Olympic (2 inch) Weights
thingiverse
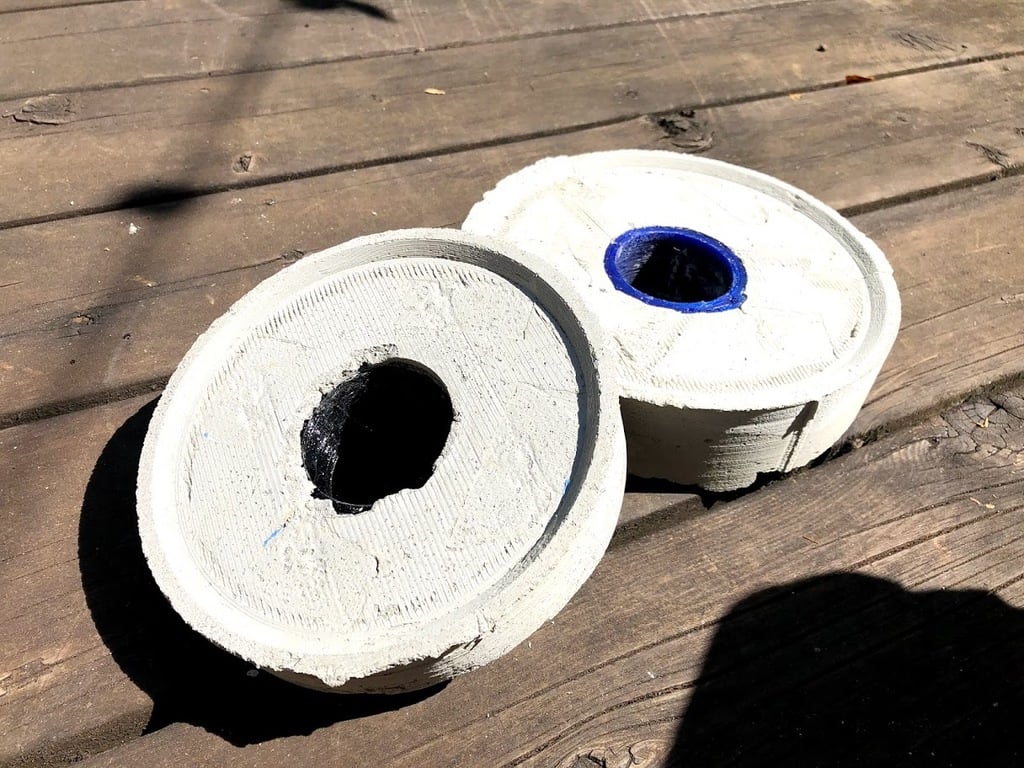
In normal circumstances this wouldn't make any sense. Concrete isn't an ideal material to use for making your own weights: even though it's pretty heavy, it's not as dense as the materials that weights are usually made of (iron or steel), it's a ton more fragile, its weight may vary slightly as humidity changes, and it can be very hard on your weightlifting bar. These aren't normal circumstances, though, and as COVID-19 has closed gyms around the world and emptied stores of their selection of weights both online and offline, I've found that this usually non-ideal solution is totally workable. Here, you'll find a collection of models you can use for casting your own olympic-size (2-in center) concrete weights in three different sizes: 2.5lb, 5lb, and 10lb. Each part is made of three different types of components: * The (reusable) parts for the mold itself: * Floor: The part(s) for the bottom floor of your mold. In the 2.5lb version, this is a single part, but for the 5lb & 10lb versions, you'll see that this is printable in thirds to make it fit within the print area of most printers. * Wall: The parts for the walls of your mold. This is always printable in thirds so you can easily eject your concrete weight from the mold by peeling off each of the walls. * The center axis of your new weight. This plastic part will serve as the center of your new weight, and given that it is made out of plastic instead of concrete, will protect your weightlifting bar from damage when adding/removing weights. In case it's not obvious, this part is not reusable and will become part of your weight when you're finished. * (Optional) a small overflow dam you can use to prevent concrete from overflowing into the center of your weight's axis if your concrete turns out to be less dense than expected. ## Casting Your Weight 1. Assemble your mold * First, tape together the three parts of your mold's wall using blue painters tape (or some other easy-to-remove tape) on the outside edge. Set this assembly on a table. * If your weightlifting mold's floor is in multiple parts, snap the parts together by hand. You may need to gently use a hammer. * Place your weightlifitng mold's floor upside down over the wall you've assembled. Tape the floor to the wall to create a rigid structure. * Flip your mold over. 2. Secure the center axis of your weight in the center of the mold. You may need to use a hammer to get it to set flat. 3. (Optional) Insert the "overflow dam" part if you want to increase your chances of having a clean surface on the top of your center axis. 4. Prepare your concrete mixture, and pour it into the mold. Depending on how much water you've used in your concrete, you may need to pack your concrete mixture into the mold by hand, making an effort to ensure that concrete makes its way between the fins of the center axis. 5. Wait for the recommended amount of time. For the concrete I selected, that was just an hour. 6. Remove your new weight from the mold by: * Removing the tape holding your walls' components together and to the bottom of the mold. * Gently prying the walls off of your newly cast part. * Gently prying the floor of your mold off of your new concrete weight. 7. That's all! ## How do I get an accurate weight? You won't! At least, not extremely accurate -- things like humidity can change the weight of concrete weights day-to-day -- but I was able to get within two ounces on every weight I made by following the below pattern using [CementAll](https://www.homedepot.com/p/Rapid-Set-55-lb-Cement-All-Multi-Purpose-Construction-Material-02010055/202188447) rapid-set concrete. ### 2.5 lbs * Concrete Mix: 1060 g * Water: 131 g ### 5 lbs * Concrete Mix: 2119 g * Water: 262 g ### 10 lbs * Concrete Mix:4239 g * Water: 524 g ### How to calculate your own? You'll probably guess, given the precision of the above measurements, that there's some sort of formula involved, and you'd be right. The way I've arrived at the above is: ``` total_weight = target_weight * 1.05 concrete_weight = total_weight * 0.89 water_weight = total_weight * 0.11 ``` Essentially, I'm aiming for an 89:11 concrete-to-water ratio, and attempting to _over_-shoot the weight slightly knowing that I'll probably lose a little concrete in this process, and can remove small amounts of concrete after-the-fact with a drill in the unlikely event it turn out to be substantially over the target weight in the end. ## What if I want to make bigger weights? I think this approach should work for bigger weights, I just didn't happen to need to make more weights above 10lb. You can easily use this same approach for bigger weights by: 1. Copying the Fusion 360 Project for the 5lb weights. 2. Adjusting the diameter of the circle in the main sketch such that it matches (or, ideally, is slightly less than) the standard diameter of weights of that weight. 3. Adjusting the position of the "Weight Ceiling" plane until the "mass" property of the "Concrete" body is what you're looking for. Note that you also might need to adjust the height of the walls, possibly.
With this file you will be able to print Casting Molds for 2.5lb, 5lb, and 10lb Concrete Olympic (2 inch) Weights with your 3D printer. Click on the button and save the file on your computer to work, edit or customize your design. You can also find more 3D designs for printers on Casting Molds for 2.5lb, 5lb, and 10lb Concrete Olympic (2 inch) Weights.