Cat's Eye Iris Box
prusaprinters
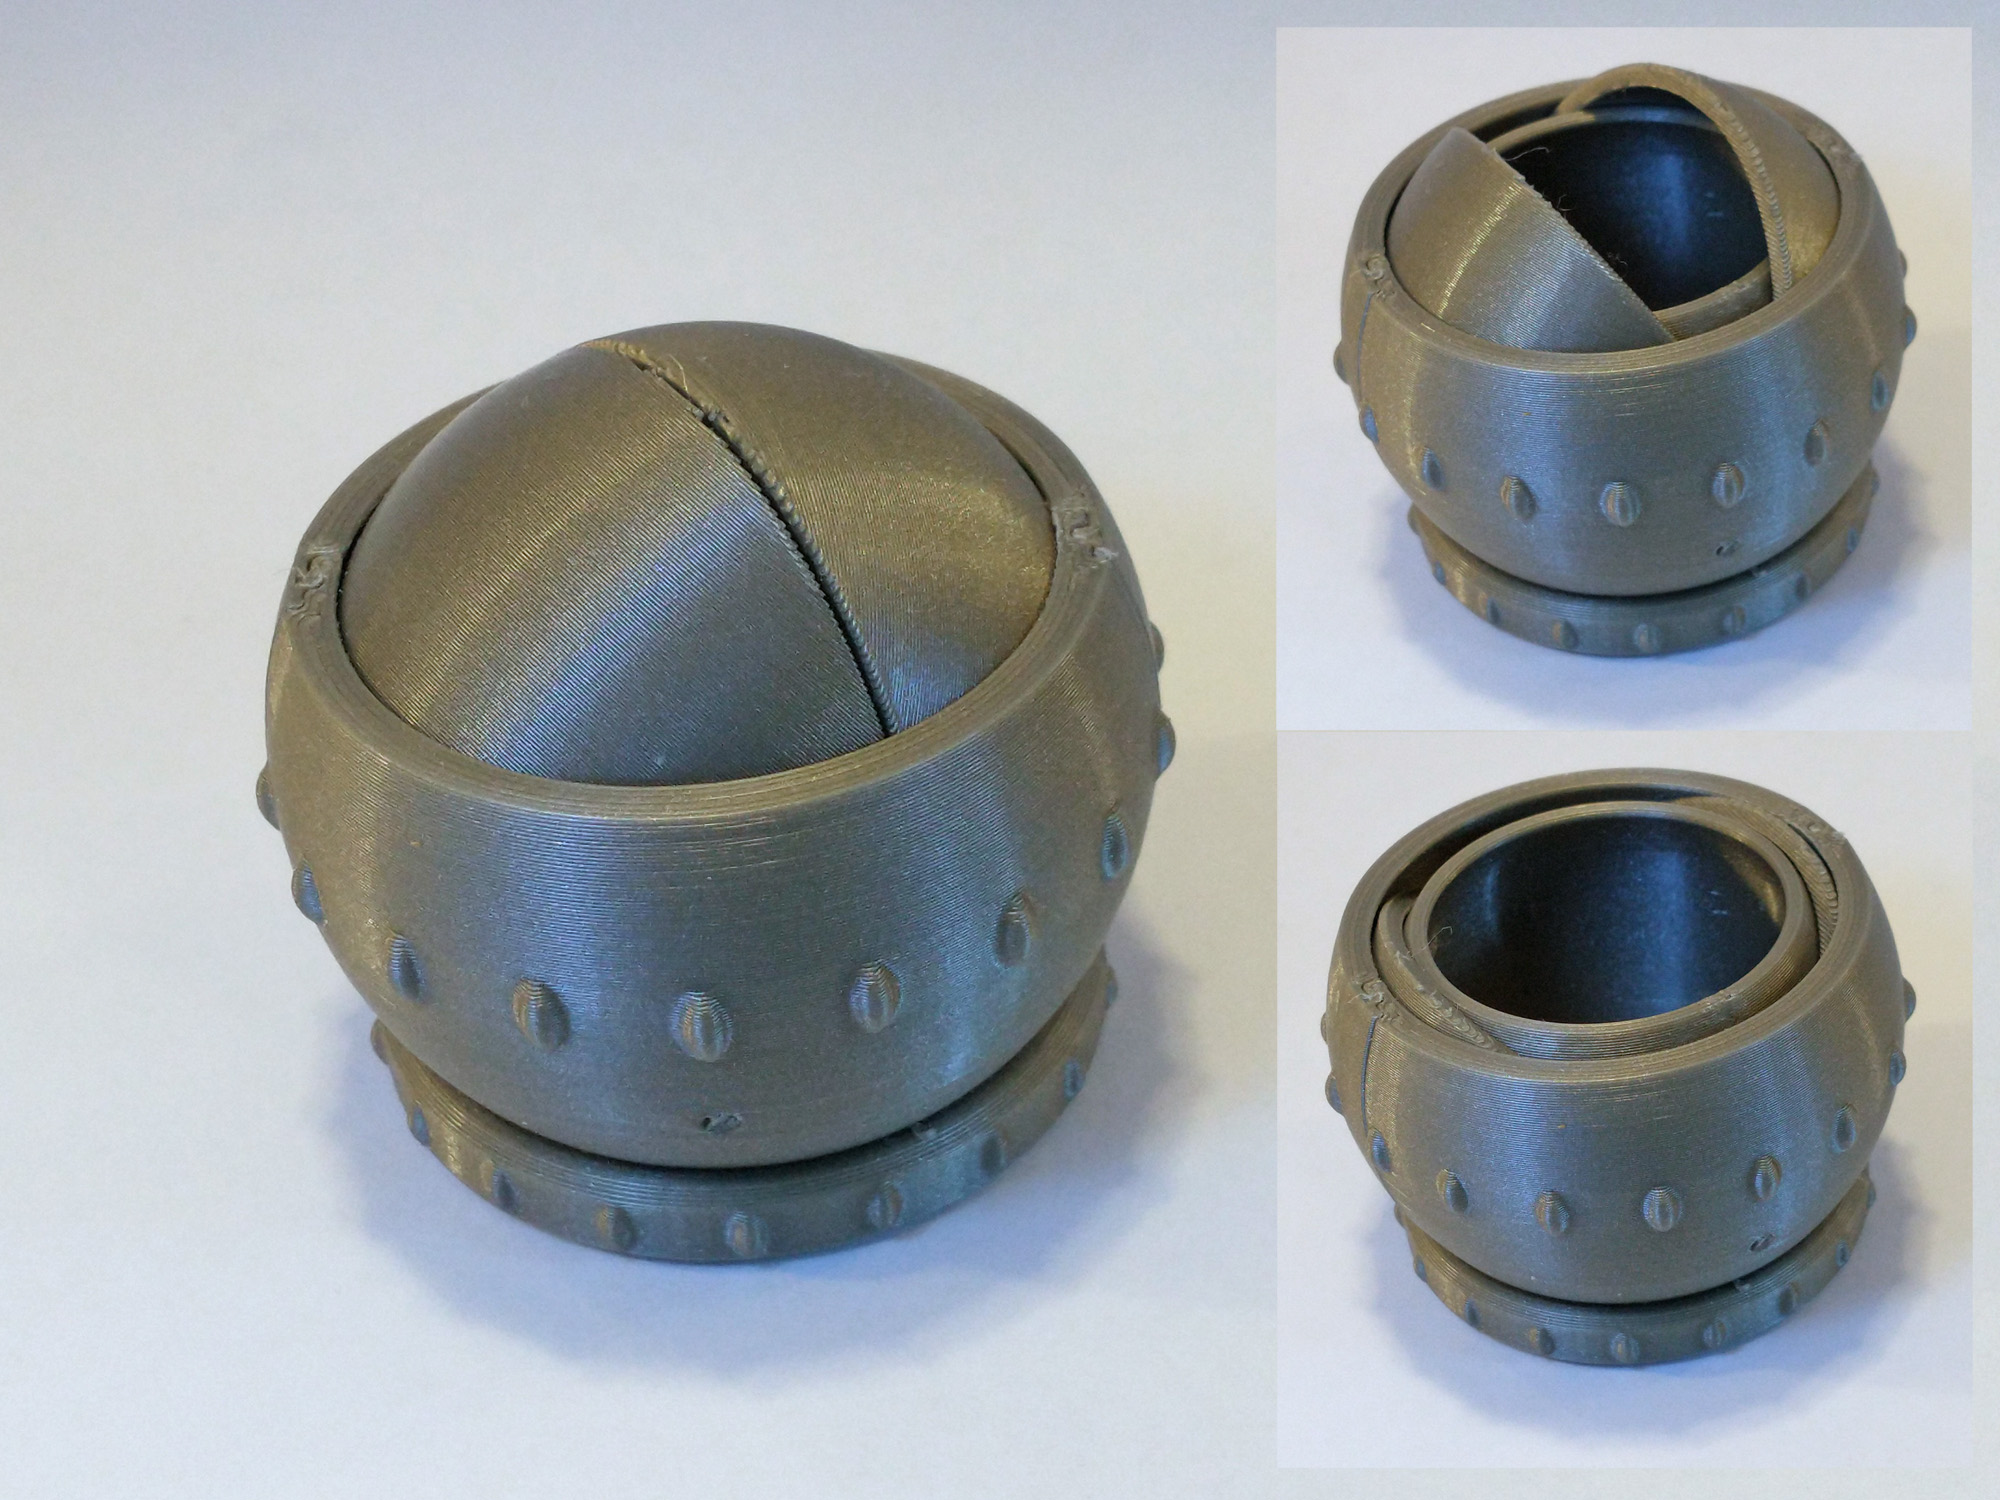
<p>Unlike those <a href="https://www.printables.com/model/257845-print-in-place-iris-box-locking"><i>other</i></a><i> </i>fussy print-in-place iris boxes, this prints and assembles easily with no mysterious “breaking free” process. All parts snap together with no glue or fasteners. There are a couple of small built-in supports that easily break away (leave your slicer supports turned off) and a couple of small brim “patches” where the edges might be inclined to lift.</p><p><strong>Printing</strong><br>Print this in PLA with 0.2mm layers. Print 2 of the Lids and one each of the other parts. After printing, break off the built-in supports and brims and clean up any strings or nits. On the interior of the spherical mating surfaces, sand down any ridges from over-extrusion at the edges.</p><p><i>Pro Printing Tip: When printing convex overhangs, the overhanging edge wants to warp upwards. The steepest overhangs in this model are the lower halves of the hemispherical pieces. To minimize warping, orient the hemispherical parts so that the fan is blowing onto the <strong>outside </strong>of the hemispheres. </i></p><p><i>Note:</i> It is possible to scale this model up, but it uses short sections of 1.75mm filament to act as actuator pins for the lids. If you do scale this up, you'll have to print small diameter actuator pins of the appropriate scale.</p><p><strong>Assembly</strong><br>First make sure that the holes in the sides of the lids fit over the pins on the side of the core. (Clean up the pins and the ID of the holes if necessary.) Next, slip the indented hole side of one lid over one pin and the indented hole side of the other lid over the opposing pin. It should look like the 5th and 6th photos above. You can then snap the other side of each lid over the other pin as shown in the 7th photo. Both lids should pivot freely.</p><p>Next, cut off two 4mm long pieces of 1.75mm filament to act as actuator pins. Insert the pins in the small hole in the side of each ring part so that it is flush with the outer surface. The pin will protrude on the inside by 2mm as shown in the 8th photo. If the fit of the pins is not snug, you can gently squish one end of the pin with pliers to get a nice press fit in the hole.</p><p>Next, old both lids open all the way. Press the bottom ring part over the lids so that the protruding pin fits into the slot in the lid. Take the top ring part and place it on the opposite side and click the two halves together. If one or both pins push out, just push them back flush and into the slots in the lids. With any luck, rotating the ring will push both lids open and closed together.</p>
With this file you will be able to print Cat's Eye Iris Box with your 3D printer. Click on the button and save the file on your computer to work, edit or customize your design. You can also find more 3D designs for printers on Cat's Eye Iris Box.