cd rom stepper motor linear rail system
thingiverse
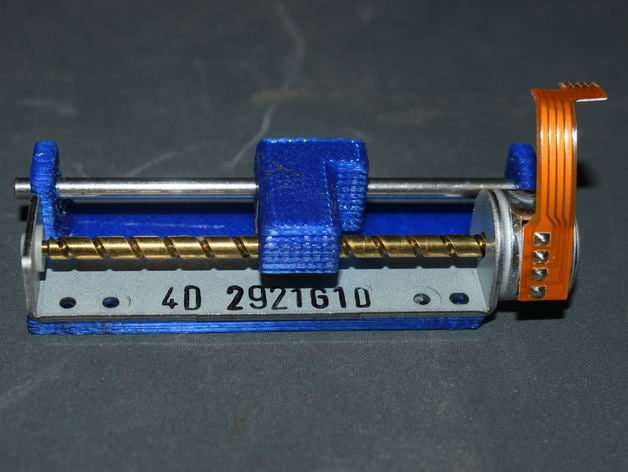
DIY CD ROM Stepper Motor Linear Rail A huge shout out and thanks to Mr Darwin for his great idea on using mouldable epoxy for the lead screw bolt. Check out his YouTube channel for many fantastic ideas and projects. Things you'll need besides a printer and filament: 1) Hand mouldable epoxy putty stick 2) Paper clip 3) CD ROM or DVD ROM stepper motor 4) 3mm rod (usually found with the stepper motor in the CD ROM) Make a small ball of mouldable epoxy, press it into the cup of the slider nut, scrape off any excess, and align the center of the cup with at least two threads of the lead screw. Lightly press down to form lead screw ridges in the epoxy, remove the slider nut, and let the epoxy set. Clean the threads if needed. Unfold the paper clip and cut it to 10-12 mm length. Assemble the linear rail and push the paper clip under the lead screw and into the hole in the slider nut. The paper clip wire holds tension between the slide nut and lead screw. Wire up the stepper motor and let your imagination run wild! There are two versions of the slider nut, one with a 3mm shaft size slightly larger depending on your printer's tolerance. If you need mounting points, feel free to ask. Print Settings: Printer Brand: RepRap Printer: Prusa I3 Rafts: No Supports: Yes Resolution: As you wish Notes: Print the slide nut at 100% infill
With this file you will be able to print cd rom stepper motor linear rail system with your 3D printer. Click on the button and save the file on your computer to work, edit or customize your design. You can also find more 3D designs for printers on cd rom stepper motor linear rail system.