CE3_Lead_Screw_Stabilizer
thingiverse
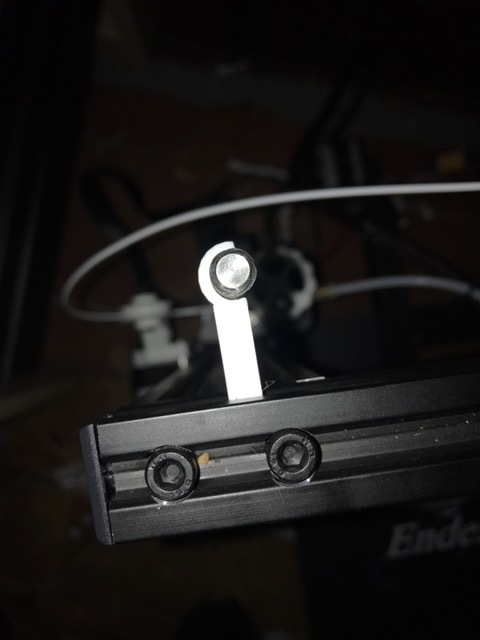
This one is my second design. As in my first design, I wanted a way to take some of the movement out of the lead screw on my Creality Ender 3. I wanted to do this without any additional hardware (IE: T-Nuts,Bolts,Bearings,Etc.). So, I made this guide. On my machine, the lead screw appears to move freely, by hand. Yes, I know...to take out all of the movement I should have an enclosure with a bearing. I did not want to take this that far... Instead, I only wanted to try and remove any major movements in the lead screw. So far, I am not having any real issues with the Z Axis. I only wanted a minor improvement. In Cura, I only used the recommended settings, generated supports, and a brim. Other than that, I just let it run it's course. Note: I have not tried a print with this addition; but, do not expect any difficulties as my lead screw moves easily by hand. Again, I only wanted to take the major movements out of the lead screw. I believe that there is enough free play that will prevent damage. However, use at your own risk. This took about 39 mins to print. CADD Software: TinkerCADD Slicer Software: Cura 3.6.0 Computer: MacBook Pro
With this file you will be able to print CE3_Lead_Screw_Stabilizer with your 3D printer. Click on the button and save the file on your computer to work, edit or customize your design. You can also find more 3D designs for printers on CE3_Lead_Screw_Stabilizer.