Cellular Lamp Magnetic Stand
thingiverse
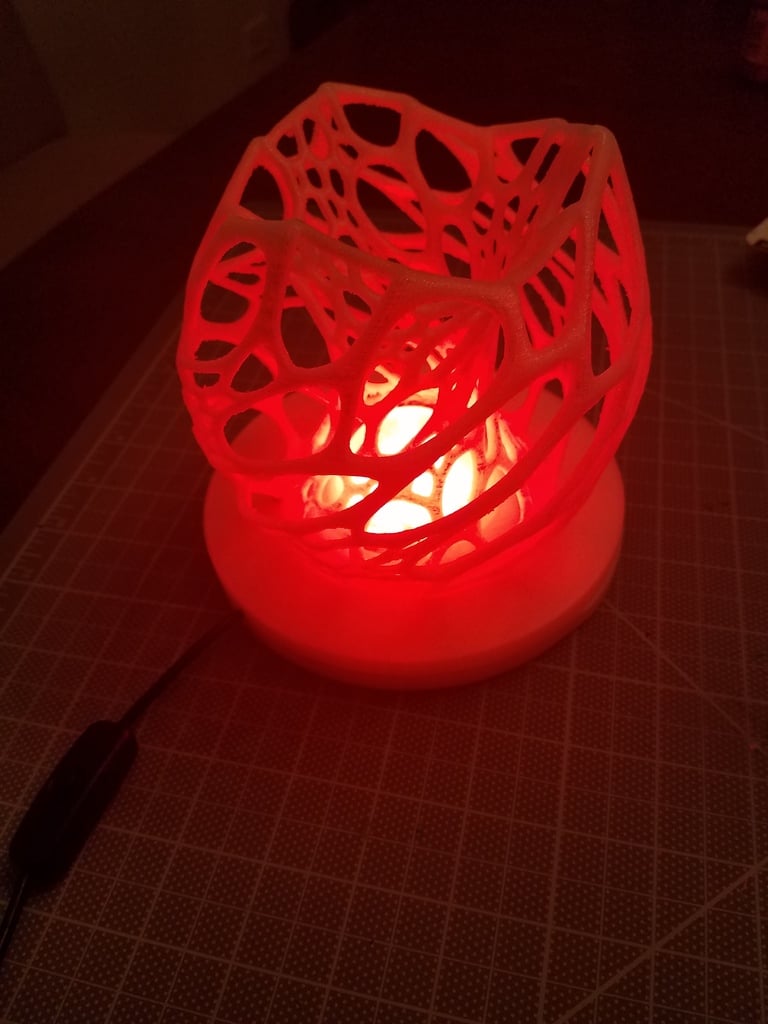
*EDIT 1*: While printing the base, there was extremely odd tool paths. I looked at the model again and realized it was tilted a few fractions of a degree causing odd printing. I have uploaded the new fixed model for this. Base_Mag_V2.stl *EDIT 2*: I printed this and suggest to print it at around 104-105%. I made the tolerances in the holes slightly too small. Additionally, I have rewired mine up to be controlled through my phone using the "Blynk" app (https://www.blynk.cc/). I changed the board from an adafruit trinket pro to a ESP8266 development board (I used this one: http://a.co/adm7Jz2 It says ESP8265, but it shows up as an ESP8266) I wanted a nice base to use with the amazing cellular lamp so I made one. I wanted to be able to easily disassemble it so I used magnets to hold it all together. There is room on the inside for all of the internal electronics. For the electronics, I used an adafruit trinket pro and a 12 ring neopixel to control the lights. You could use a bluefruit board which would allow you to control the lights via your phone. All of the electronics I purchased for around $14 at my local Microcenter or you can use the amazon links below. You can use a phone micro usb cable to run the power or use a plug with a switch. I used StijnVanDamme's Cellular Lamp diffuser (https://www.thingiverse.com/thing:1883446) and made the parts allow it to fit between. The magnets are 6mmx2mm. They should fit snug into the holes. Confirm the polarity before you glue them in place! On my base I manually drilled all of the holes because I didn't want to reprint it, but these models have perfectly aligned holes for them so your print will be better than mine! There are two tops that are attached. "Top_lampattachment" has two holes for magnets that will allow you to glue a magnet inside and to the bottom on the lamp without having to drill into the lamp. So if you want an attachment for the lamp then use "base_mag" and "Top_lampattachment". If you do not then use "base_mag" and "top_mag" Printing: I used 20% infill for the parts. Print them all flat on the print bed. For the top piece print it with the top side on the print bed so it will be nice and smooth. Magnets: https://www.amazon.com/gp/product/B075RZ82HP/ref=oh_aui_detailpage_o01_s00?ie=UTF8&psc=1 Trinket Pro: https://www.amazon.com/Adafruit-Pro-Trinket-16MHz-piece/dp/B0131VM9I0/ref=sr_1_2?ie=UTF8&qid=1531275787&sr=8-2&keywords=trinket+pro&dpID=61tlJabMLhL&preST=_SX300_QL70_&dpSrc=srch Neopixel Ring: https://www.amazon.com/Adafruit-RGB-LED-Neopixel-Ring/dp/B00KAE3R1U/ref=sr_1_cc_1?s=aps&ie=UTF8&qid=1531275849&sr=1-1-catcorr&keywords=neopixel+12+ring
With this file you will be able to print Cellular Lamp Magnetic Stand with your 3D printer. Click on the button and save the file on your computer to work, edit or customize your design. You can also find more 3D designs for printers on Cellular Lamp Magnetic Stand.