Cement Candle using 3D Printed Mold
thingiverse
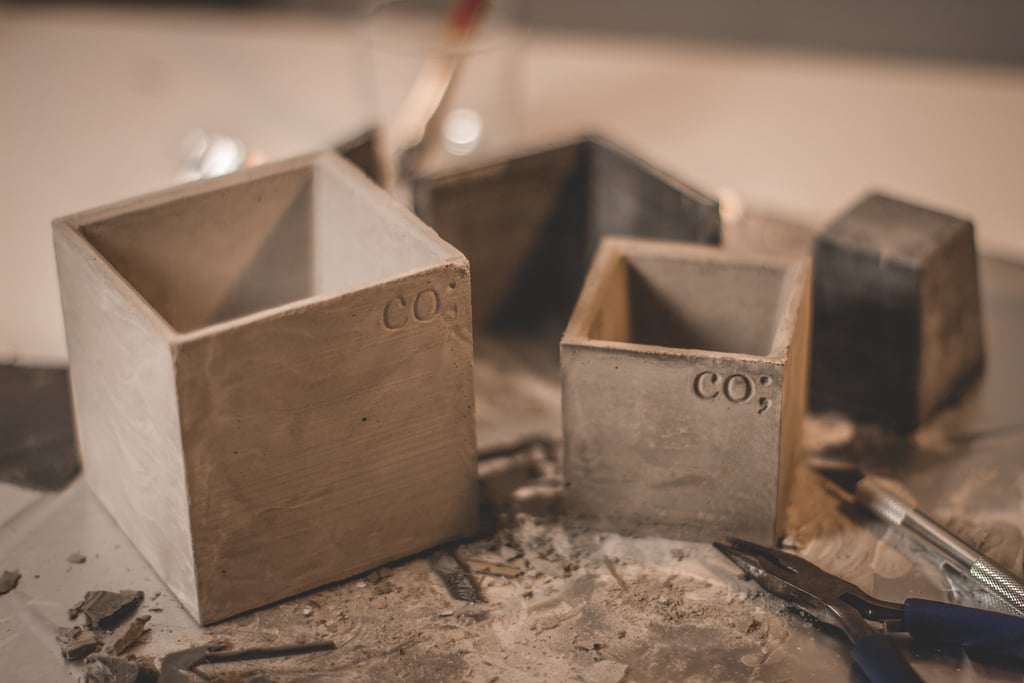
## **Preface** This candle is part of a [video](https://youtu.be/muWc_HYNCkE) which I've published on my YouTube channel. I recommend watching the video to understand how these parts are meant to be used, although I'll do my best to explain it here as well. --- ## **Specifications** The dimensions are specified by the size of the inner cavity, as that's the size that determines what kind of wick you'll want to use. But don't get too hung up on wick sizes. I found out that there's an entire community around candles where they take wick sizes very serious, but for most of us, we won't even be able to tell the difference. For reference, I used a wick with a diameter of 3mm. There are three candle sizes to choose from: 50x50x50mm, 75x75x75mm, 100x100x100mm. With outer dimensions of 60x60x60mm, 85x85x85mm & 110x110x110mm. --- ## **What to print?** One mold consists of 3 parts: Two of which are sides and one for the bottom. I put my logo on the wall of one of the sides. If you don't want to have my logo in the cast, you can just print the plain side twice, because the walls are symmetrical. **The "Bottom" part of the mold is sacrificial. You will have to break it when demolding!** --- ## **Bill of Materials** * Cement or Plaster (Any brand will do. Pick what fits your criteria, e.g. color, homogenity, curing time, price...) * Optional: Sand or small rocks to mix with the cement * Paraffine wax or beeswax * Wick (I used a 3mm dia. wick) * Tools (3D printer, sandpaper, x-acto knife...) *Overall price: ~5-10€ per candle. Less if using paraffine wax* --- ## **Making the Candles** Some of the following steps might not be so easy to understand. If that's the case, I suggest watching [my video](https://youtu.be/muWc_HYNCkE) about it where I show how I did it. 1. Print all 3 pieces of the mold 2. Sand the inner surfaces down with 180-400 grit 3. Use vaseline or vegetable oil on the inner surfaces of the mold 4. Hold the mold together with tape or rubber bands 5. Mix cement with water until the consistency seems pourable 6. Once the cement starts to set (after ~1h) scrape off the excess cement to make it smooth 7. Let the cement cure for ~24h (depends on what kind of cement you use) 8. Demold ("Bottom" part is sacrificial. You will have to destroy it.) 9. Let dry for at least 24h (or put it in the oven at 50°C for a couple of hours) 10. **Slowly** melt required amount of beeswax 11. Optional: Preheat the form to ~50°C (lowers risk of cracking) 12. Hang the wick into the form with something like a pencil 13. Fill the form with (bees)wax 14. Optional: When (bees)wax cools, it shrinks. If it has shrunken too much, top it off with some more wax.
With this file you will be able to print Cement Candle using 3D Printed Mold with your 3D printer. Click on the button and save the file on your computer to work, edit or customize your design. You can also find more 3D designs for printers on Cement Candle using 3D Printed Mold.