Center Point Marker Device
thingiverse
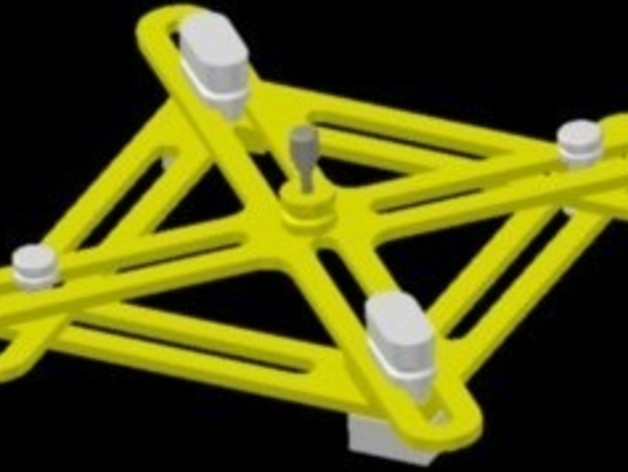
The Center Point Marker Device is a versatile tool that marks the center of square, cylinder, rectangular, and octagonal objects. Invented in 2005 by Hugh Lyman (US Patent No. 7,082,694), this device ensures accurate marking with an accuracy range of 0.005 to 0.010 inches on his commercially printed prototype. It is a simple tool that requires minimal hardware: a 3D printer and filament, sanding sticks or files, a drill press, four #3 x 3/8" flat head sheet metal screws, a rubber band, and a punch. The device has been made available to the public after the patent was abandoned, with downloadable STL files, DXF files, and PDF instructions provided for easy access. Accuracy depends on proper assembly, and users may need to remake certain parts. For further questions or donations, contact Hugh Lyman at hlyman@comcast.net.
With this file you will be able to print Center Point Marker Device with your 3D printer. Click on the button and save the file on your computer to work, edit or customize your design. You can also find more 3D designs for printers on Center Point Marker Device.