Centrifugal Water Pump
thingiverse
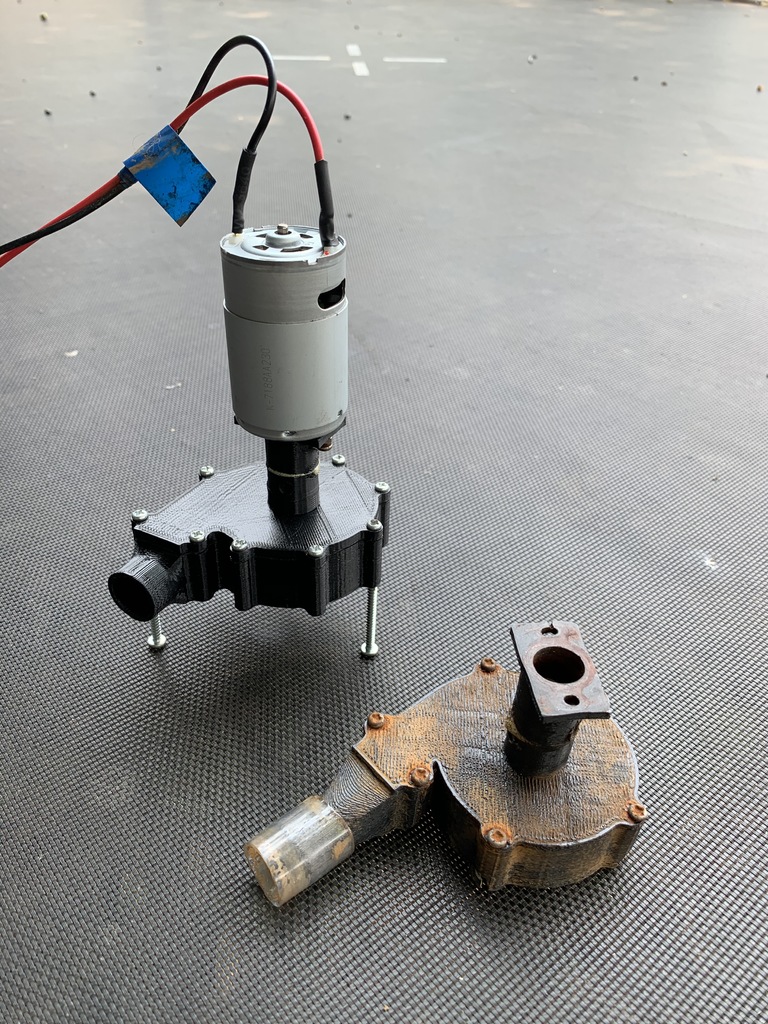
Hot off the smoking Anet A8! :) After being given a broken Anet A8, complete with melted wires, I set about fixing it and upgrading it with Marlin Firmware, level sensor and flexible steel print bed. This is my water pump design; with the main aim being to teach myself 3D design and 3D printing. Also figured that I might as well make something useful; as I needed a small water pump to remove water that collects under the house. Also a good test of PLA in quite harsh conditions; the dirty pump in the picture has been in use for nearly a year.There's no pump curve or other engineering design behind it; it's just made to fit the small space and the size of the hose I had. There's a Version 2 & Version 3; Version 1 didn't work so I haven't bothered to upload it. Version 3 has a bigger outlet and a thicker lid. Also tidied up the way it was drawn around screw holes etc. I recommend that for both that you use the short impeller; it actually moves more water. The tall impeller pushes too much water with the motor I'm using and just back pressures the pump housing. In this application the pump sits on long screws and is always underwater. The motor sits above water and is triggered by a float switch from a boat store. I also use a DC speed controller with soft start; connected to an old 12VDC battery, as the current draw from the motor is up to 18 Amps. (ps: Can't figure out the Thumbnails bit, so not all images are present) 8th Feb 2020 - Its raining hard at the moment, so finally got around to putting V3 pump under house. Took a pic of the V2 pump that was in place for quite a few months, to show how dirty the environment it's in. 8th Sept - Neglected to mention there is a hexagonal recess in the impeller that suits an M4 hexagonal bolt or nut. I'm using the M4 bolt as the drive shaft. Also there is hexagonal recess in the lid; which allow for two 5/32" brass nuts to be inserted. Drill these out to 4mm and so they act as bearings. 28th Dec 2020 Added a pic of the taller water pump and the file for the extra long collar. This is to get the pump motor away from the water. For the shaft use a 4mm threaded rod and a nyloc nut; cut it to size. * DC Motor is a "770" style motor from a local electronics store. https://www.jaycar.com.au/standard-high-power-d-c-motors-11800-rpm/p/YM2770 * Soft starter / DC motor speed controller https://www.ebay.com.au/itm/Speed-DC-Motor-Controller-Governor-Module-Digital-DC-brushed-21KHZ-Set-New-Hot/123860910294 * Drive shaft for the impeller is a 4mm hex headed bolt; which press fits into the impeller * Pump lid or cover has hex recesses in it as well. Use 5/32" brass nuts pressed in as bearings and drill them out to 4.5mm * Coupling for motor to drive shaft is a solid brass one off eBay, like this one. https://www.ebay.com.au/itm/5Pcs-Bass-Motor-coupling-Motor-Drive-Shaft-Coupling-Coupler-Connector-Sleeve/113961381587?hash=item1a88a0aed3:m:mAyGtqxiGOuKpDrUEzpXsjQ * Print with 1.2mm shell (4 layers) and 30% infill * No support, except for pump housing * No brim or raft needed, unless you have warping problems
With this file you will be able to print Centrifugal Water Pump with your 3D printer. Click on the button and save the file on your computer to work, edit or customize your design. You can also find more 3D designs for printers on Centrifugal Water Pump.