Cessna Simulator Flaps Control
thingiverse
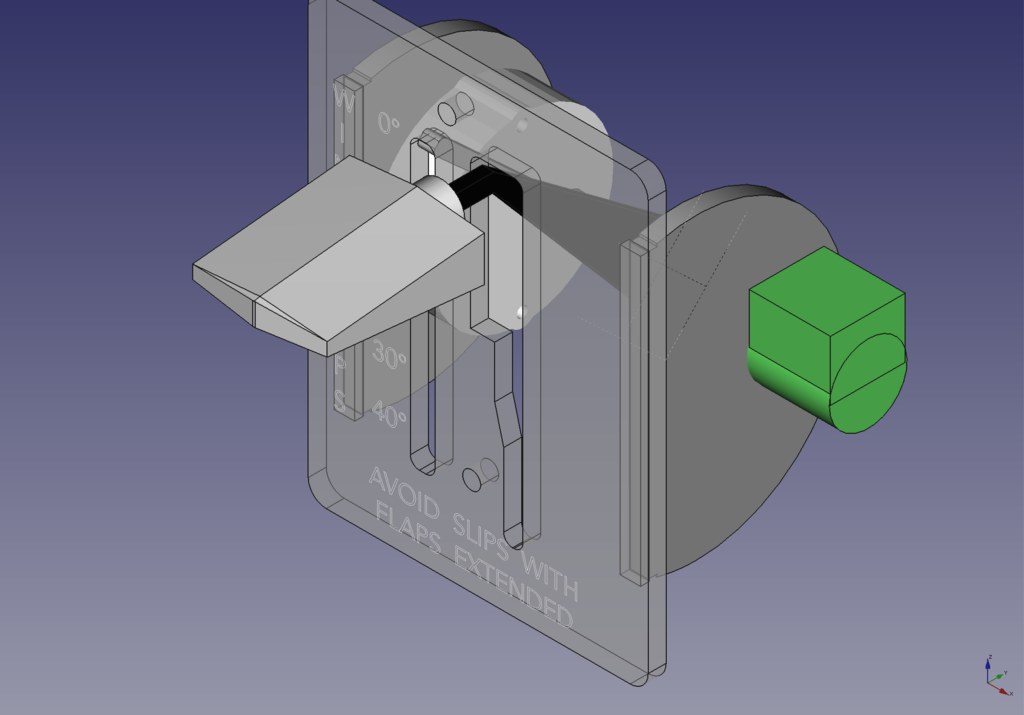
# Intro This is a flaps control for the Cessna 172 home cockpit simulator. Check it out in action. It's designed to fit a potentiometer used as an input, selecting the flaps setting, and a switec x27.168 stepper motor driving the indicator needle, showing the current flaps setting. # BOM - Potentiometer - Amazon: https://www.amazon.com/gp/product/B01JCMS58K - Stepper Motor - Aliexpress: https://www.aliexpress.com/item/32862052536.html (10-pack, just one needed) # Assembly - Print the parts - Glue them together (epoxy used) - Solder motor wires, making sure they go through the slots - Install the motor, friction fit; for extra security, a screw can be added with washers required - Install the indicator needle - Solder potentiometer wires - Insert the potentiometer shaft into the hole and put on the nut but don't tighten yet - Install the handle lever arm into the potentiometer's slot (ensure it can move in the slot) - Tighten the nut to fix the potentiometer in place - Add a handle to the lever arm - To solve an issue with the potentiometer being light and pulling down, wire was wrapped around its shaft - Secure the control in the panel using friction fit or holes in the faceplate - Print out the card and glue it to the faceplate # Sim Wiring to the simulator is app-specific. For X-Plane, SimVim was chosen, requiring a separate driver (simvim.com/tech_stepper.html) and an Arduino board (simvim.com/svc_stepper.html).
With this file you will be able to print Cessna Simulator Flaps Control with your 3D printer. Click on the button and save the file on your computer to work, edit or customize your design. You can also find more 3D designs for printers on Cessna Simulator Flaps Control.