Cetus Duct
thingiverse
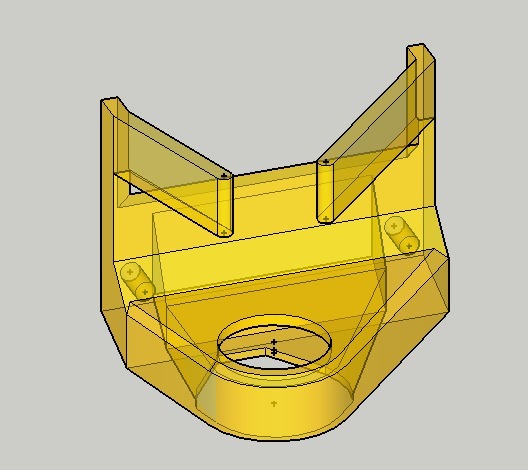
Replacement duct I reviewed the original design. I regret that the original print quality is too bad. I felt that it was not good the moment I saw it. The original duct was broken while it was attached or removed several times. From the manufacturer, since there is no supply of print data, I made it from scratch. I am planning to lose all useless space and subtle mistakes while designing. Processing of the stop hole is strange in the original. Also, the formation of air poles for extruders is strange. I can not imagine it was designed by experts. Version 2 was redesigned so that the injection of filaments was easy to see. Version 3 made the injection easier to see. It is challenging. I love this one. Ejection of the filament is easy to see anyway. It would be better to cut the steel plate in front so that the injection is easy to see. The original Cetus, the injection was easy to see. The design of MK2 is getting worse. v4.00: I felt that it was meaningless to cool the tip of the injection nozzle, so I did not cool it. Perhaps, an effect can be expected at a 0.2 mm nozzle. The nozzle will be less likely to clog due to injection priority. v4.01: If the cooling is zero, the raft is difficult to peel off, so the parts other than the injection nozzle were slightly cooled. v4.02: Experimental version. v4.03: Well, usable version. I think version 4 series is easy to use because it is easy to replace. It can be used properly depending on cooling priority or injection priority. It is professional specification. This modification is recommended because it is expected that the cooling will be insufficient and filament delivery will be poor. https://www.thingiverse.com/thing:3692742 v4.04: Well safe design. Recommended for everyone. v4.05: It is difficult to install. I gave a guide. v4.06: More blowing to the injection nozzle, Less blowing to the extruder. v4.07: Less blowing to the injection nozzle, More blowing to the extruder. v4.08: Middle blowing to the injection nozzle, Middle blowing to the extruder. Today, I made various ducts. Maybe you're having trouble deciding which one to use. My criteria are the surface after peeling the raft, the surface left after peeling the raft. In particular, the condition of the raft after peeling is anxious. You can judge by touch. The effort of raft removal is limited to reduction. However, there should be no problem in shaping.
With this file you will be able to print Cetus Duct with your 3D printer. Click on the button and save the file on your computer to work, edit or customize your design. You can also find more 3D designs for printers on Cetus Duct.