Cetus Head Cover
thingiverse
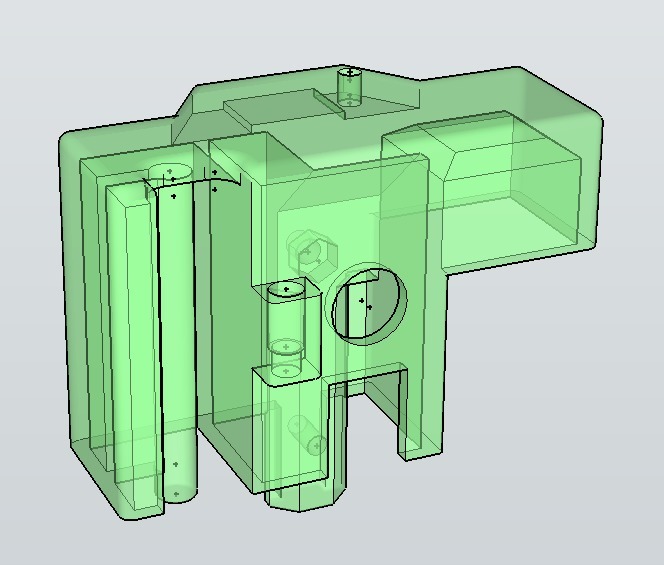
Cetus head cover I want to attach parts to the head, but I do not want to break the genuine head, so I tried drawing from scratch. Compared to the original, the top was made 1 mm thick. Because the original looked weak. Then, the meaningless, 6 mm wasted hole was not reproduced. The difficult part to assemble is the embedding of M3 nuts. It is easy to work with using M3's 20 mm long screw. A version without rounding is for remodeling. If there is rounding, CAD operation is difficult. enjoy it ! [Caution] If the stepping motor on the Z axis vibrates after replacement and can not be initialized, do as follows. Please exchange with the genuine head and check the output of screws. [Caution] The upper M3 screw does not reach. Therefore, it is necessary to exchange it for a long screw. The length of the M3 screw is recommended to be 12 mm to 14 mm. The same design as a genuine product is possible, but it is necessary to use a long screw to increase the strength.
With this file you will be able to print Cetus Head Cover with your 3D printer. Click on the button and save the file on your computer to work, edit or customize your design. You can also find more 3D designs for printers on Cetus Head Cover.