Charger Cable Organizer 2nd edition
prusaprinters
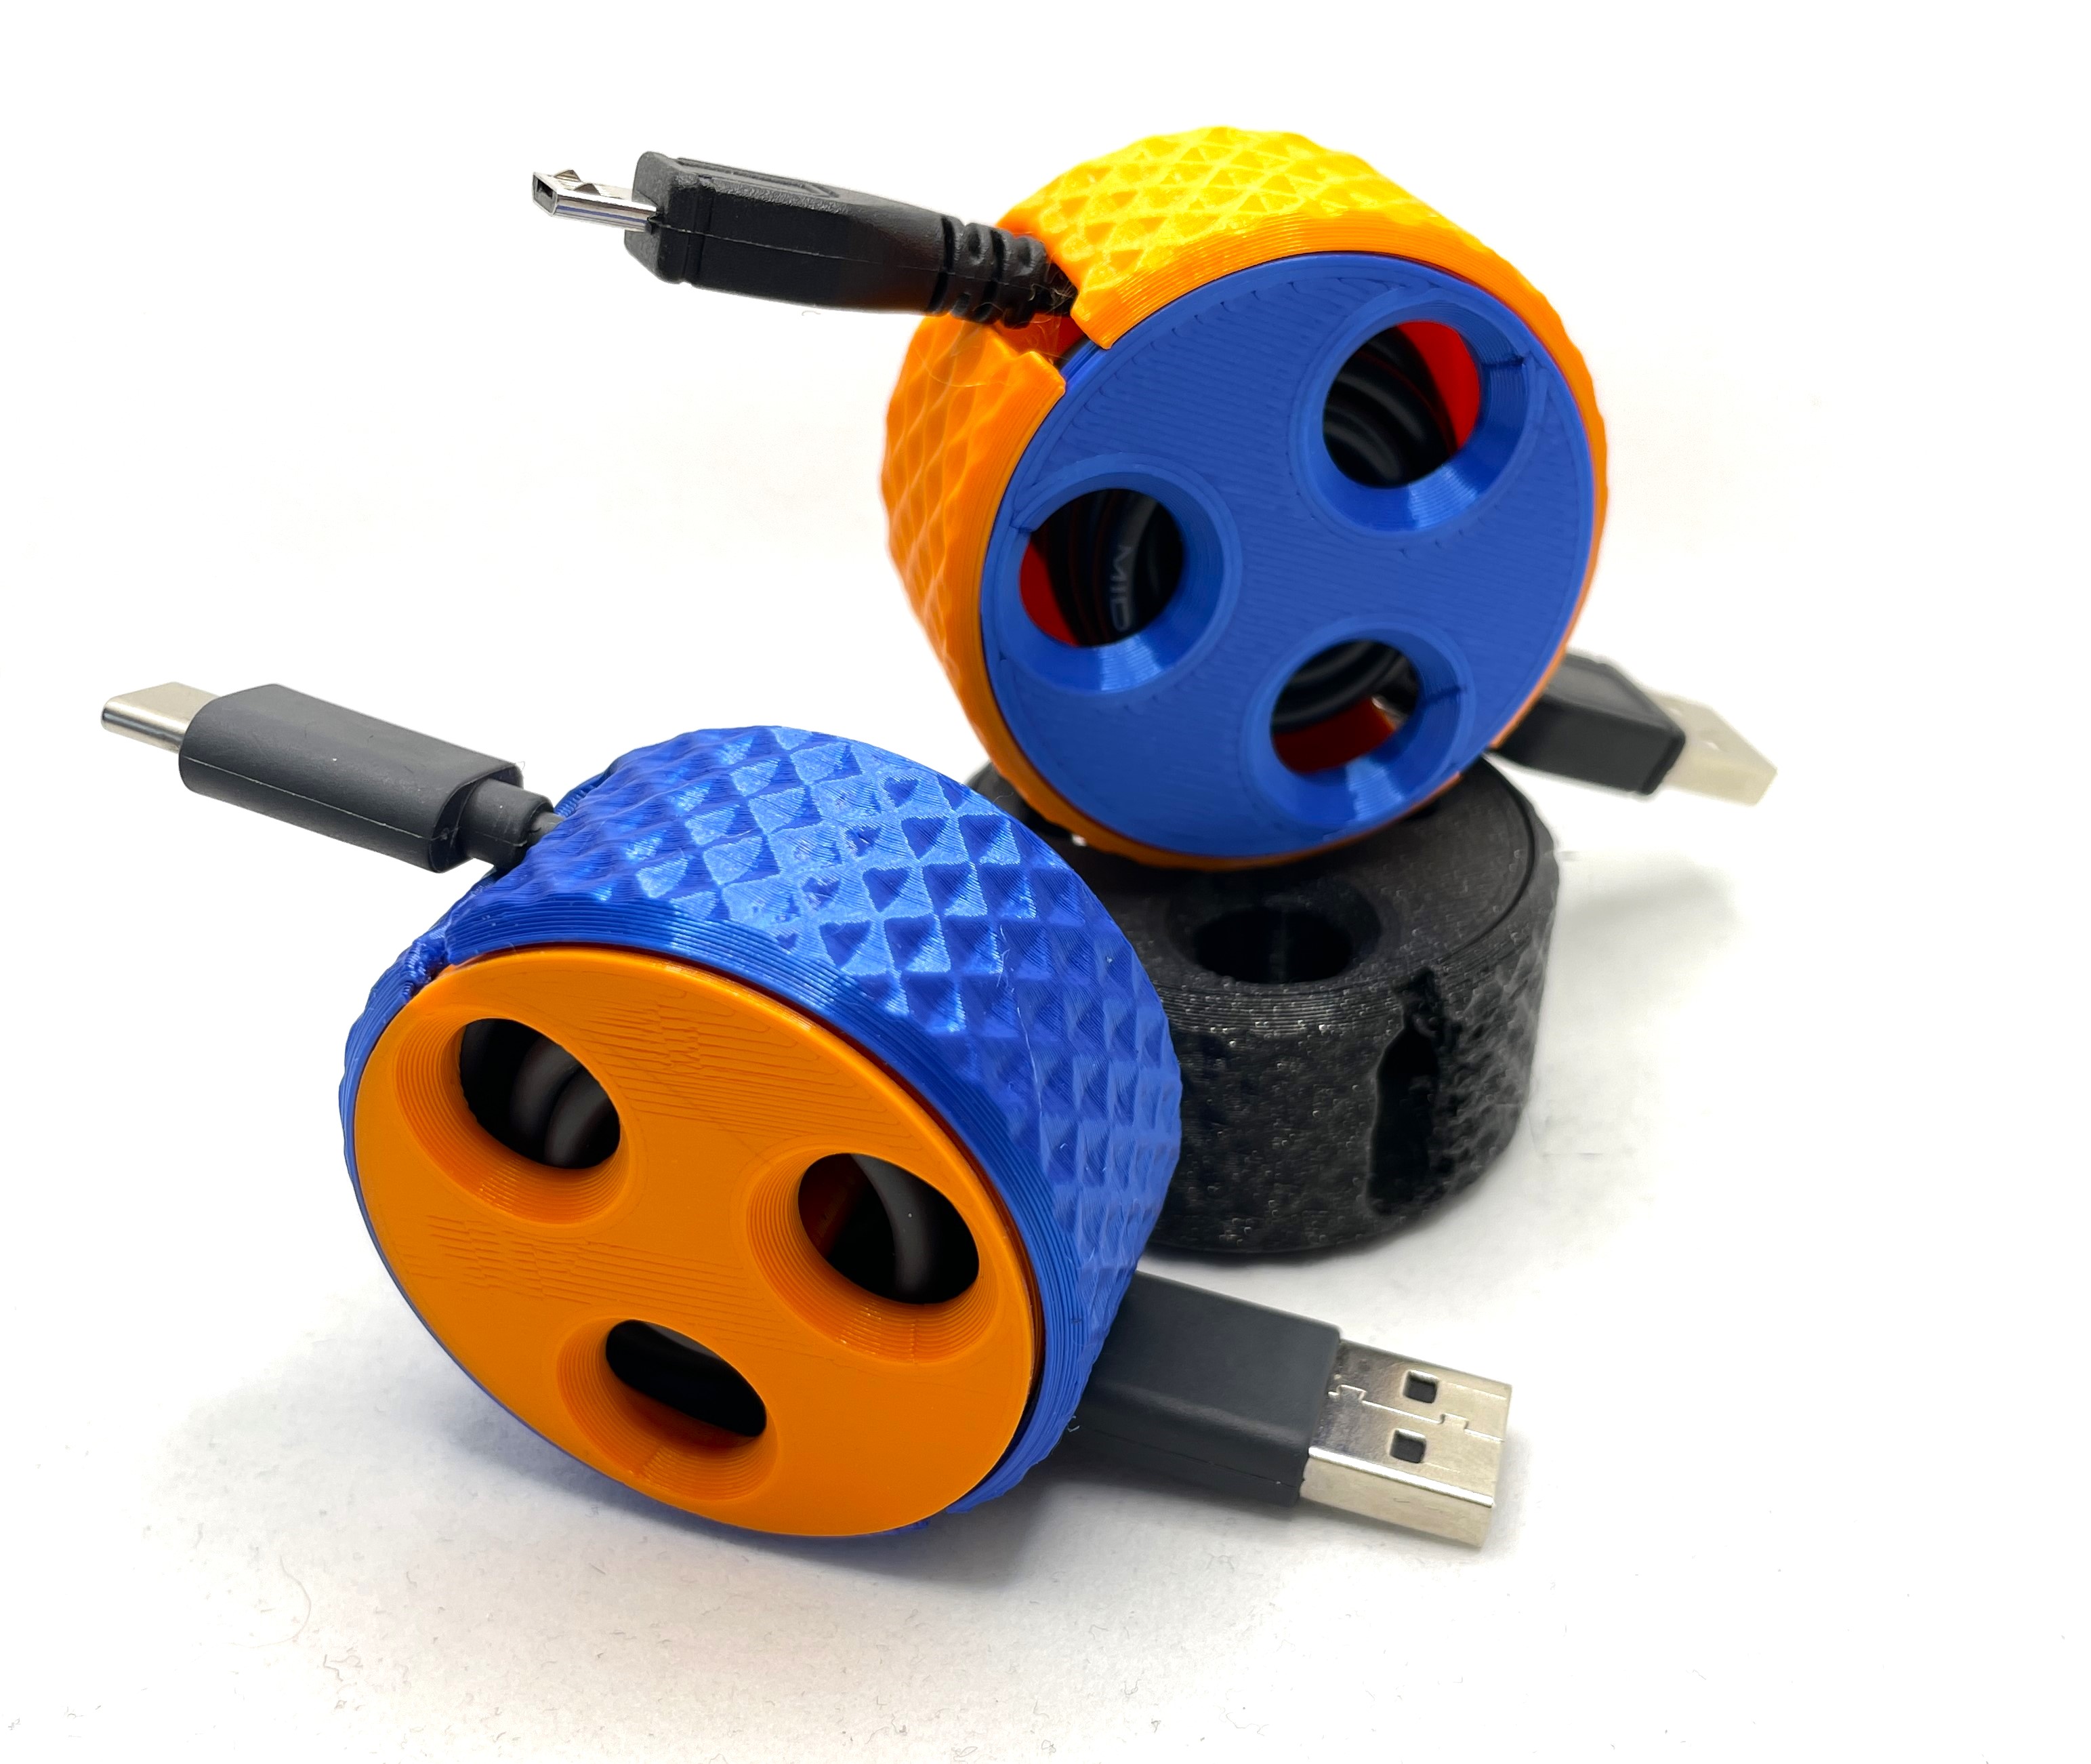
<h3><strong>-- THE CABLE WINDER II --</strong></h3><p> </p><p><strong>This design is an updated and improved version of my popular design “</strong><a href="https://www.printables.com/model/51301-charger-cable-organizer"><strong>Charger Cable Organizer</strong></a><strong>”</strong></p><p>Thanks to all that posted feedback and makes of my other design, and as a result of all your suggestions and ideas for improving the design i've now designed this second version.</p><h4><strong>Changes and Improvements.</strong></h4><ul><li>Changed the core design to avoid breaking of the small locking pins.</li></ul><figure class="image image-style-align-center image_resized" style="width:33.48%;"><img src="https://media.printables.com/media/prints/289859/rich_content/c5ddbc98-7a3c-40d5-beda-f96141a334db/new-vs-old-core.jpg#%7B%22uuid%22%3A%22b4fcf242-6013-4715-bfb2-5b0f192a2516%22%2C%22w%22%3A1039%2C%22h%22%3A554%7D"></figure><ul><li>Core is now a part of the lid to minimize risk of core and lid fusing together when printing.</li><li>Model 1 comes with core 2 versions. Groves and Ridges for unlocking the lid from casing</li></ul><figure class="image image-style-align-center image_resized" style="width:32.43%;"><img src="https://media.printables.com/media/prints/289859/rich_content/df66bec8-bffc-4171-8a98-5ae38bcda332/grooves-and-ridges-1.jpg#%7B%22uuid%22%3A%22219d5daa-d02c-4981-8059-1a2fe295bf3a%22%2C%22w%22%3A670%2C%22h%22%3A420%7D"></figure><ul><li>More space inside the casing</li><li>New designs and sizes.</li><li>Step files for Model 1 lid added for those who whats to add logo or text to the design.</li></ul><figure class="image image-style-align-center image_resized" style="width:58.7%;"><img src="https://media.printables.com/media/prints/289859/rich_content/fffb0dd5-d296-40e9-bb61-987f02ad3674/models.jpg#%7B%22uuid%22%3A%22253cfb2d-562f-4e5f-a3bb-0a87c5ca6780%22%2C%22w%22%3A939%2C%22h%22%3A657%7D"></figure><h4><strong>List of Models.</strong></h4><p> <strong>1. Basis model</strong> comes in 3 versions with almost same look and feel as the old design. </p><ul><li><strong>Normal </strong>version holds standard length (1-1,2m) Phone charger cables <strong>ø2,7-3,0mm</strong></li><li><strong>Medium</strong> version (6mm taller) fits slightly longer cables <strong>ø2,7-3,0mm</strong> </li><li><strong>Ekstra</strong> version (12mm taller) holds long cables <strong>ø2,7-3,0mm</strong></li></ul><p><strong> 2. New model</strong> also comes in 3 versions with a re-designed flush type build-in lid.</p><ul><li><strong>Normal </strong>version holds standard length (1-1,2m) Phone charger cables <strong>ø2,7-3,0mm</strong></li><li><strong>Medium</strong> version (6mm taller) fits slightly longer cables <strong>ø2,7-3,0mm</strong> </li><li><strong>Ekstra</strong> version (12mm taller) holds long cables <strong>ø2,7-3,0mm</strong></li></ul><p><strong> 3. New model</strong> also comes in 3 versions with totally re-designed look.</p><ul><li><strong>Normal</strong> version holds standard length (1-1,2m) Phone charger cables <strong>ø2,7-3,0mm</strong></li><li><strong>Medium</strong> version (6mm taller) fits slightly longer cables <strong>ø2,7-3,0mm</strong> </li></ul><p>Scale the models <strong>X and Y </strong>axis in your slicer<strong> </strong>to use thicker cables.</p><ul><li>115% <strong>X and Y</strong> scaling fits <strong>ø3,0-3,5mm</strong> cables</li><li>130% <strong>X and Y</strong> scaling fits <strong>ø3,5-4,0mm</strong> cables</li><li>Try out different sizes to see what fits your cables</li></ul><h4><strong>Printing.</strong></h4><ul><li>0.2 layer </li><li>2 perimeters</li><li>20% infill</li><li>No supports</li><li>PLA or PETG</li></ul><h4><strong>Assembly Instruction. </strong></h4><ol><li>Insert cable in the slot in the lid pins.</li><li>Align casing slots with cable and push cable in </li><li>Snap together lid and casing (you should hear a firm snap when it's in place)</li><li>Wind up cable :)</li></ol><h4><strong>Disassembly instruction.</strong></h4><ol><li>Un-wind cable from the cable winder.</li><li>Hold the casing with two fingers on the bottom part so the top/lid points toward your hand.</li><li>From the casing bottom pinch together the two locking pins grooves and push the core inside the casing.</li></ol><p>It's important to hold the casing at the bottom (where the locking pins are) so you're not pinching the casing and lid at the top of the casing.</p><h4><strong>Notes.</strong></h4><ul><li>Please be aware the <strong>silk</strong> filament is commonly more brittle and will cause the core pins to snap easier than other filament types. I've tried to accomodate it in the design but some silk filaments are simply just to brittle.</li><li>Scaling the design should only be done in X and Y direction or else the locking mechanism tolerances might not fit.</li></ul><h4><strong>Disclaimer.</strong></h4><p>The Cable Winder II can cause kinks, excessive wear and damage to some cables over time, and the use of this design is at your own risk! </p><h3><strong>Happy Printing :)</strong></h3><p> </p><p><strong>If you enjoy my work please like and share your make or press the donate button to buy me a coffee.</strong></p><p> </p>
With this file you will be able to print Charger Cable Organizer 2nd edition with your 3D printer. Click on the button and save the file on your computer to work, edit or customize your design. You can also find more 3D designs for printers on Charger Cable Organizer 2nd edition.