Charger Cable Organizer
prusaprinters
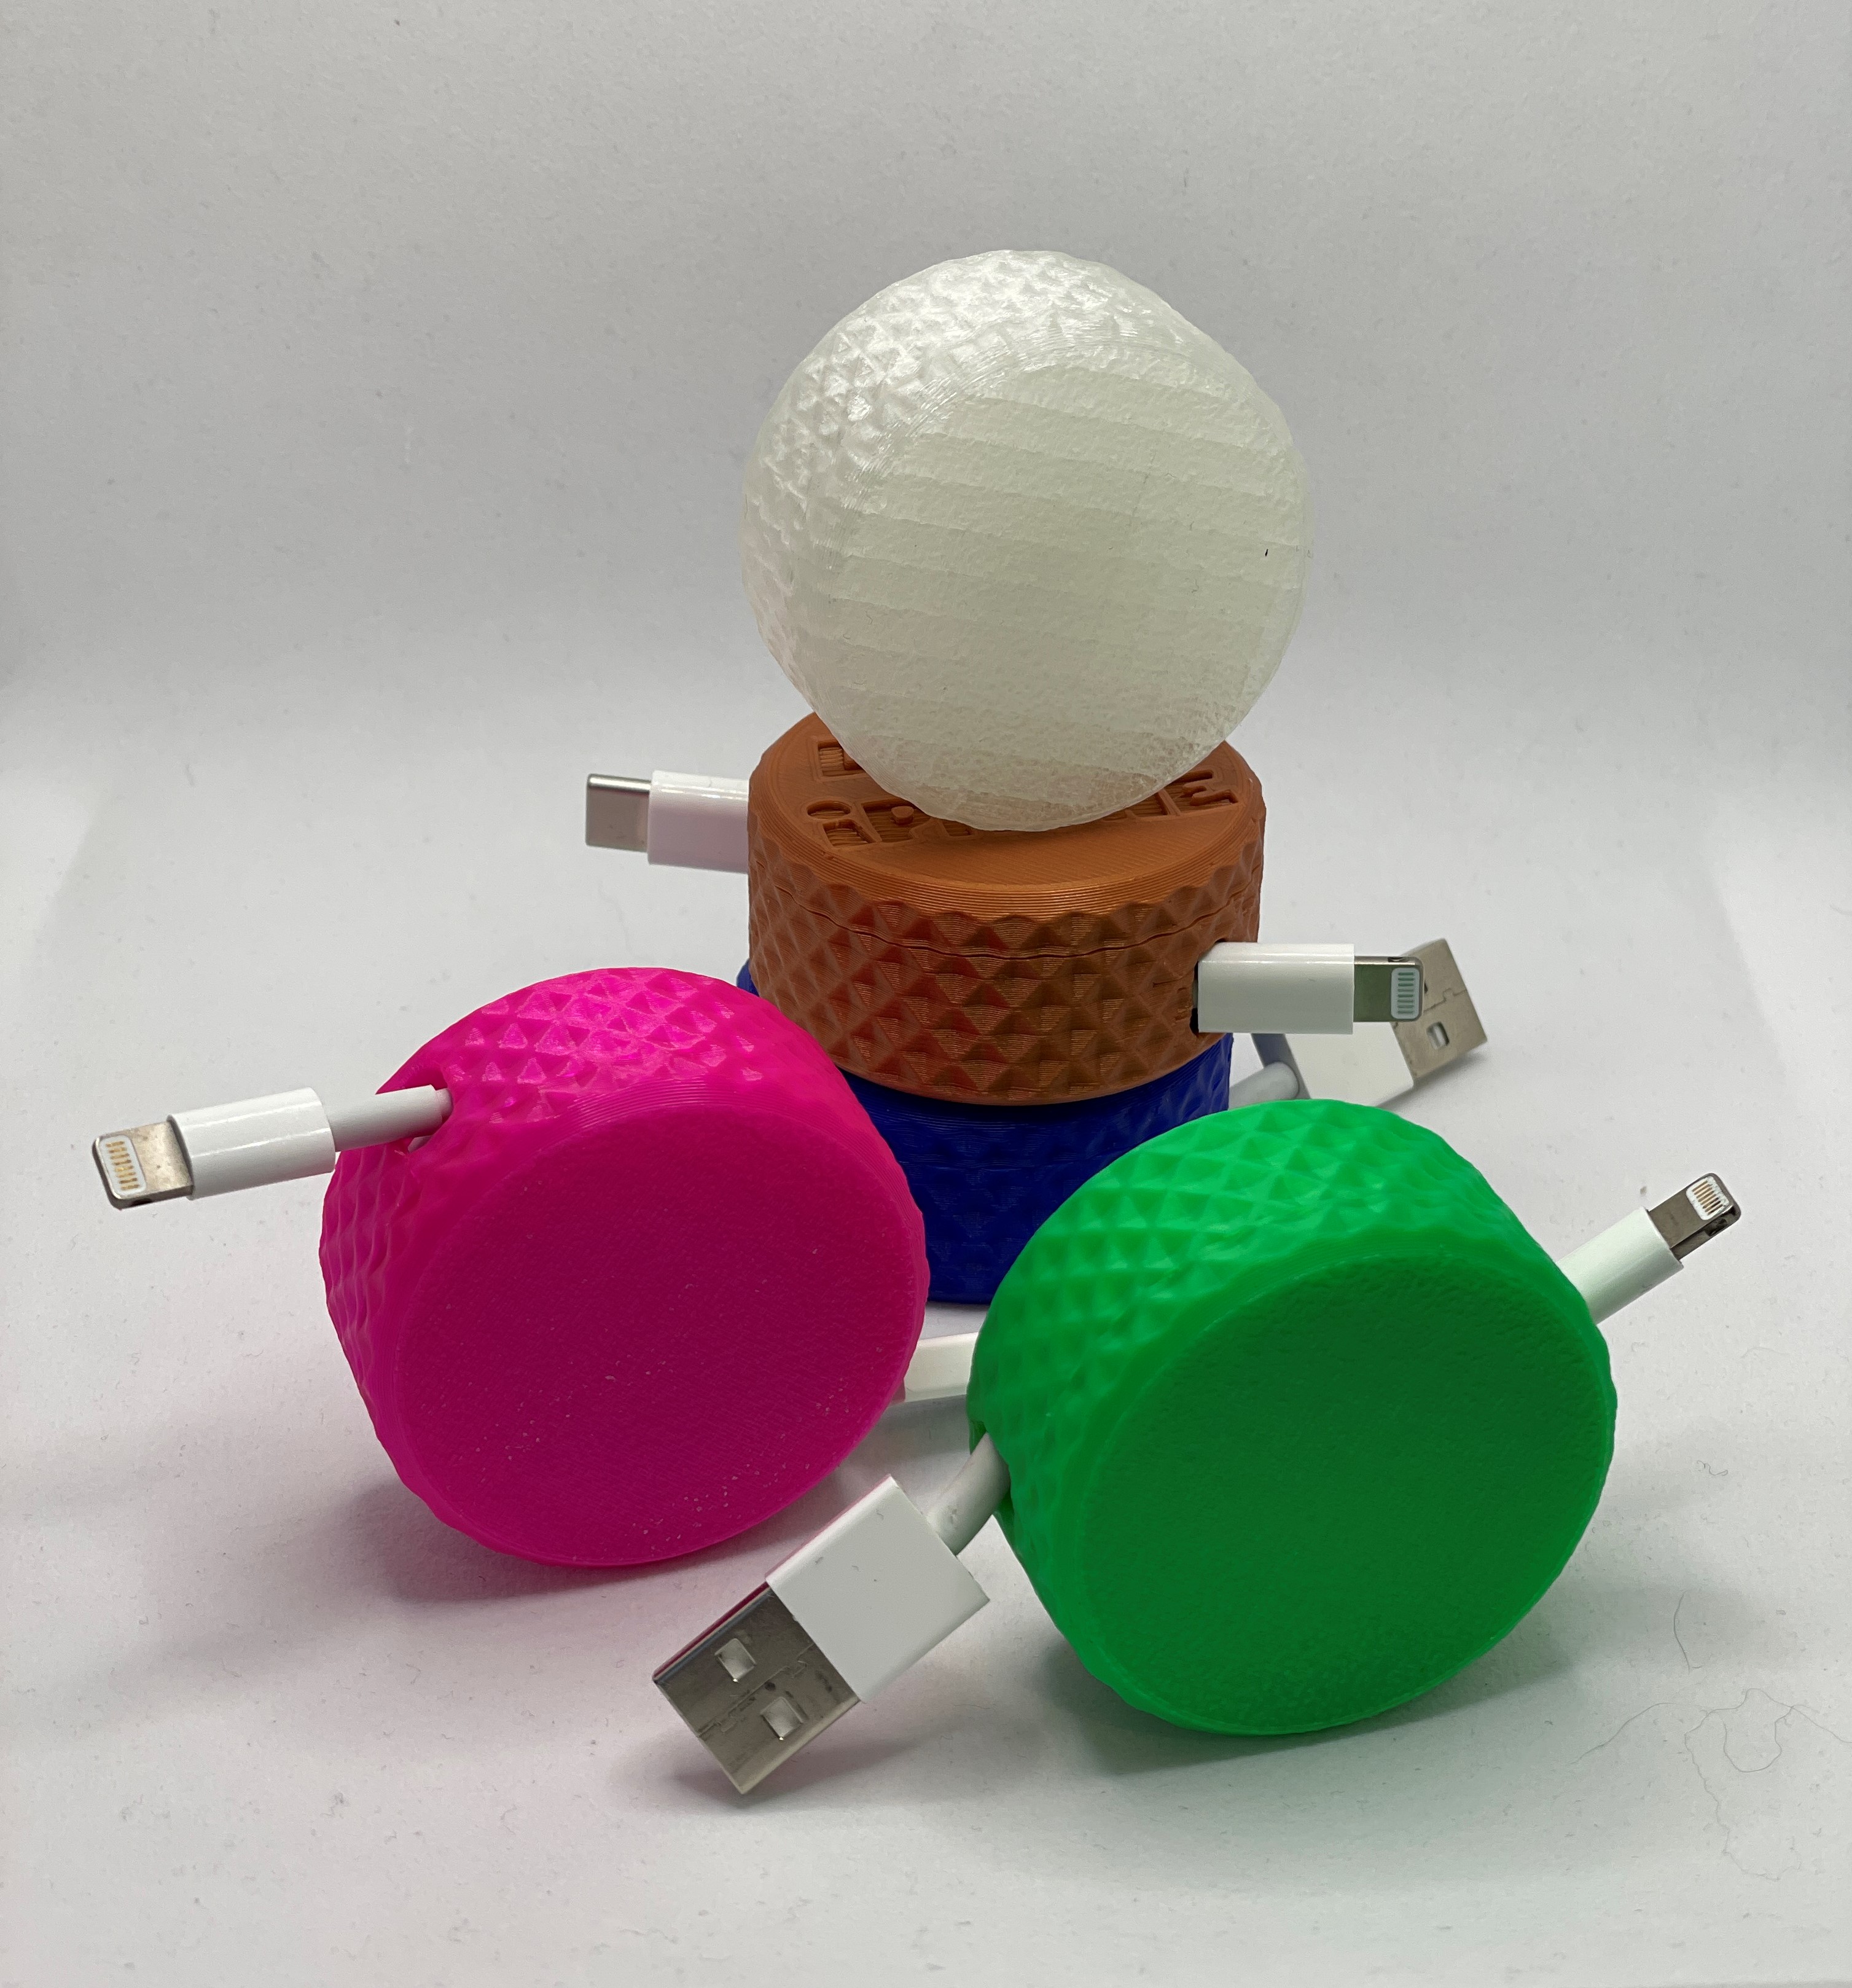
<h3><strong>-THE CABLE WINDER-</strong></h3><p>We all know the problems with phone charger cables laying around and getting tangled up in all possible ways.</p><p>That issue I know all to well, and especially on my nightstand, I several times managed to get my arm tangled up in the cable while sleeping.<br>And exactly this was also my motivation for designing this super simple but very cool cable organizer.</p><p>Just rotate the Lid to roll in the cable, -and to roll out the cable you simply just pull the two cable ends. <a href="https://youtu.be/KbDtDlF6EUA">Watch video here</a> </p><p>Easy storage of cables, and fits right in the pocket or almost any bag or purse.</p><p>The pictures explains it all :)</p><p>It's designed to fit all standard 3mm cables with lightning or USB-C type connector.</p><p>Assembly is very easy and is done by snapping the parts together.</p><p><strong>PLEASE make sure to have your printer tuned/calibrated to be able to print the version 2+3 casing/core part correctly.</strong> <strong>It has 0.2 tolerance gap between the parts.</strong></p><figure class="media"><oembed url="https://www.youtube.com/watch?v=z4nVXVhp9o4"></oembed></figure><figure class="media"><oembed url="https://youtu.be/zDgTx_KfdtI"></oembed></figure><p><strong>UPDATE 11-01-2021:</strong><br>Added some files with other patterns. (HEX & RIBBS)<br>You still need the Winder Core V1.stl It's only the Casing and Lid that has been changed.</p><p><strong>UPDATE 12-01-2021:</strong><br>Added files for a Cable Organizer with 6x14mm holes and a taller casing for cables with slightly bigger connectors.</p><p><strong>UPDATE 22-01-2021:</strong><br>Added a casing with slightly bigger holes to fit other cable types with bigger connectors. (6,5x12mm)</p><p><strong>UPDATE: 24-01-2021:</strong><br>Added a lid with a little flip-up handle. It's at print-in-place file and you only need to pry the handle free first time you open it.<br>Be sure to have the bridge settings tuned in and set bridging angle to 45 degrees.</p><p><strong>UPDATE: 26-01-2021:</strong><br>This version is a 2-part print only. The casing and core is now one part. The core prints inside the casing and after printing you just snap i loose and it rotates smoothly.<br>I also added a open-top version to make it fit more cable types.<br><strong>PLEASE make sure to have your printer tuned/calibrated to be able to print the casing/core part correctly.</strong> <strong>It has 0.2 tolerance gap between the parts.</strong></p><p><strong>UPDATE: 06-01-22: Version 3 now available. </strong></p><figure class="image image-style-align-left image_resized" style="width:32.47%;"><img src="https://media.prusaprinters.org/media/prints/51301/rich_content/9b2862f9-38a4-42b8-95b2-d5834683febb/img_3246.jpg#%7B%22uuid%22%3A%22e6cfdecb-8d23-405a-9264-1b61eb66771f%22%2C%22w%22%3A4032%2C%22h%22%3A3024%7D"></figure><p><strong> </strong></p><p>Version 3 <strong>EXTRA </strong>compared to version 2</p><p> </p><p> </p><p> </p><p>This version is a enhancement of version 2 with a bit more smooth curve on the first layer of cable and 2 taller versions. </p><p>The version 3 consists of 3 different casings with <strong>STANDARD - MEDIUM - EXTRA</strong> hight of casing and core. This is done to prevent the top and bottom from getting thicker when scaling up the model in the slicer. So if you want to print a taller/larger model you should to select the EXTRA or MEDIUM model and scale it in X/Y only.</p><p><strong>STANDARD</strong> - same hight as version 2</p><p><strong>MEDIUM</strong> - 6mm taller casing and core</p><p><strong>EXTRA</strong> - 12mm taller casing and core</p><p>Version 3 is only available in the “open-top” and integrated core version and uses same lid as Version 2</p><p>Version 1 casing with open-top holes uploaded.</p><p><strong>TESTED version 2 Scale models:</strong><br>120% all axis - OK<br>125% all axis - OK<br>130% all axis - OK<br>150% all axis - OK<br>200% all axis - OK<br>300% all axis - OK<br>125% X/Y axis - OK<br>150% X/Y axis - OK</p><p><strong>NOTE:</strong> It's only the Version 1+2+3 that will be updated in the future. Version 0 will remain only in original versions.</p><h3>Print instructions:</h3><p>Version 1: Prints without support and it's recommended to print the Lid & Casing with 15% infill, and the Core with 100% infill to make it more rigid.</p><p>Version 2+3: Prints without support and it's recommended to print the Lid and Casing with 15% infill, and the Core with 100% infill to make it more rigid. </p><p>To do this you'll have to split the casing and core. Right-click the casing/core and select “SPLIT TO PARTS” then right-click the core and select “INFILL” and set infill to 100% for the Core</p><h5><strong>Post print instruction:</strong></h5><p>The Casing top-surface that rotate against the Lid might need some light sanding if the top surface is too rough.<br>But it's easy to determine the need of sanding by turning the Lid and Casing against each other before assembling all parts.</p><p>All parts needs to rotate freely to ensure the cable rolls in/out smoothly.</p><p><strong>Happy Printing :)</strong></p><h5>Discaimer: </h5><p>The Winder can cause kinks, excessive wear and damage to some cables over time, and the use of this design is at your own risk! </p>
With this file you will be able to print Charger Cable Organizer with your 3D printer. Click on the button and save the file on your computer to work, edit or customize your design. You can also find more 3D designs for printers on Charger Cable Organizer.