Chickens Whirligig
prusaprinters
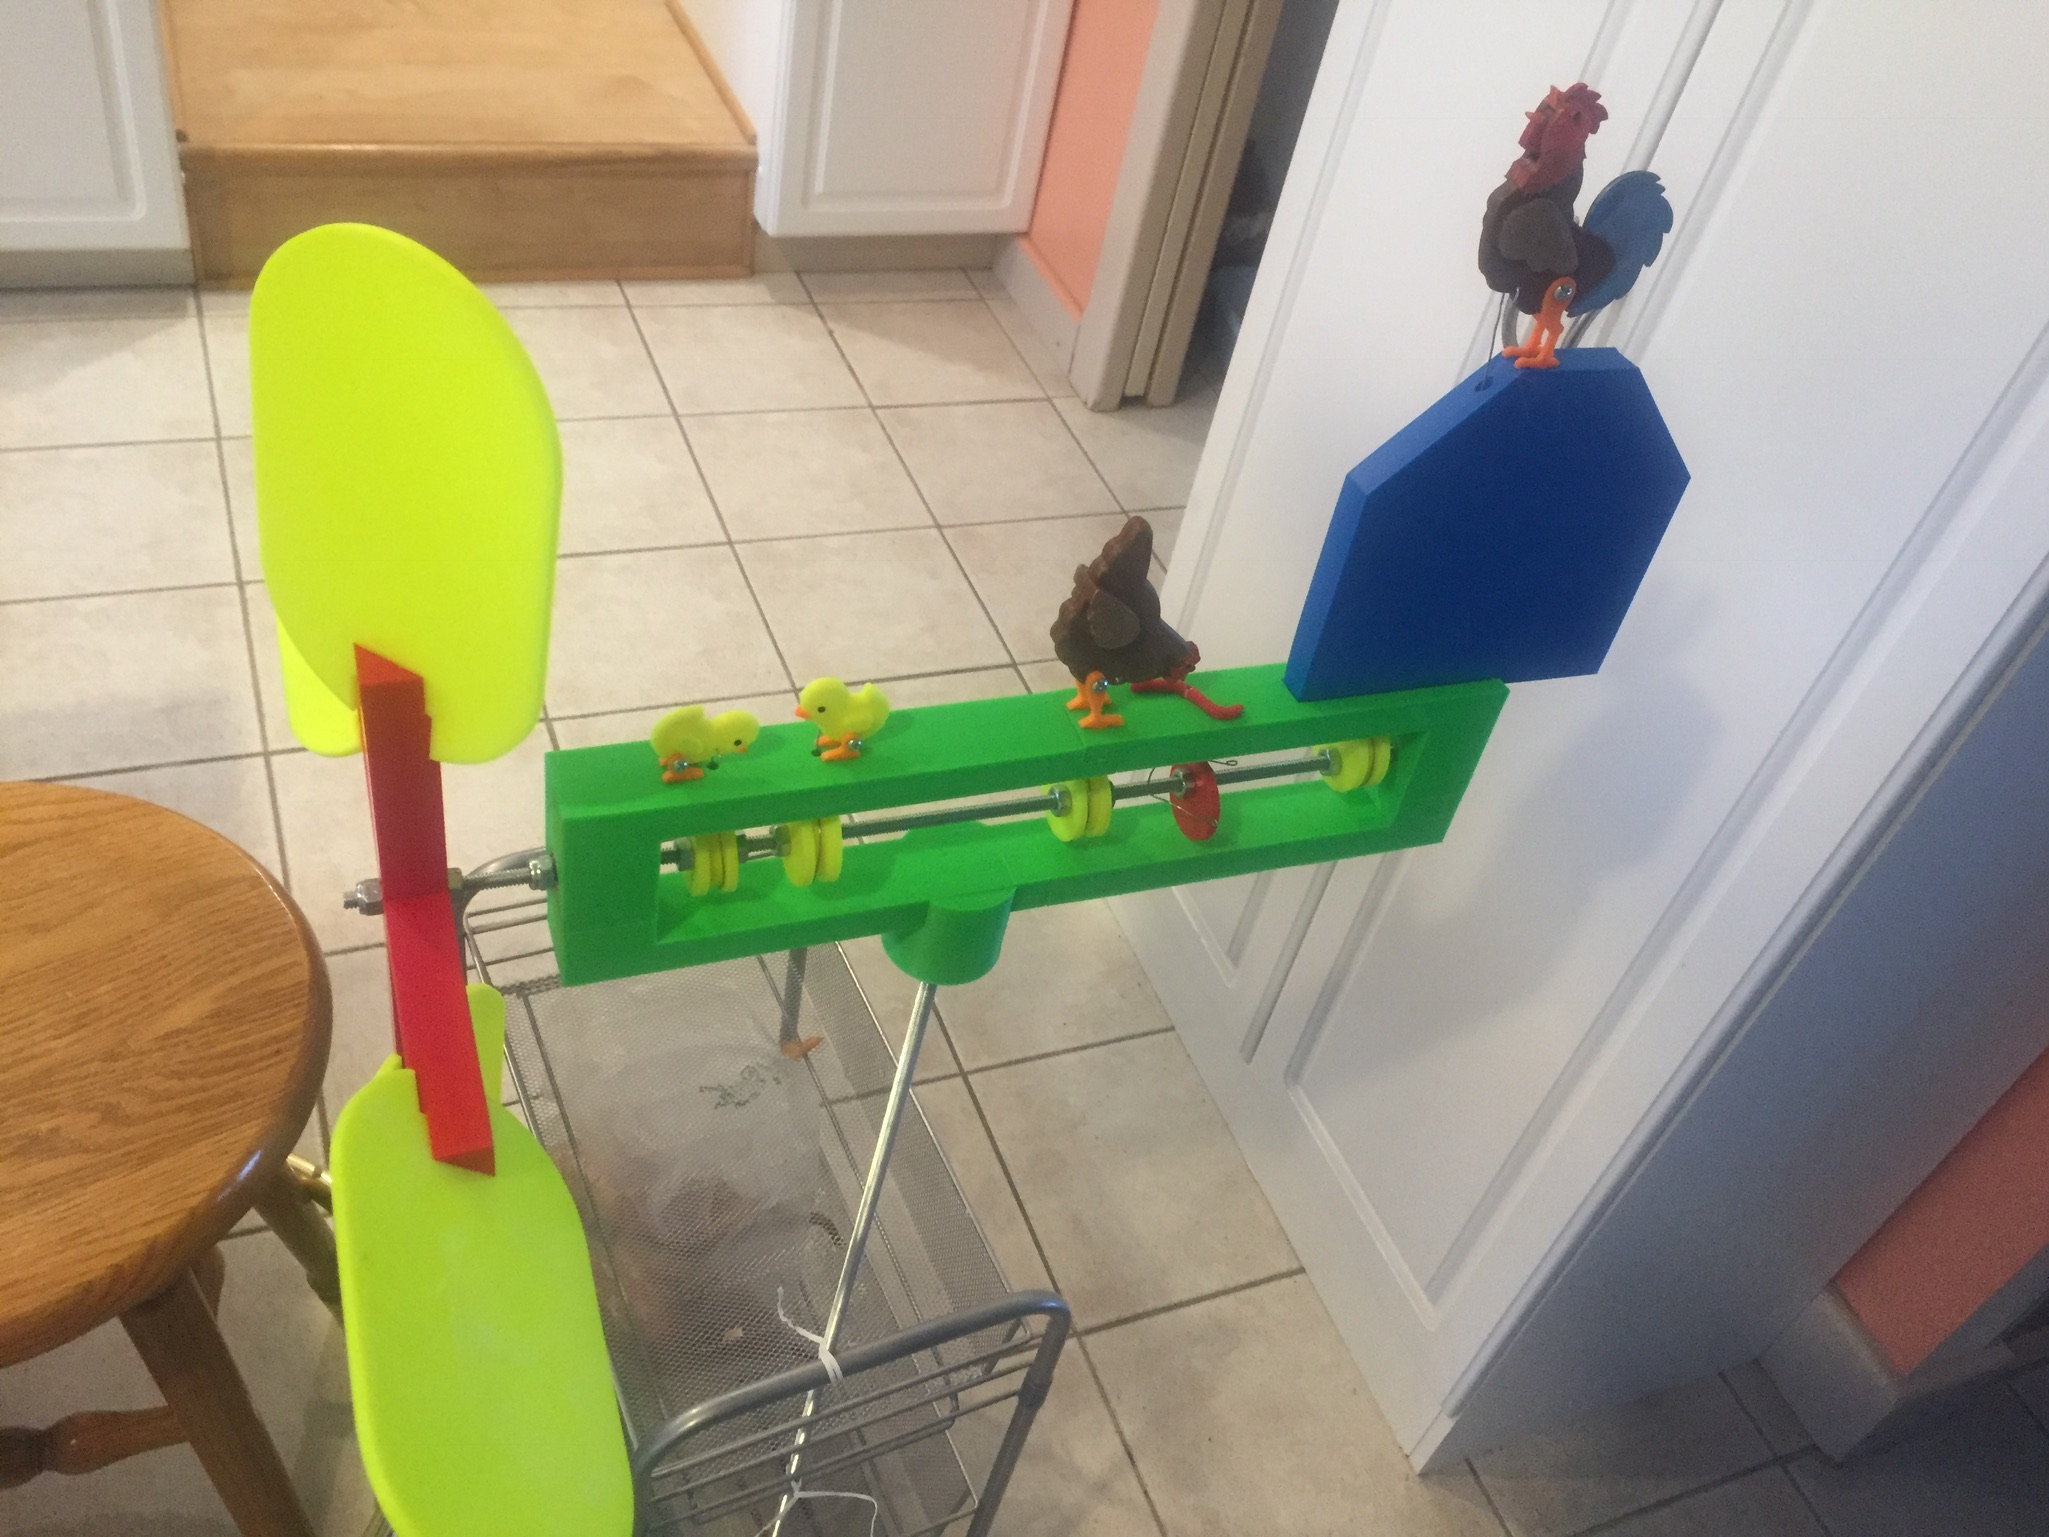
<p>This is another in my whirligig series. I made this one by request for my sister. It by far the most complicated one I have made.</p> <p>Assembly is pretty straight forward, but if you need help, check out the Assembly.svg file included in the downloads.</p> <p>If the part filename has a number in it, that's how many you print. If not, just print one. The chickens are all printed with left and right halves. This is done so that I could have details in relief and still be able to have a flat side to lay on the print bed. Just glue the halves together and you're good to go. The rooster also has a hinged wattle and beak half so that his beak opens and closes when he crows. I used a piece of tie wire for the hinge pin and held it in place with a drop of super glue on each side. I also used super glue on the nuts of the screws I used to hinge the legs on all of the chickens.</p> <p>I put a video of it in action on youtube. I don't have this whirligig outside because of the snow, so I had to shoot it in my kitchen. Sorry about the video quality.<br/> <figure class="media"> <oembed url="https://www.youtube.com/watch?v=TDT6VDlC9WY"></oembed> </figure> </p> <h3>Print instructions</h3><h3>Category: Interactive Art Print Settings</h3> <p><strong>Printer:</strong> FlashForge Creator Pro</p> <p><strong>Rafts:</strong> No</p> <p><strong>Supports:</strong> Yes</p> <p><strong>Resolution:</strong> .2mm</p> <p><strong>Infill:</strong> 25%</p> <h3> Post-Printing</h3> <p><strong>Assembling</strong></p> <p>You will need the following hardware:</p> <p>1 1/4 - 20 threaded rod for the axle. Cut to length<br/> 11 1/4 - 20 nuts<br/> 3 1/4 - 20 nyloc nuts<br/> 2 6-32 X 3/4" machine screws and nuts<br/> 4 4-40 X 3/4" machine screws and nuts<br/> 1 4-40 X 1" machine screw<br/> 2 feet of stiff, fine wire. I used 1/32" (about .8mm) diameter wire I had.<br/> 1 5/16 threaded rod<br/> 2 5/16 nyloc nuts<br/> 2 608zz skateboard bearings<br/> 2 r4-zz skateboard bearings</p> <p>Feel free to substitute the closest metric equivalent.</p> <p>When attaching the wires, keep them loose enough to ride freely around the cam. To keep drag at a minimum, make sure the wire is as straight as possible where it goes through the holes in the base. I wound up testing and adjusting everything with just the wires (no chickens) until everything worked without binding up anywhere. Then I added the chickens.</p> <p>For the worm, I drilled the hole out big enough so that I could thread the 4-40 machine screw into it. The fit was good enough that I didn't have to glue it. The wire that rides on either side of the worm cam is wrapped around the machine screw, then trapped between two nuts. It then needs to be bent so that it just touches the center of both sides of the cam. It will take some fiddling to get it to work consistently.</p> <p>The 4 chicken cams have two parts that need to be glued together. I did it that way to keep from having to use supports when printing.</p>
With this file you will be able to print Chickens Whirligig with your 3D printer. Click on the button and save the file on your computer to work, edit or customize your design. You can also find more 3D designs for printers on Chickens Whirligig.