Child safety lock for shoe rack (e.g. Ikea Bissa)
prusaprinters
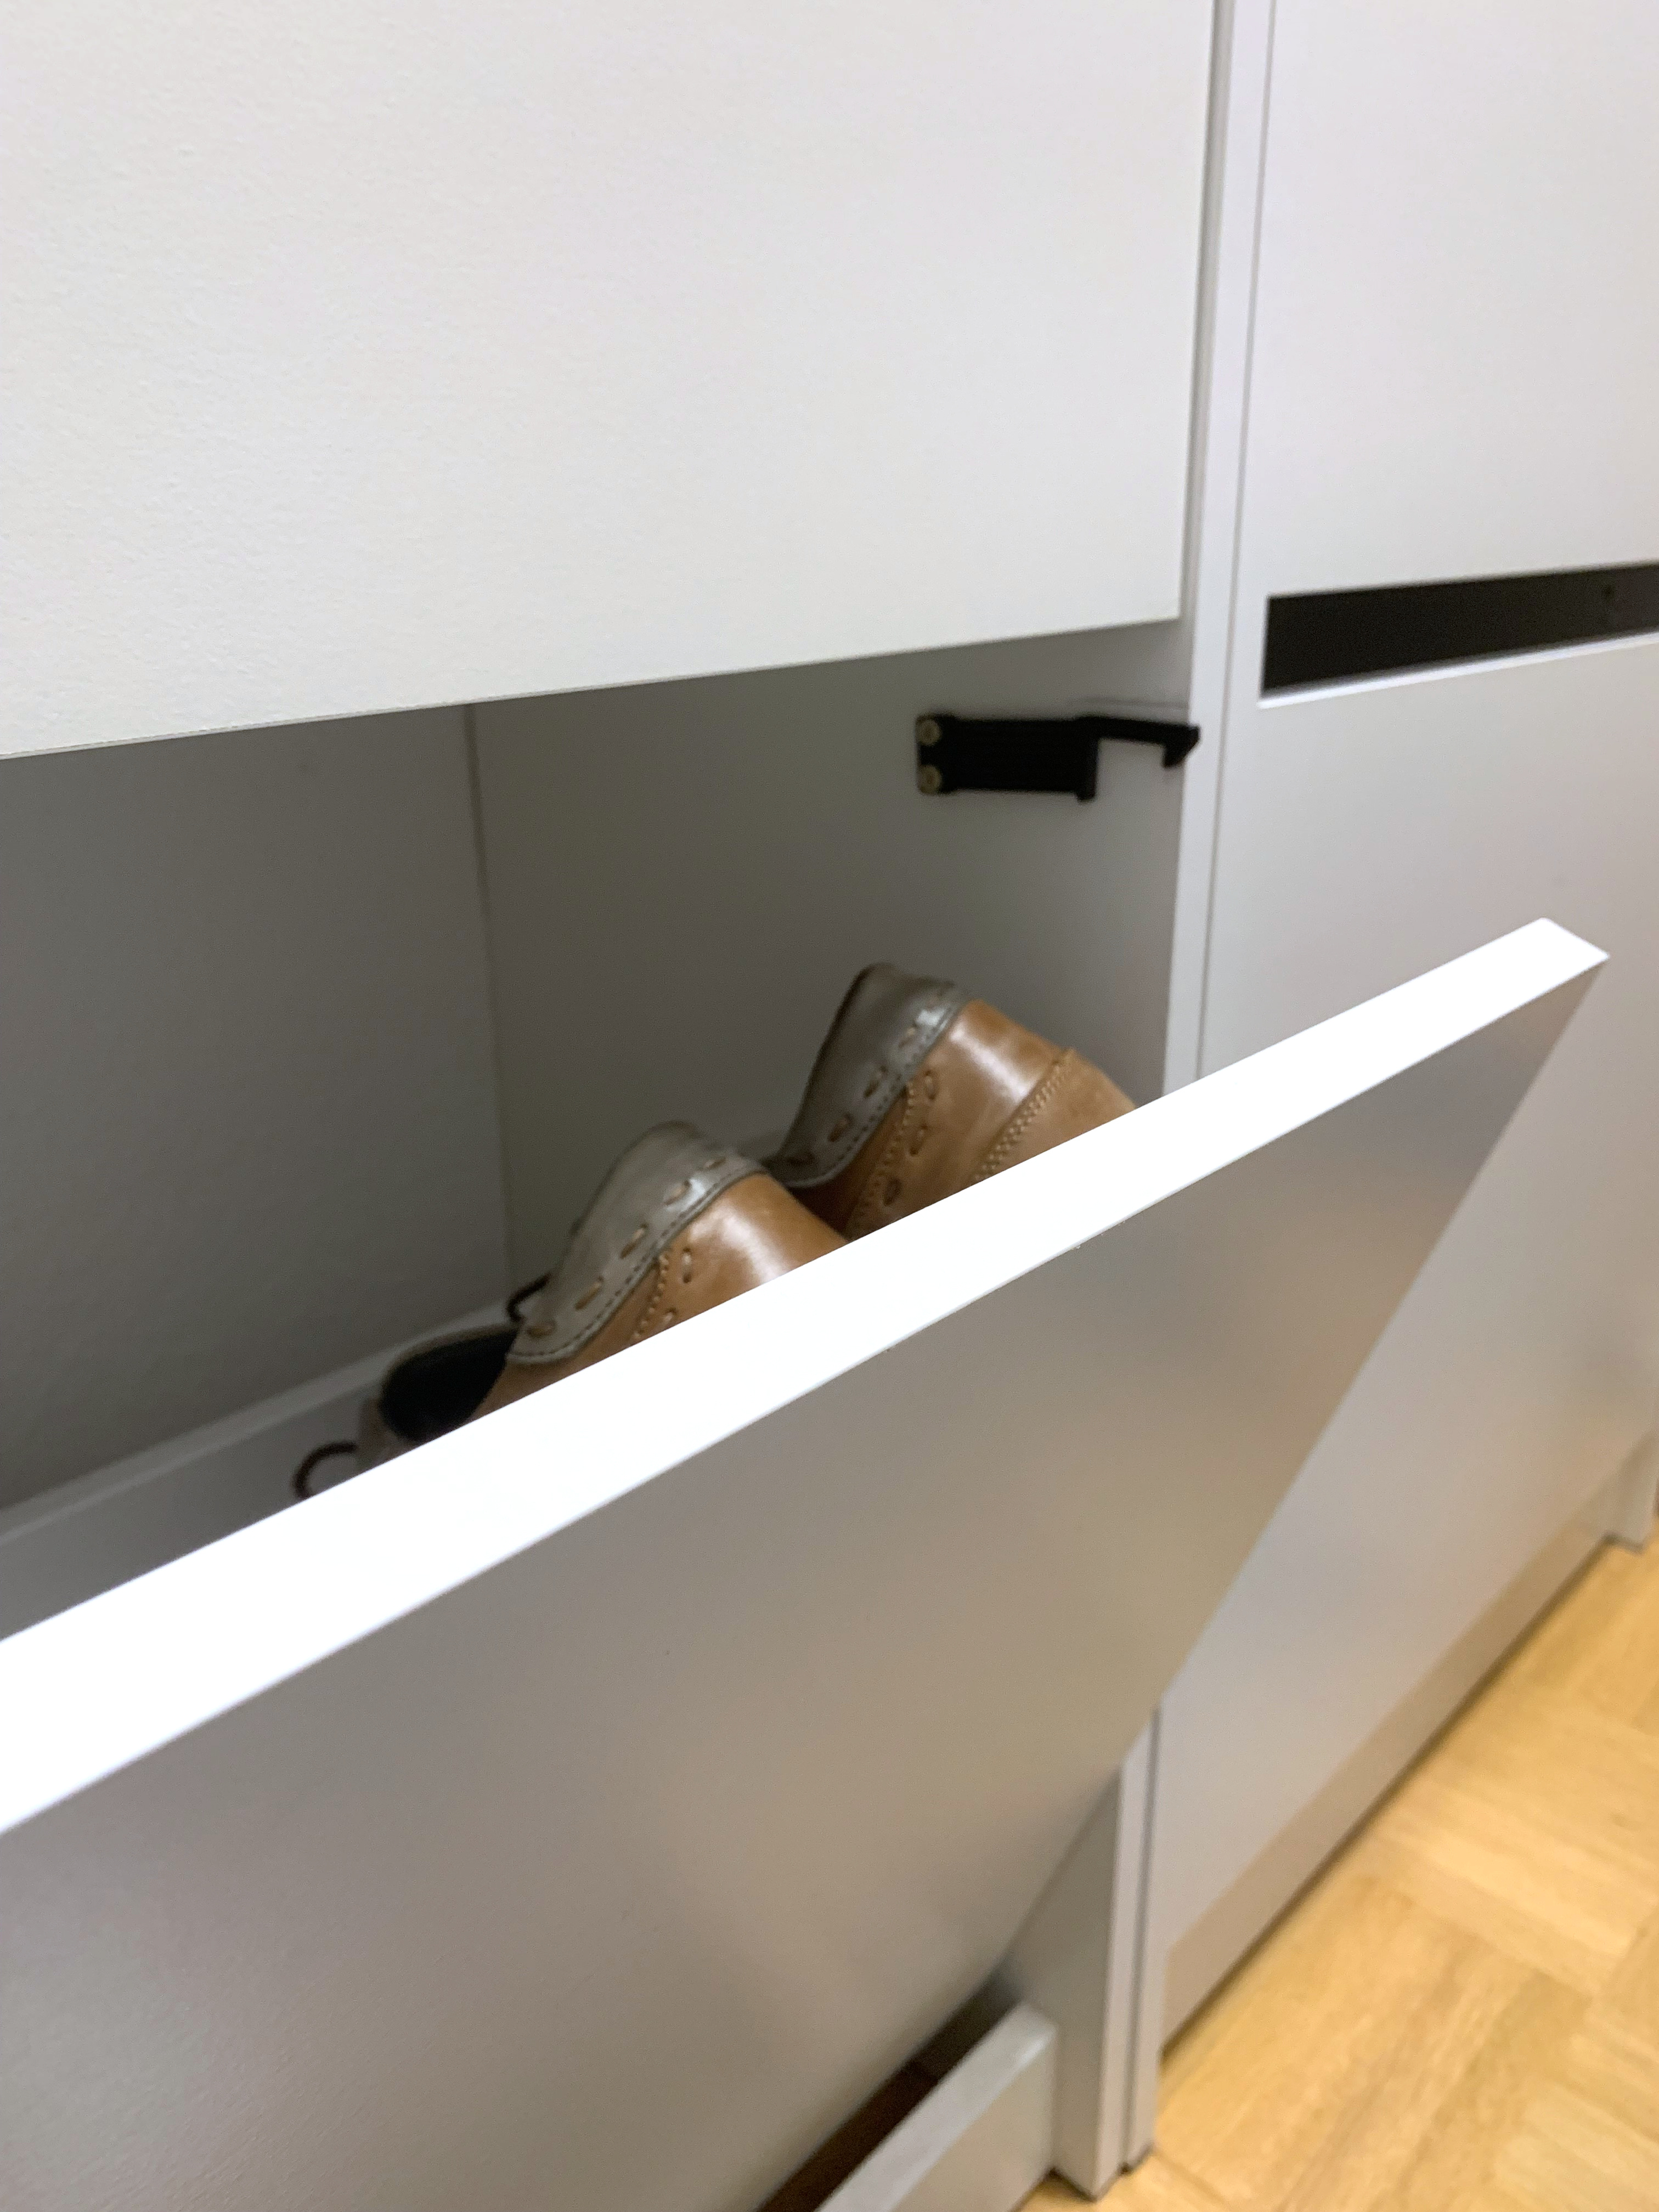
<h3>Introduction</h3><p>So, after bolting the Ikea Bissa shoe cupboard to the wall at least our child is not in danger of being crushed, but it still might be surprised by the sudden opening of a door. After many iterations, this is what I came up with. The latch can be easily operated with one hand by using the thumb to push the latch up. It is symmetric and can therefore be mounted on the left or right of the cupboard. It is mounted with a couple of 3x15mm or 3.5x15mm screws.</p><figure class="image"><img src="https://media.prusaprinters.org/media/prints/88153/rich_content/2c26e5fc-0dcf-471e-b5b2-3407f044016e/img_1552.jpg#%7B%22uuid%22%3A%22381b1103-289b-4d05-8d8d-03d2675d069f%22%2C%22w%22%3A4032%2C%22h%22%3A3024%7D"></figure><h3>Design</h3><p>The design is simple but took some iterations to get right. Lets start with the spring. I tested different thicknesses of PETG and saw that with increasing thickness one needs to make the spring longer to stay in the linear range for a given deflection. PETG will quite soon get into the range where the deflection will be permanent or even getting some thinning of the spring at points, leading to breakage. Having no fancy material at hand, I had to live with it and adjust the spring. Therefore multiple thin spring leaves were introduce to allow the 5mm to 10mm travel needed while providing enough strength to stop a child. Additionally the vulnerable beginnings and ends of the springs were rounded with a 0.5mm radius. 40mm spring length for a 1.67mm (i.e 4 lines 0.45mm x 0.2mm extrusion) seemed to work for the 10mm deflection. As a nice side effect we get a, pleasing to the eye, near linear movement of the hook. :-)</p><p>Looking at the hook. First I started with a 90 degree hook angle. But this soon proved to be bad as the pulling on the draw will exert a force on the hook, bending it outwards. Then our nice 90 degree hook will be opened to about 100 degree and therefore slip up and release the draw. I corrected this with two changes. First I reduced the hook angle to 80 degrees to allow for some bending before the failure. Secondly the springs are slanted 5 degrees downwards towards the screws. With this, when the hook is pulled outwards, it will also get a downwards force from the spring, locking it even stronger in place. A quite nice extra is that the hook will also be pushed up when its pushed inwards, making the closing easier.</p><h3>Mounting</h3><ol><li>Use a pencil to first draw the position of the door. </li><li>Then place the latch on the door and draw a line over the top. </li><li>Final drawing</li><li>Now put some 3x15mm or 3.5x15mm screws in the holes so that just the tips are over the surface. </li><li>If you use 3.5mm they will bite in the plastic making it simple. </li><li>Now hold the latch in place. Leave 2mm to 3mm of play to the outside of the door so that the hook can freely travel up and down. Then move it parallel to the line you drew over the top so that it is roughly 3mm below it to pretension the spring. Use a small hammer to tap the screws to get them stated in the hard surface material of the cupboard. Start fastening the fist screw. When it is a third of the way in, test the position with the door. If not satisfactory apply pressure in the direction it needs to go. With this you can adjust maybe the last half millimeter.</li></ol><figure class="image"><img src="https://media.prusaprinters.org/media/prints/88153/rich_content/dd4b027a-cae8-4339-ae95-6c21be50273e/mounting.jpg#%7B%22uuid%22%3A%22f0ea63cb-4de6-4a16-8364-84fdd4615079%22%2C%22w%22%3A756%2C%22h%22%3A850%7D"></figure><h3>Printing</h3><p>Print with PETG 0.2mm Quality. I used the Prusament PETG. </p><p>Please note that the width of the springs is set to 1.67mm i.e. the optimum to get 4 lines with the 0.2mm layer height and the standard 0.45mm line width. I got this from the Prusa slicer “Layers and Perimeters” → “Horizontal shells”.</p><p>Filling is not so important. I recommend 20% straight lines.</p><p>Skirt: minimal loops = 3; height = 1; This just dumps the first bit of PETG on the print bed and thereby will make the first layer much more even. I recommend 3 loops since this is quite a small model. Otherwise not enough PETG is dumped before the start of the parts</p><p>Print bed recommendation: Powder coated steel sheet with glue stick. I usually just put a 5cm to 10cm light line on the cold print bed, spray a bit of widows cleaner on it and use an small part of a cloth to wipe the bed until you cannot see the glue stick mark anymore. The bed should stay wet during the process. If not, use more cleaner or less cloth. Then within the next couple of minutes heat the bed, since leaving water too long on the steel sheet may lead to corrosion. This will leave a very even and thin film on the bed</p><p>When finished, you may carefully remove the steel bed from the printer, but please be patient for the print to cool a minute or two. Otherwise you may permanently deform the part on removal</p><p> </p>
With this file you will be able to print Child safety lock for shoe rack (e.g. Ikea Bissa) with your 3D printer. Click on the button and save the file on your computer to work, edit or customize your design. You can also find more 3D designs for printers on Child safety lock for shoe rack (e.g. Ikea Bissa).