Christmas Candle Mold (17mm)
prusaprinters
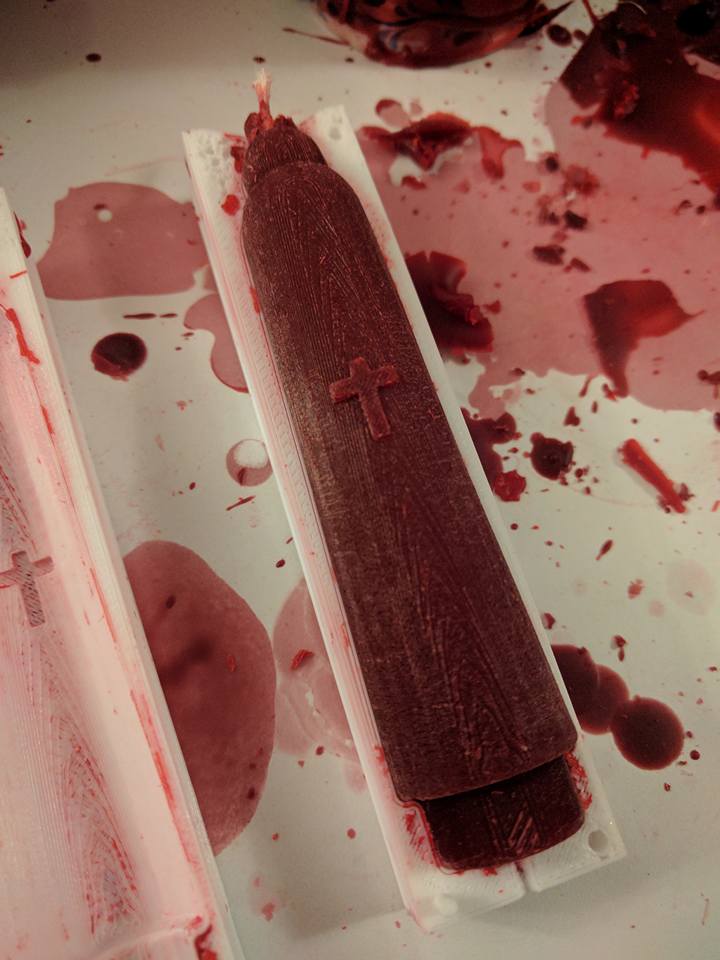
<p>I have a beautiful Christmas Pyramid Decoration, and it requires an uncommon size candle(17mm diameter base). I decided I could make a mold to create my own candles.<br/> This is a simple 2 part symmetrical mold, and container for pouring.</p> <h3>Print instructions</h3><h3>Category: DIY Print Settings</h3> <p><strong>Printer:</strong> FlashForge CreatorPro</p> <p><strong>Rafts:</strong> No</p> <p><strong>Supports:</strong> No</p> <p><strong>Resolution:</strong> 0.15mm</p> <p><strong>Infill:</strong> 45%</p> <p><strong>Notes:</strong></p> <p>I made these using PETG plastic. Which seems to not shrink and behave much like PET (vs ABS.)</p> <p>The box was made with a much coarser .25mm and lower infill (as low as your printer can effectively go) I think I used 25% just to speed up the print.</p> <h3> Post-Printing</h3> <p><strong>1 - Print 6 Copies of the mold</strong></p> <p>Each print is only half a mold, so you need 2 pieces to form a complete mold, This design is based around making 3 candles at a time, so print 6 molds.</p> <p><strong>2 - Print a copy of the "mold holder"</strong></p> <p>The mold holder is a 3 chamber box that holds molds upright and keeps them sealed together till the wax cools. The sizing should fit, though I had to use a file to sand down each of the inside edges to allow the molds to slide freely in and out, you want a tight fit, but not so tight you can't slide them; alternatively you might print the holder at slightly bigger. Depends on the type of plastic you use and how much shrinkage you get etc.</p> <p><strong>3 - Add Wick</strong></p> <p>Tie a knot in one end of your wick and place it in the bottom groove of the candle mold, then attach the other part of the mold, making sure the wick gets in the grove. Cut off the string with ~2-3" of extra at the top.<br/> Repeat for each candle mold.</p> <p><strong>4 - Place Molds into holder</strong></p> <p>Put each of 3 molds into the mold holder. Then using 3 pieces of tape, pull the wicks tight and tape them to the edge of the holder.</p> <p><strong>5 - Melt and pour wax</strong></p> <p>This isn't a guide on how to make candles, look up proper procedures for candle making for more information on this step. Wax can be very dangerous, so proper precautions and working techniques should be followed.</p> <p>Once you have poured the wax, you will probably need to tap the box etc to get out air pockets (I'm still trying to figure this out, about 30% of my candles so far have had significant air bubbles in them)</p> <p>Let sit for ~2 hours to cool. If you want to make multiple sets, I have found putting the set in the fridge for 30 minutes gets it cool enough to pull the molds out of the holder and re-use the holder with another set of molds.</p> <p><strong>6 - Remove from mold</strong></p> <p>Once it has cooled sufficiently, untape the wicks, and gently and evenly pull the mold apart, one side will typically release first. Then using the knot at the bottom, slowly and carefully pull the candle out of the second half of the mold.</p> <p><strong>Note I had already cut the Wick to size here.</strong></p> <p><strong>7 - Cut the wick to size</strong></p> <p>Cut the knot off the bottom of the candle, and cut the top too about 1cm in length (1/2")<br/> Place in candle holder, light and enjoy!</p> <h3> How I Designed This</h3> <p>This was designed in FreeCAD. Initially I modelled the candle I wanted, then using boolean operations subtracted it from a cube, and split the cube in half. Then I added the pins and matching holes just to help align the boxes and hold them together a bit by padding and pocketing some symmetrical circles on the exposed face.</p>
With this file you will be able to print Christmas Candle Mold (17mm) with your 3D printer. Click on the button and save the file on your computer to work, edit or customize your design. You can also find more 3D designs for printers on Christmas Candle Mold (17mm).