Christmas Tree with Branches- Customizer version
pinshape
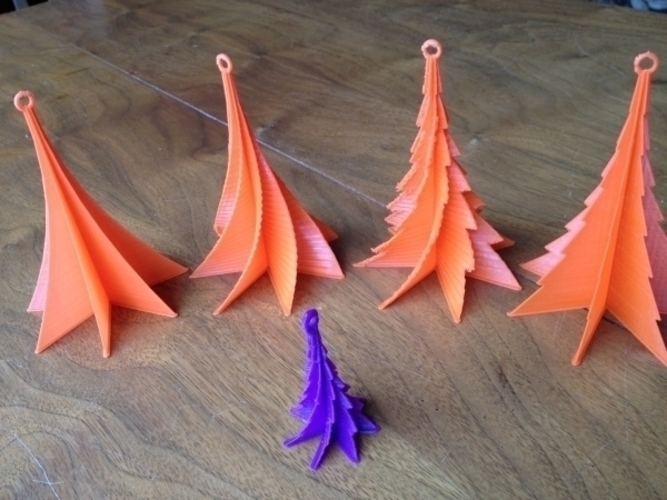
Make a Christmas Tree in the Customizer. In this version, the sides of the tree follow a cubic curve. You will notice more curve if you make the branches number higher (so Branches=1 no curve, Branches>4 you see a nice cubic curve). You can also set the branch overhang. This means that if you set overhang to 0, there will be no branches. If you set it higher than 1, you will get nice branches. Note that this can cause blobs if the overhang is higher than 5mm, but it can also be a nice effect. This design was originally created by kowomike and can be found at http://www.thingiverse.com/thing:186164. To help educate your friends and family about home 3D printing, I recommend watching this simple and straightforward explanation of the process (made by and for schools): http://www.youtube.com/watch?v=YpHv19jdloI. Instructions: Play with your slicer settings. I think that printing fastest is achieved when you can make sure you are not trying to print "in fill". By setting infill=0 and wall=nozzle width, I was able to greatly reduce print time. The orange plastic ones were sliced with CURA13.11.2. Instructions for Printing: * Layer: PLA 0.1mm * Wall: 0.4mm * Top/Bottom: 0.4mm * Fill: 0% * Speed: 100mm/sec * Temperature: 200 * Nozzle: 0.4mm * Printer: Ultimaker1
With this file you will be able to print Christmas Tree with Branches- Customizer version with your 3D printer. Click on the button and save the file on your computer to work, edit or customize your design. You can also find more 3D designs for printers on Christmas Tree with Branches- Customizer version.