Chuwi Larkbox Pro Heatsink Top Cover Upgrade
prusaprinters
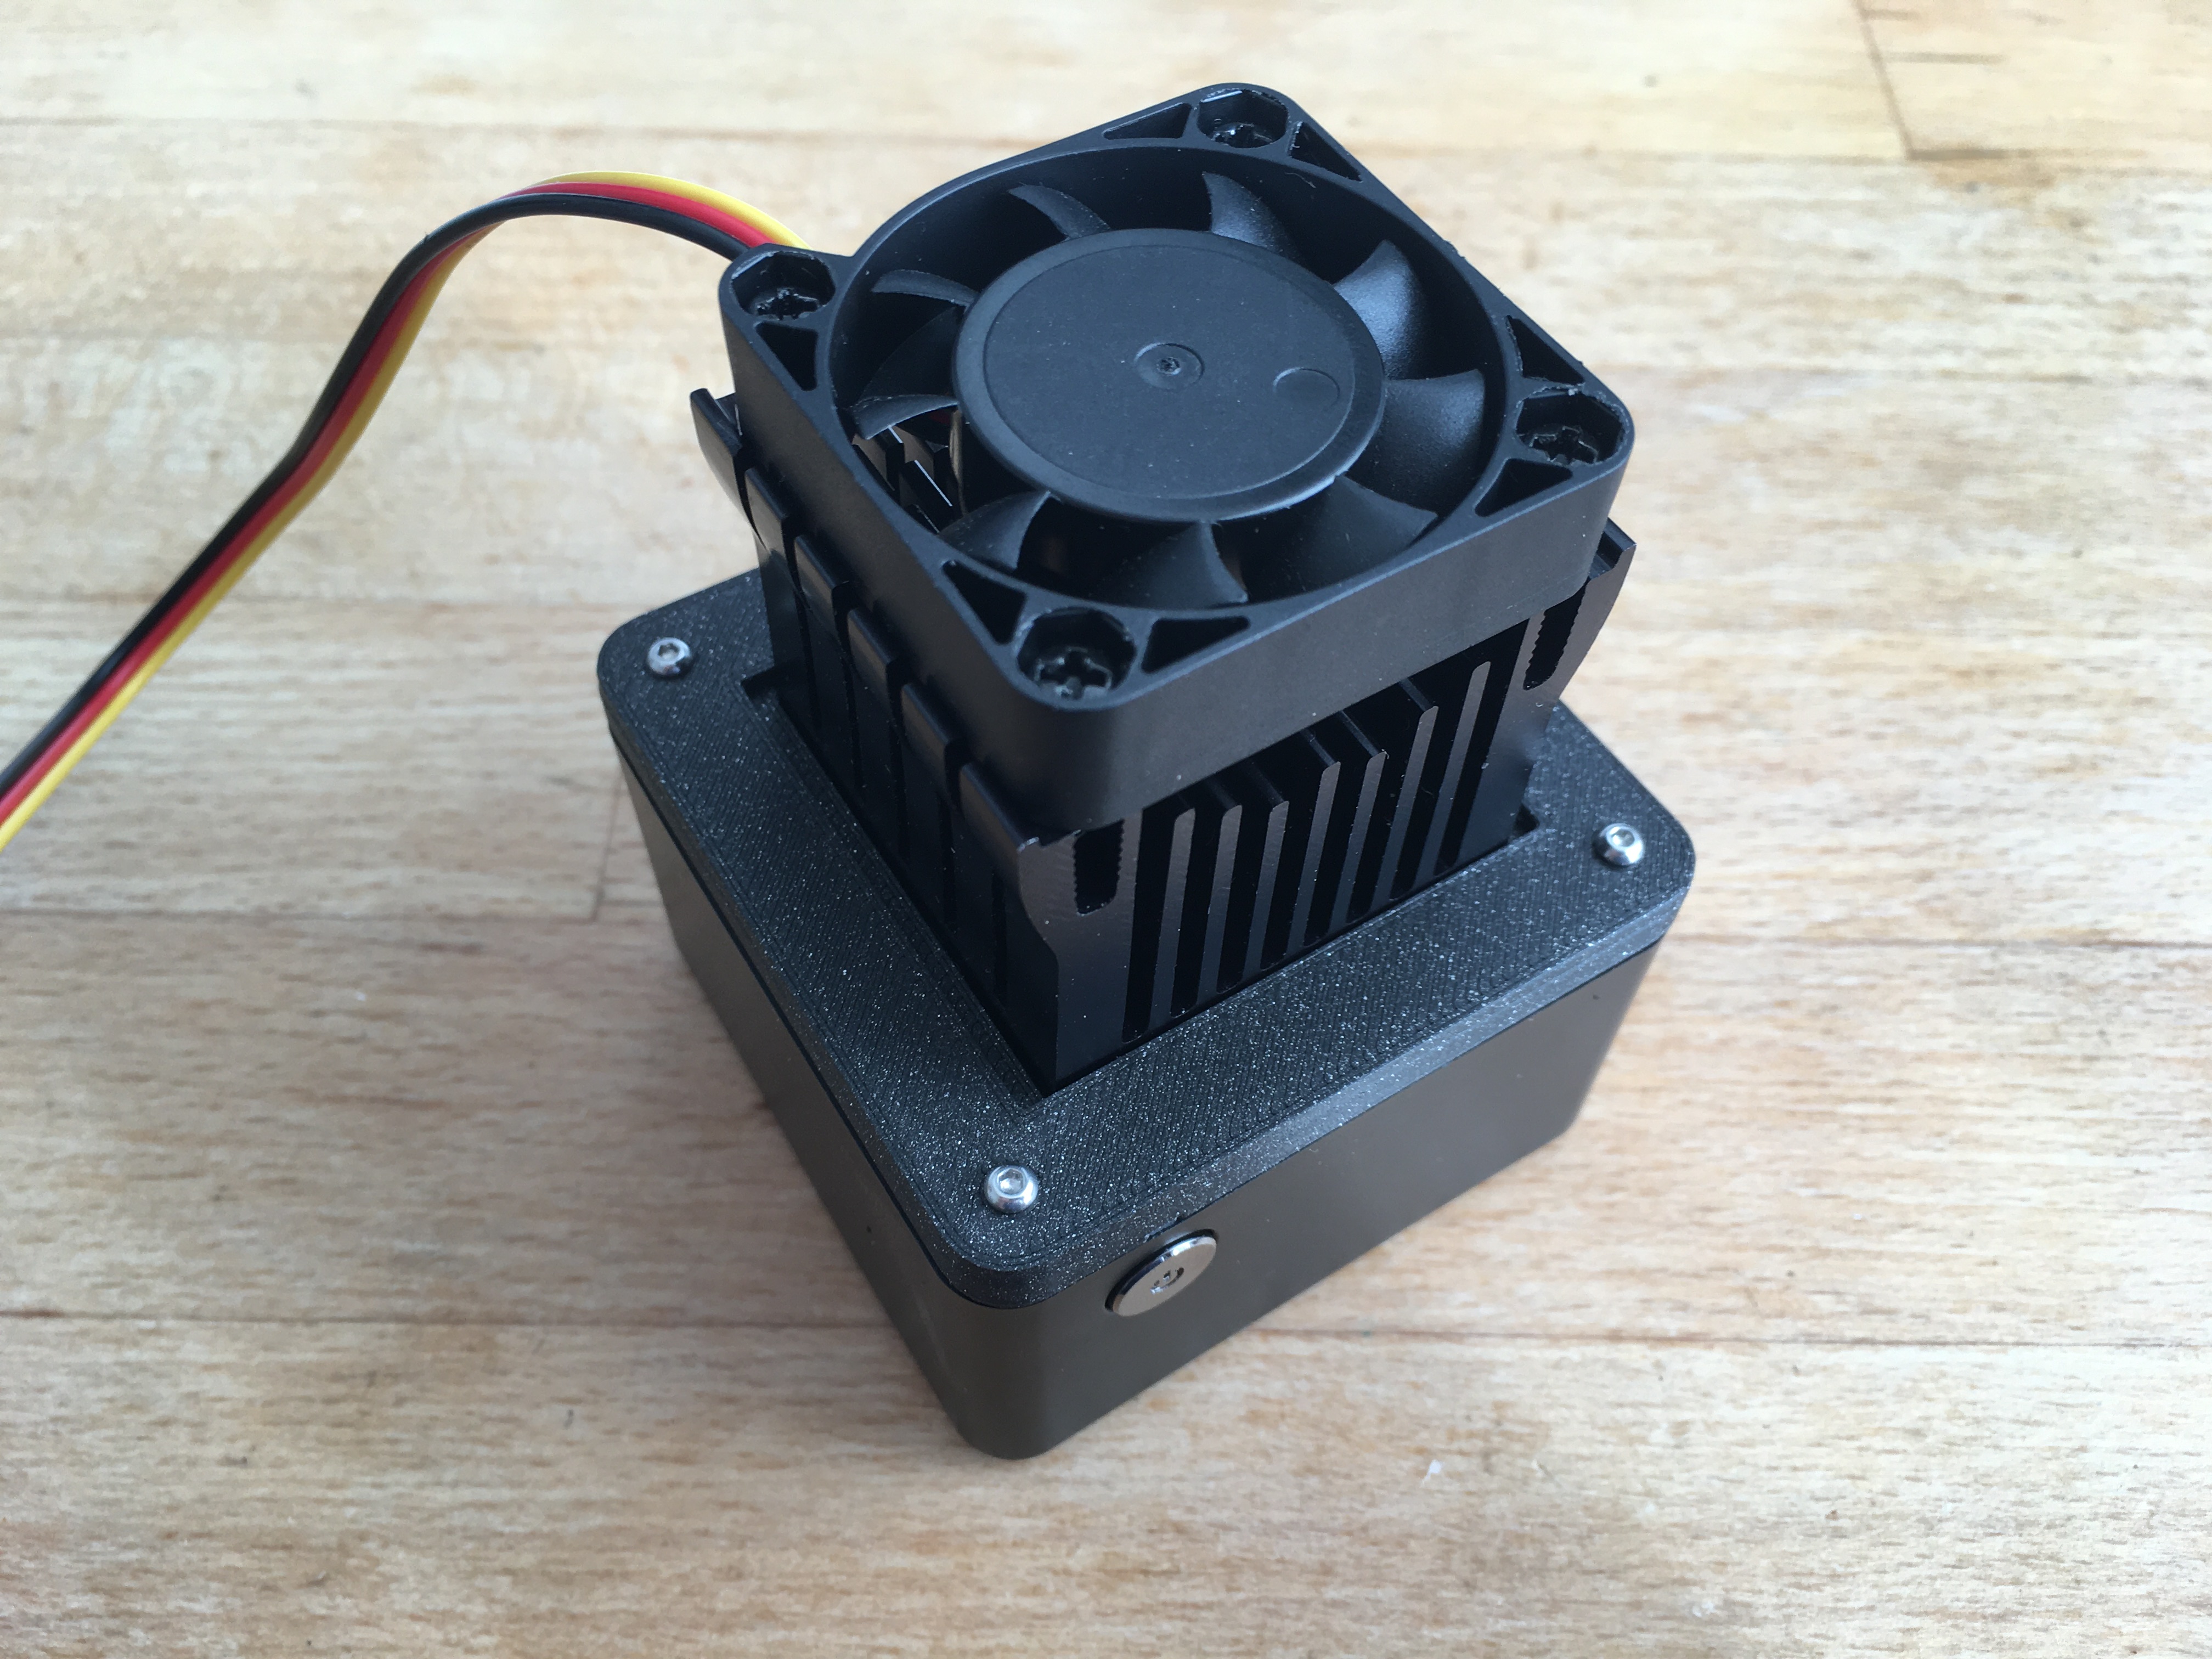
<p><strong>DISCLAMER</strong> | <strong>This is an unofficial, amateur-made, not thoroughly tested modification that could definitively break your Chuwi Larkbox Pro. Please proceed at your on risk.</strong> I am no electronic or industrial engineer, I'm just tinkering. :¬) </p><p>I own a Chuwi Larkbox Pro, which is a really tiny Intel PC. Sadly the cooling solution and BIOS setups are not fine tuned and result in a annoyingly noisy PC. The Larkbox fan turn on at full speed every time the CPU temperature reach 50°C, which happen really often.</p><p>So I made an experimental replacement of the top cover of the Larkbox to accommodate a different heatsink + fan combo. The heatsink used is a pretty cheap Aluminium Adjustable PC Northbridge Heatsink + Fan combo which can be found on Ebay, Aliexpress and Amazon. The dimensions of the heatsink are : 40(L)x38(l)x36(H)mm. <br>The fan is a standard 40x40x10mm. The one included with the heatsink is a 12v, but I replaced it with a 5v to power it using a USB port. I also used a standard fan resistor cable to step down the 5v to 3.3v in order to reduce fan speed and noise.</p><p>The result is a really quiet and really cooler computer. It hardly goes over 45°C. <br>The negative side is that I originally planned to use the internal fan connector but couldn't manage to find such small connector as the one present on the motherboard. Also, at the end, it almost double the height of the Larkbox Pro… not so tiny anymore but quieter.<br>Sadly, without the fan the temperature ramps up quite fast. I tried up to 70°C but in the long term it may damage the PLA of the print.</p><p><strong>For reference</strong><br>The heatsink I bought is this one: <a href="https://fr.aliexpress.com/item/32432346031.html">https://www.aliexpress.com/item/32432346031.html</a><br>The 5v fan is: <a href="https://www.aliexpress.com/item/32671709287.html">https://www.aliexpress.com/item/32671709287.html</a><br>The 0.8mm copper plate is: <a href="https://www.aliexpress.com/item/32964078069.html">https://www.aliexpress.com/item/32964078069.html</a><br><br><strong>Needed</strong><br>- 4 x M2x5mm or M2x6mm screws<br>- Thermal compound<br>- Heatsink + Fan<br>- 20x20mm or 15x15mm copper plate (I used a thickness of 0,8mm but it can vary due to the 3D printed holder tolerance).<br>- Insulating adhesive tape (example: Kapton tape)</p><p><strong>Printing presets</strong><br>It was printed using a Prusa Mini+ using Prusament PLA Galaxy Black using the 0.15mm Quality preset with supports for the "Heatsink Holder" at 15% infill.<br>Tolerance of the printed pieces may need some tweaking on each 3D printer.</p><p><strong>Instructions</strong><br>1. Completely teardown your Larkbox Pro. Keep every component and screw we are going to re-use most of it. You will need to relocate the adhesive Wifi Antenna as it is glued on the original top cover, I moved mine next to the M2 expansion slot bottom plate.</p><p>2. Screw the LED light plastic channel to the 3D printed Heatsink holder using the screw that was used originally (see photo 4).</p><p>3. Slide the heatsink in the Heatsink holder as shown (see photo 5 and 6).</p><p>4. Cut insulating adhesive tape to protect the other components from touching the heatsink to avoid short circuit! You can use the “Insulating Adhesive Tape Template” to cut the hole needed in the tape. I used Kapton tape as it is heat resistant.</p><p>5. Place the 0.8mm copper plate (you may need another thickness due to the tolerance of your 3D prints) using a drop of thermal grease between the copper plate and the heatsink (see photo 7).<br>Place the original thermal pad on the other cooled IC (not the CPU).</p><p>6. Place back the motherboard inside the Larkbox Pro case without screwing it. Put the Thermal grease on the CPU (see photo 8 and 9).</p><p>7. Put the Heatsink in the heatsink holder on the CPU/motherboard (see photo 10 and 11).</p><p>8. Gently put the entire Larkbox Pro upside down (it should sit on the fan itself). Screw the original M2 standoffs back. It should grip in the 3D printed Heatsink Holder holes (see photo 12 and 13). <strong>WARNING</strong> | The heatsink should be held tightly on the CPU but <strong>the screws should not be overtighten or it could damage the CPU and motherboard. Please do it precautiously. </strong>For reference, on my modified Larkbox Pro, I can move slightly the heatsink but it is still tightly held.</p><p>9. Put the top cover on (see photo 14). You can screw the top cover using the 4 M2x5mm or 6mm screw (the only not original screw needed) (see photo 1 and 2). Screw should grip in the 3D Printed Holder holes. </p><p>10. Reassemble the remaining pieces of the Larkbox Pro (IO board, Wifi antenna, both bottom cover and feet).</p><p><br>It is by no mean a perfect upgrade and may need some improvements, feel free to remix it!<br>:¬)</p>
With this file you will be able to print Chuwi Larkbox Pro Heatsink Top Cover Upgrade with your 3D printer. Click on the button and save the file on your computer to work, edit or customize your design. You can also find more 3D designs for printers on Chuwi Larkbox Pro Heatsink Top Cover Upgrade.