Circuit Board
thingiverse
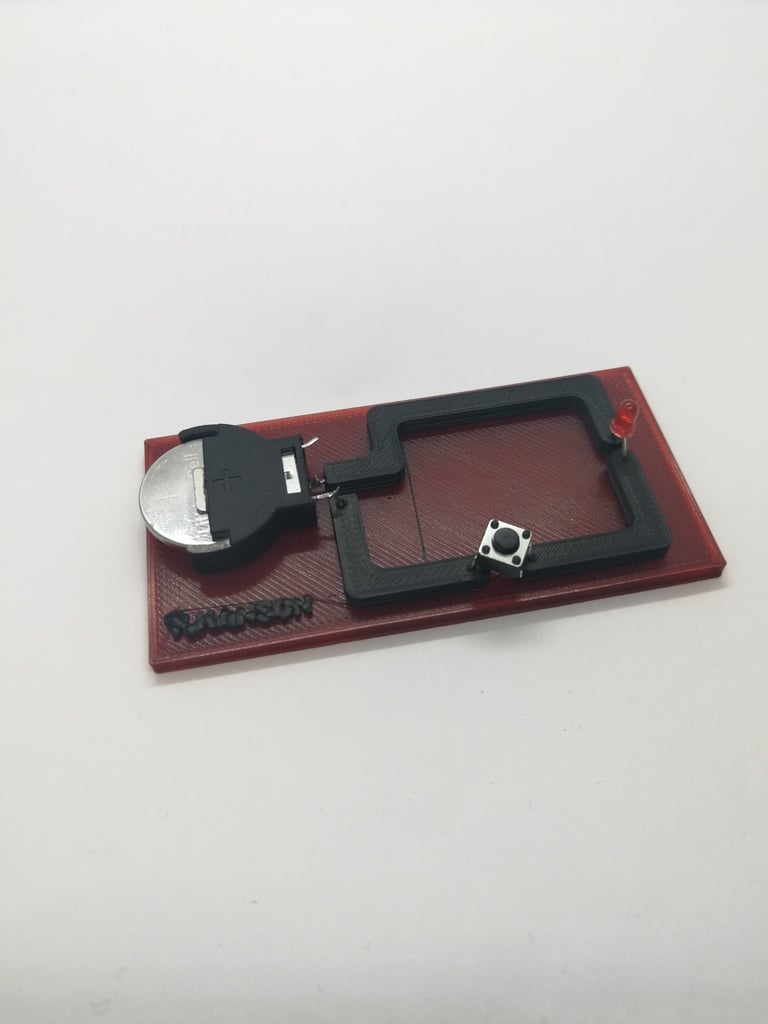
One print, No wires, No gimmicks This print is just a test with conductive filament. It works decently well in bringing power to the little LED and maintains a solid connection. Here is the spread sheet with the parts to build this: https://docs.google.com/spreadsheets/d/1Pvu8J32hAgOiMe2Ywing7QEMuAd9Oq4ts_CTPej7K0U/edit?usp=sharing Print settings: 1. Make sure to stop the print when the circuit parts starts (this can be done in cura there are a lot of videos on Youtube to help out). 2. Make sure the print is 100% infill. Instructions: 1. Cut down the LED legs (make sure you still know what leg is positive and negative) 2. Insert the switch and LED by using a soldering iron to heat up the legs while pressing them into the correct spots. 3. Use the cut off LED legs as extensions to add the battery holder on. Insert them the same way as in step 2. 4. Install the battery holder and solder the "Extensions" to the correct ports on the battery holder. 5. Enjoy! If you really enjoyed this little project here is my paypal :) https://www.paypal.me/trav0
With this file you will be able to print Circuit Board with your 3D printer. Click on the button and save the file on your computer to work, edit or customize your design. You can also find more 3D designs for printers on Circuit Board.