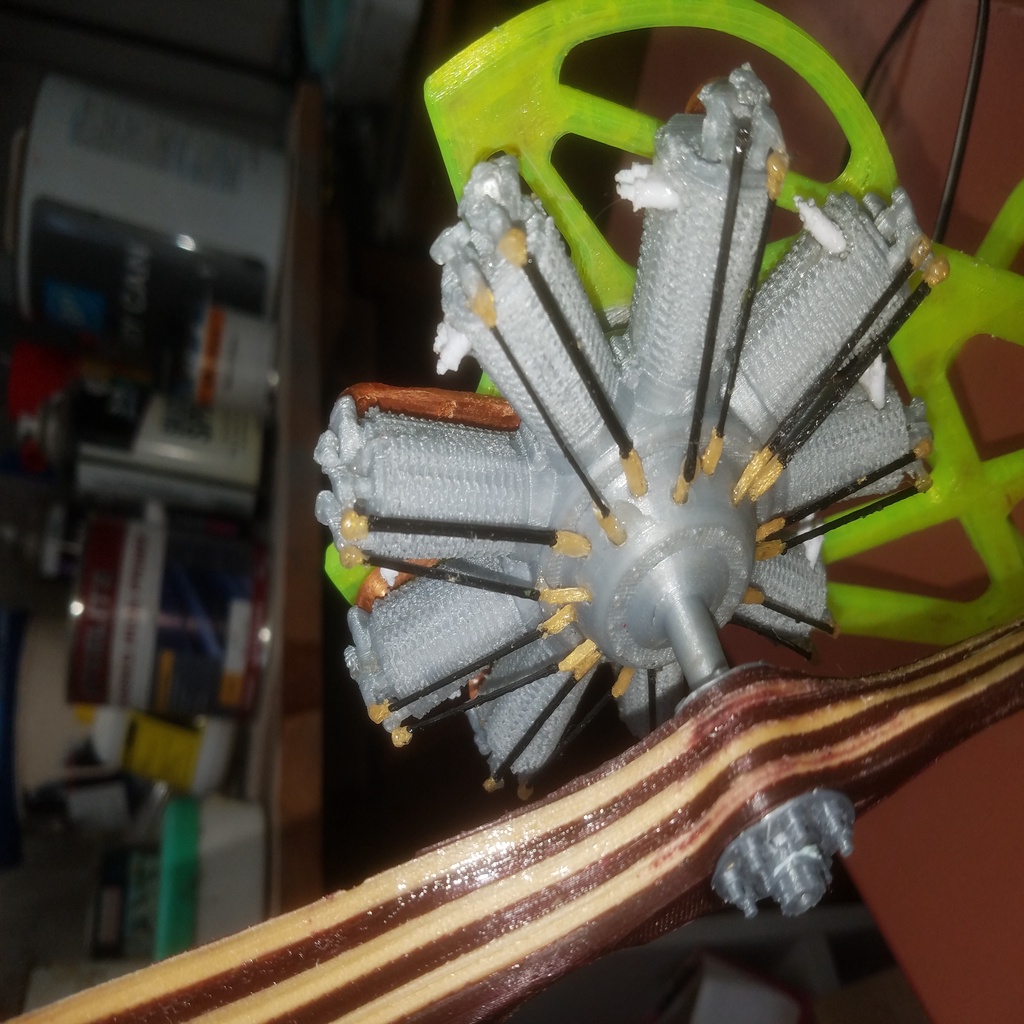
Clerget 9B rotary aero engine
prusaprinters
<p>Scale model of a Clerget 9B rotary aircraft engine, as fitted to the Sopwith Camel during WW1.</p> <p>This model is based on <a href="https://grabcad.com/library/clerget-9b-radial-engine-1">https://grabcad.com/library/clerget-9b-radial-engine-1</a>, which is a wonderfully detailed 1/4 scale model including every nut, bolt, and ball bearing. I've adapted this model for 3D printing. There is more detail in the model than can be printed with a 0.4mm nozzle. In particular, the cylinder fins didn't print well for me.</p> <p>The engine mount is my interpretation of what a Sopwith Camel engine mount appears to be, with a frame below to support it.</p> <p>The model in my photos is slightly different from the design which I'm uploading; the uploaded design is improvements based on what I found when I built my model. One detail is that the wiring for the electric motor can be brought out through the brush-holders on the rear of the central support, where the ignition wires of the real motor attach. There's also a "rear support" you can add to the rear of the mount.</p> <p>The engine's scale is 0.117 (between 1/8 and 1/9)... this arbitrary number is based on a Sopwith Camel with a 1m wingspan. Scaling up or down my STLs in a slicer would only work to a limited amount. Scaling up would result in the motor shaft being too short to go right through the prop. Scaling down would require drilling out the shaft hole back to 3mm.</p> <p>A few of the parts (propellor, pushrods, engine mount, base) are designed for dual extruder printing. Merging all the subparts should allow printing on a single extruder.</p> <p>I've glued all the parts together with 5-minute epoxy. Probably cyanoacrylate would be just as good, but epoxy does have a space-filling capability that CA doesn't.</p> <p>One slight imperfection that a purist may notice is that all the valves and pushrods are in the same position. I'll leave it to the purist to remix the model so all the valves are in the correct positions.</p> <p>Extrusion of the blue stopped midway through the print of the base; I have other things to do, so I can't be bothered redoing that.</p> <p>Inside the model is an N20 gearmotor with a 55mm M3 shaft e.g. <a href="https://www.aliexpress.com/item/32956961754.html">https://www.aliexpress.com/item/32956961754.html</a> -- I chose the 400RPM version. Running off a 9V battery, I guess it's spinning about 300RPM, which is plenty. The motor slides sideways into the mount (see the yellow test print of the mount. NB: make sure it is the right way round!) which is then screwed to the engine mount with 2.5mm self-tapping screws.</p> <p>Glue an M3 nut into the rear of the front crankshaft half, and into the recess in the propellor front flange. Glue short pieces of filament into the alignment holes in one of the crankshaft halves, and trim back to about 1mm proud of the surface. Glue the halves together with slow-setting epoxy) and glue in the spark plugs with 5-minute epoxy. These are designed to help align the cylinder halves. Glue on induction tubes, then inlet pushrods, then exhaust pushrods. Glue flanges to propellor... NB: rear side of propellor is straight, front side is curved. Glue engine mount frame into base. Spin engine onto shaft until the motor is invisible, then hold the engine and tighten the propellor against it.</p> <h3>How I Designed This</h3> <p>This model is based on <a href="https://grabcad.com/library/clerget-9b-radial-engine-1">https://grabcad.com/library/clerget-9b-radial-engine-1</a>, which is a wonderfully detailed 1/4 scale model including every nut, bolt, and ball bearing. I've adapted this model for 3D printing. There is more detail in the model than can be printed with a 0.4mm nozzle. In particular, the cylinder fins didn't print well for me.</p> <p>My first step was to scale the whole thing up to 100%, just because it saves lot's of arithmetic when thinking about it. That's available at <a href="https://cad.onshape.com/documents/ca3fc91878b68c0b0571ebe5/w/37c48c7e8a9ca64880048790/e/402b3f9ecc3104a576a6593f">https://cad.onshape.com/documents/ca3fc91878b68c0b0571ebe5/w/37c48c7e8a9ca64880048790/e/402b3f9ecc3104a576a6593f</a></p> <p>Most of the design work is at <a href="https://cad.onshape.com/documents/84e6dc69b1fc19edc791e39d/w/3b8b54841038993d6989a891/e/224d6cfb1edf437a015351b0">https://cad.onshape.com/documents/84e6dc69b1fc19edc791e39d/w/3b8b54841038993d6989a891/e/224d6cfb1edf437a015351b0</a> where I scaled it down, merged parts, etc for 3D printing.</p> <p>I carefully chose the plane for splitting the crankcase/cylinder heads to minimise overhangs on the cylinder heads. Nevertheless, there was a fair amount of work in supporting the fins and other parts in an unobtrusive way.</p> Category: Vehicles
With this file you will be able to print Clerget 9B rotary aero engine with your 3D printer. Click on the button and save the file on your computer to work, edit or customize your design. You can also find more 3D designs for printers on Clerget 9B rotary aero engine.
