Climber lamp
prusaprinters
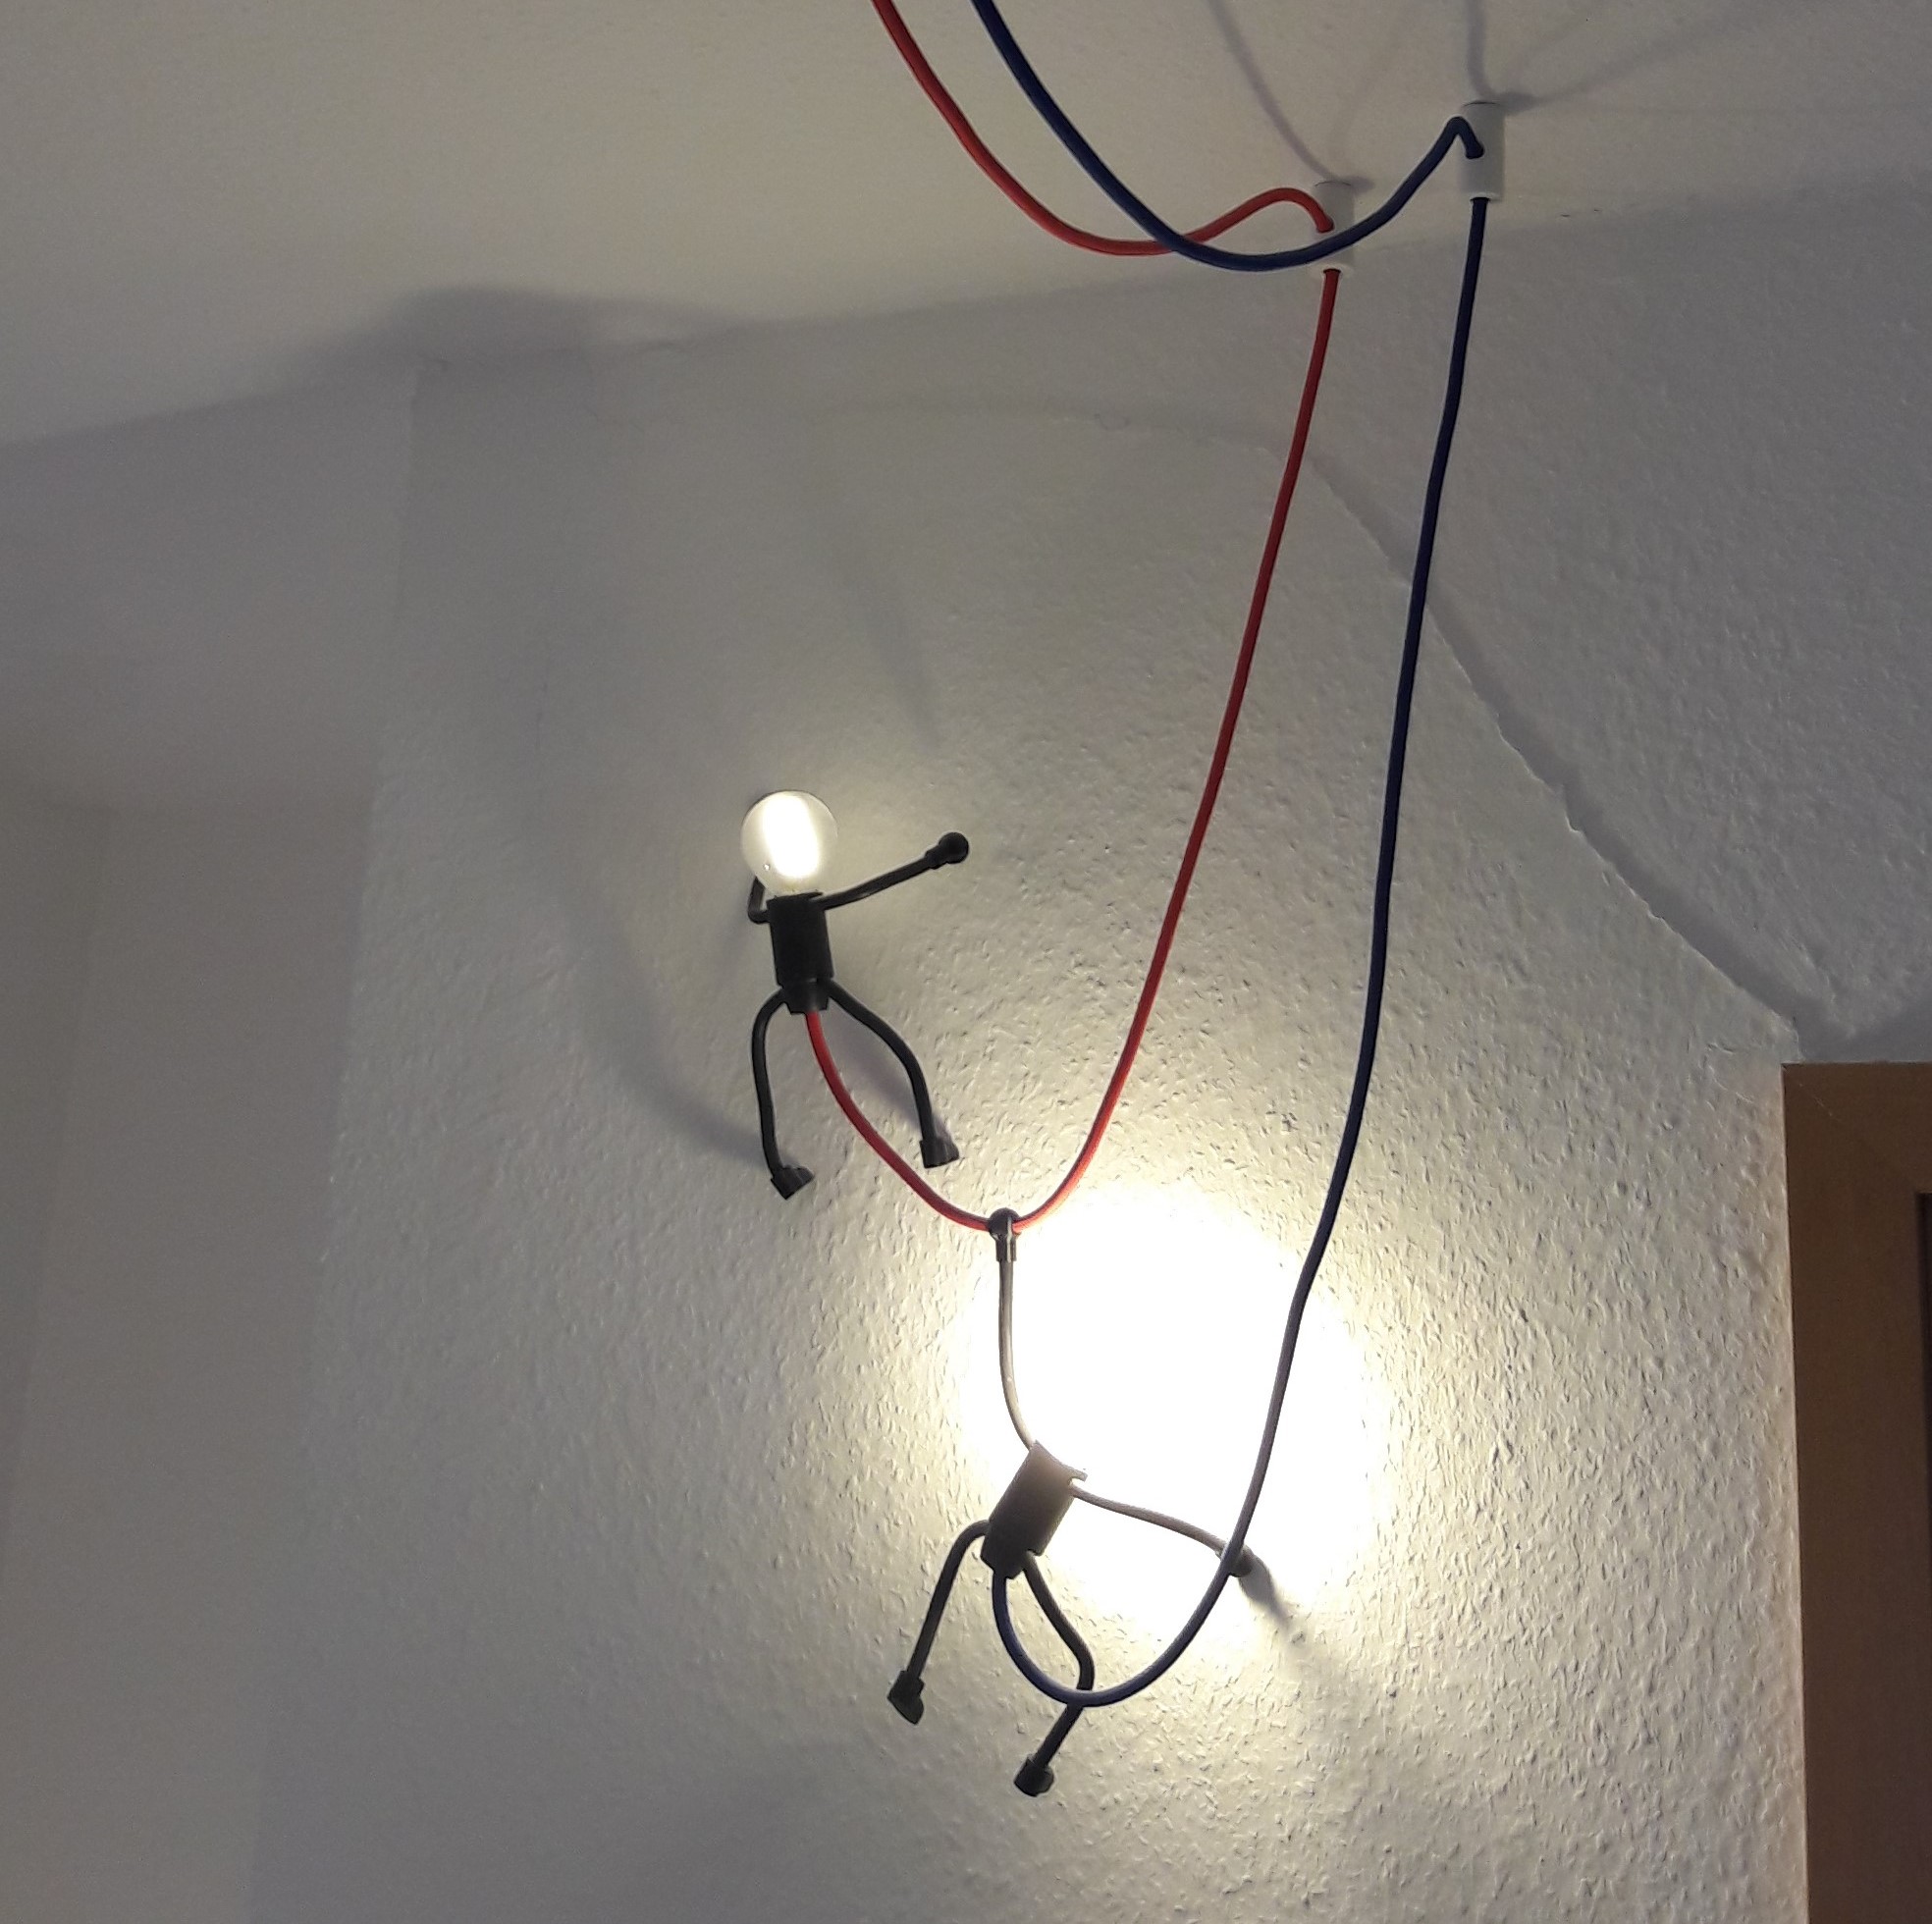
<p>Two small light bulbs with sockets, colorful textile cables, some steel wire and cable isolation combined with simple 3D prints make up a beautiful climbing lamp.</p> <h3>Print instructions</h3><h3>Disclaimer</h3> <p>This lamp requires the skill to work with mains voltage (230V/110V). If in doubt, ask a professional (or your parents if you are underage) how to work safely. The author of this manual will not take any responsibility or liability for any damages to person or property caused by improper safety precautions or the installation of the described lamp.</p> <h3>Required Materials</h3> <ul> <li>Steel wire, 1,0 mm (gauge 19 or 20)</li> <li>Insulation of a black cable or another black tube/hose with similar diameter 0,5m (1.5 feet)</li> <li>Black lamp socket preferably E14 (a smaller socket) with appropriate round LED light bulb (Small Edison Screw, SES)</li> <li>Colorful textile cable or similar (rated for 230V/110V)</li> <li>A few screw and dowels which fit your walls and ceiling</li> <li>Black and white filament of your choice (or other colors, depending on your taste)</li> <li>Thread tapping tool for inside and outside threads M4 or a similar imperial size</li> </ul> <h3>How to build:</h3> <ol> <li>Print your parts in the colors you like. For white ceilings, I recommend using a white filament for the ceiling parts if you prefer them to be less apparent. Deburr where necessary.</li> <li>Cut the black cable in four segments. Each segment will be used for one of the four limbs. The length should be somewhat similar for both arms and both legs. Remove the copper wires without damaging the isolation.</li> <li>Cut the steel wire in four pieces. Do not use flush cutters as they might get damaged. Use appropriately strong cutters. Each piece should be 3 cm longer (1 ¼ inch) than the doubled length of the isolation. Bend the steel wires in an 180° angle in the middle.</li> <li>Take the socket and cut two holes (diameter slightly larger than the steel wire) next to each other for every limb (8 holes in total). Thread the bent steel wire through the hole from the inside. As a result, at each area where a limb will be attached, two steel wire ends should come out of the socket.</li> <li>Pull the isolation over the steel wire for all four limbs.</li> <li>Choose how the two climbers should hang from your wall. Attach the respective parts to their arms. There are three possible parts:<br/> 6a Round hand without any possible connection<br/> 6b Hand with a hole of a textile wire<br/> 6c Hand with a hole for connecting to a wall</li> <li>Cut the steel wire to the needed length and attach the hand parts and the feet with super glue/cyanoacrylate or any other fast curing adhesive. When attaching one of the hands to wall (hand on wall A): the cover plate (hand on wall B) should be glued in place after final installation of the climbers.</li> <li>Pull 1 cm (1/2 inch) of heat shrink tubing over the textile cable next to the place where you want to cut it. Leave around 2 cm (1 inch) space to the cut line. Shrink it. Cut the cable. Now the textile cable will not unravel since the heat shrink tube will hold it together. Attach the textile cable to the contacts of the lamp socket and assemble it according to the manufacturer’s manual</li> <li>Mark the points, where you want to attach the climber’s hand(s), the cable management, and the outlet cover on the walls and the ceiling. Check for power cables, studs or for other things you want or want not to drill in. If you do not feel comfortable, ask a professional for help.</li> <li>Preparing the cable management by tapping the printed set screw and the cable holder with M4 tapping tools.</li> <li>Attach the outlet, cable management and at least one hand for each pair of climbers to the walls and ceiling. Thread the textile cables from the climbers through the cable management into the outlet cover. Carefully screw the set screw into the cable holder to improve the look of the cable (it should hang like a rope).</li> <li>Time for final checks. Check your local regulation, since in some countries working at mains voltage is only allowed by professionals. If you want to attach the power yourself, check your safety precautions. Open/remove the power fuse so you do not work on live wires. Prevent the fuse from being reset. Finally: if all parts of the climbers are hanging where they should, the power can be connected.</li> </ol>
With this file you will be able to print Climber lamp with your 3D printer. Click on the button and save the file on your computer to work, edit or customize your design. You can also find more 3D designs for printers on Climber lamp.