Clippard Valve Potentiometer Holder
thingiverse
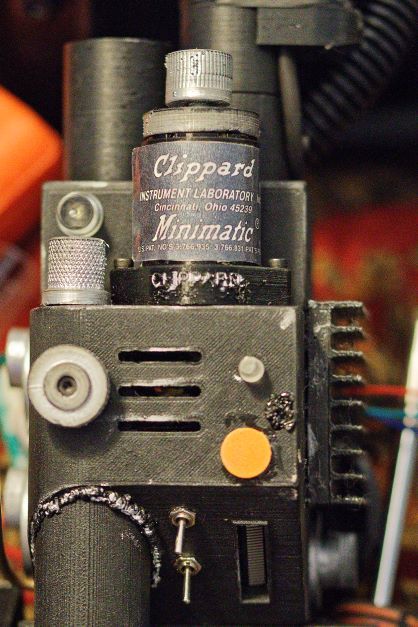
I have heard Ghostbuster cosplayers putting the volume control potentiometer under the crank generator knob on the proton pack to control the volume of the pack and wand sounds. I figured since the proton pack is controlled through the wand, why not make use of the clippard valve already on the neutrona wand? My prototype was to hollow out a space for the potentiometer on the clippard valve body found in the Q Pack, shorten the "clippard top" disc between it and the knob, and put the clippard valve knob on top with a toothed interior, as the Q pack knob is smooth inside. I first glued the potentiometer into the cavity in the clippard valve body, running the wires out of the bottom of the body. I ran wires through the wire loom from the wand to the proton pack. I then heated up the clippard valve top disc with a heat gun, and press fit it on top of the potentiometer inside the clippard valve body to compensate for the shape of the potentiometer. I then glued the clippard valve top disc on top of the potentiometer and clippard body assembly after matching up the indentations from the heated plastic onto the metal bits of the potentiometer. After that, it was simply a matter of pushing the clippard knob on top of the toothed potentiometer knob. I used negative shapes through PrusaSlicer. Because PrusaSlicer does not save negative shapes in a smooth fashion, this may be rough and I welcome any remixes.
With this file you will be able to print Clippard Valve Potentiometer Holder with your 3D printer. Click on the button and save the file on your computer to work, edit or customize your design. You can also find more 3D designs for printers on Clippard Valve Potentiometer Holder.