Clockwork using Galileo's Escapement
prusaprinters
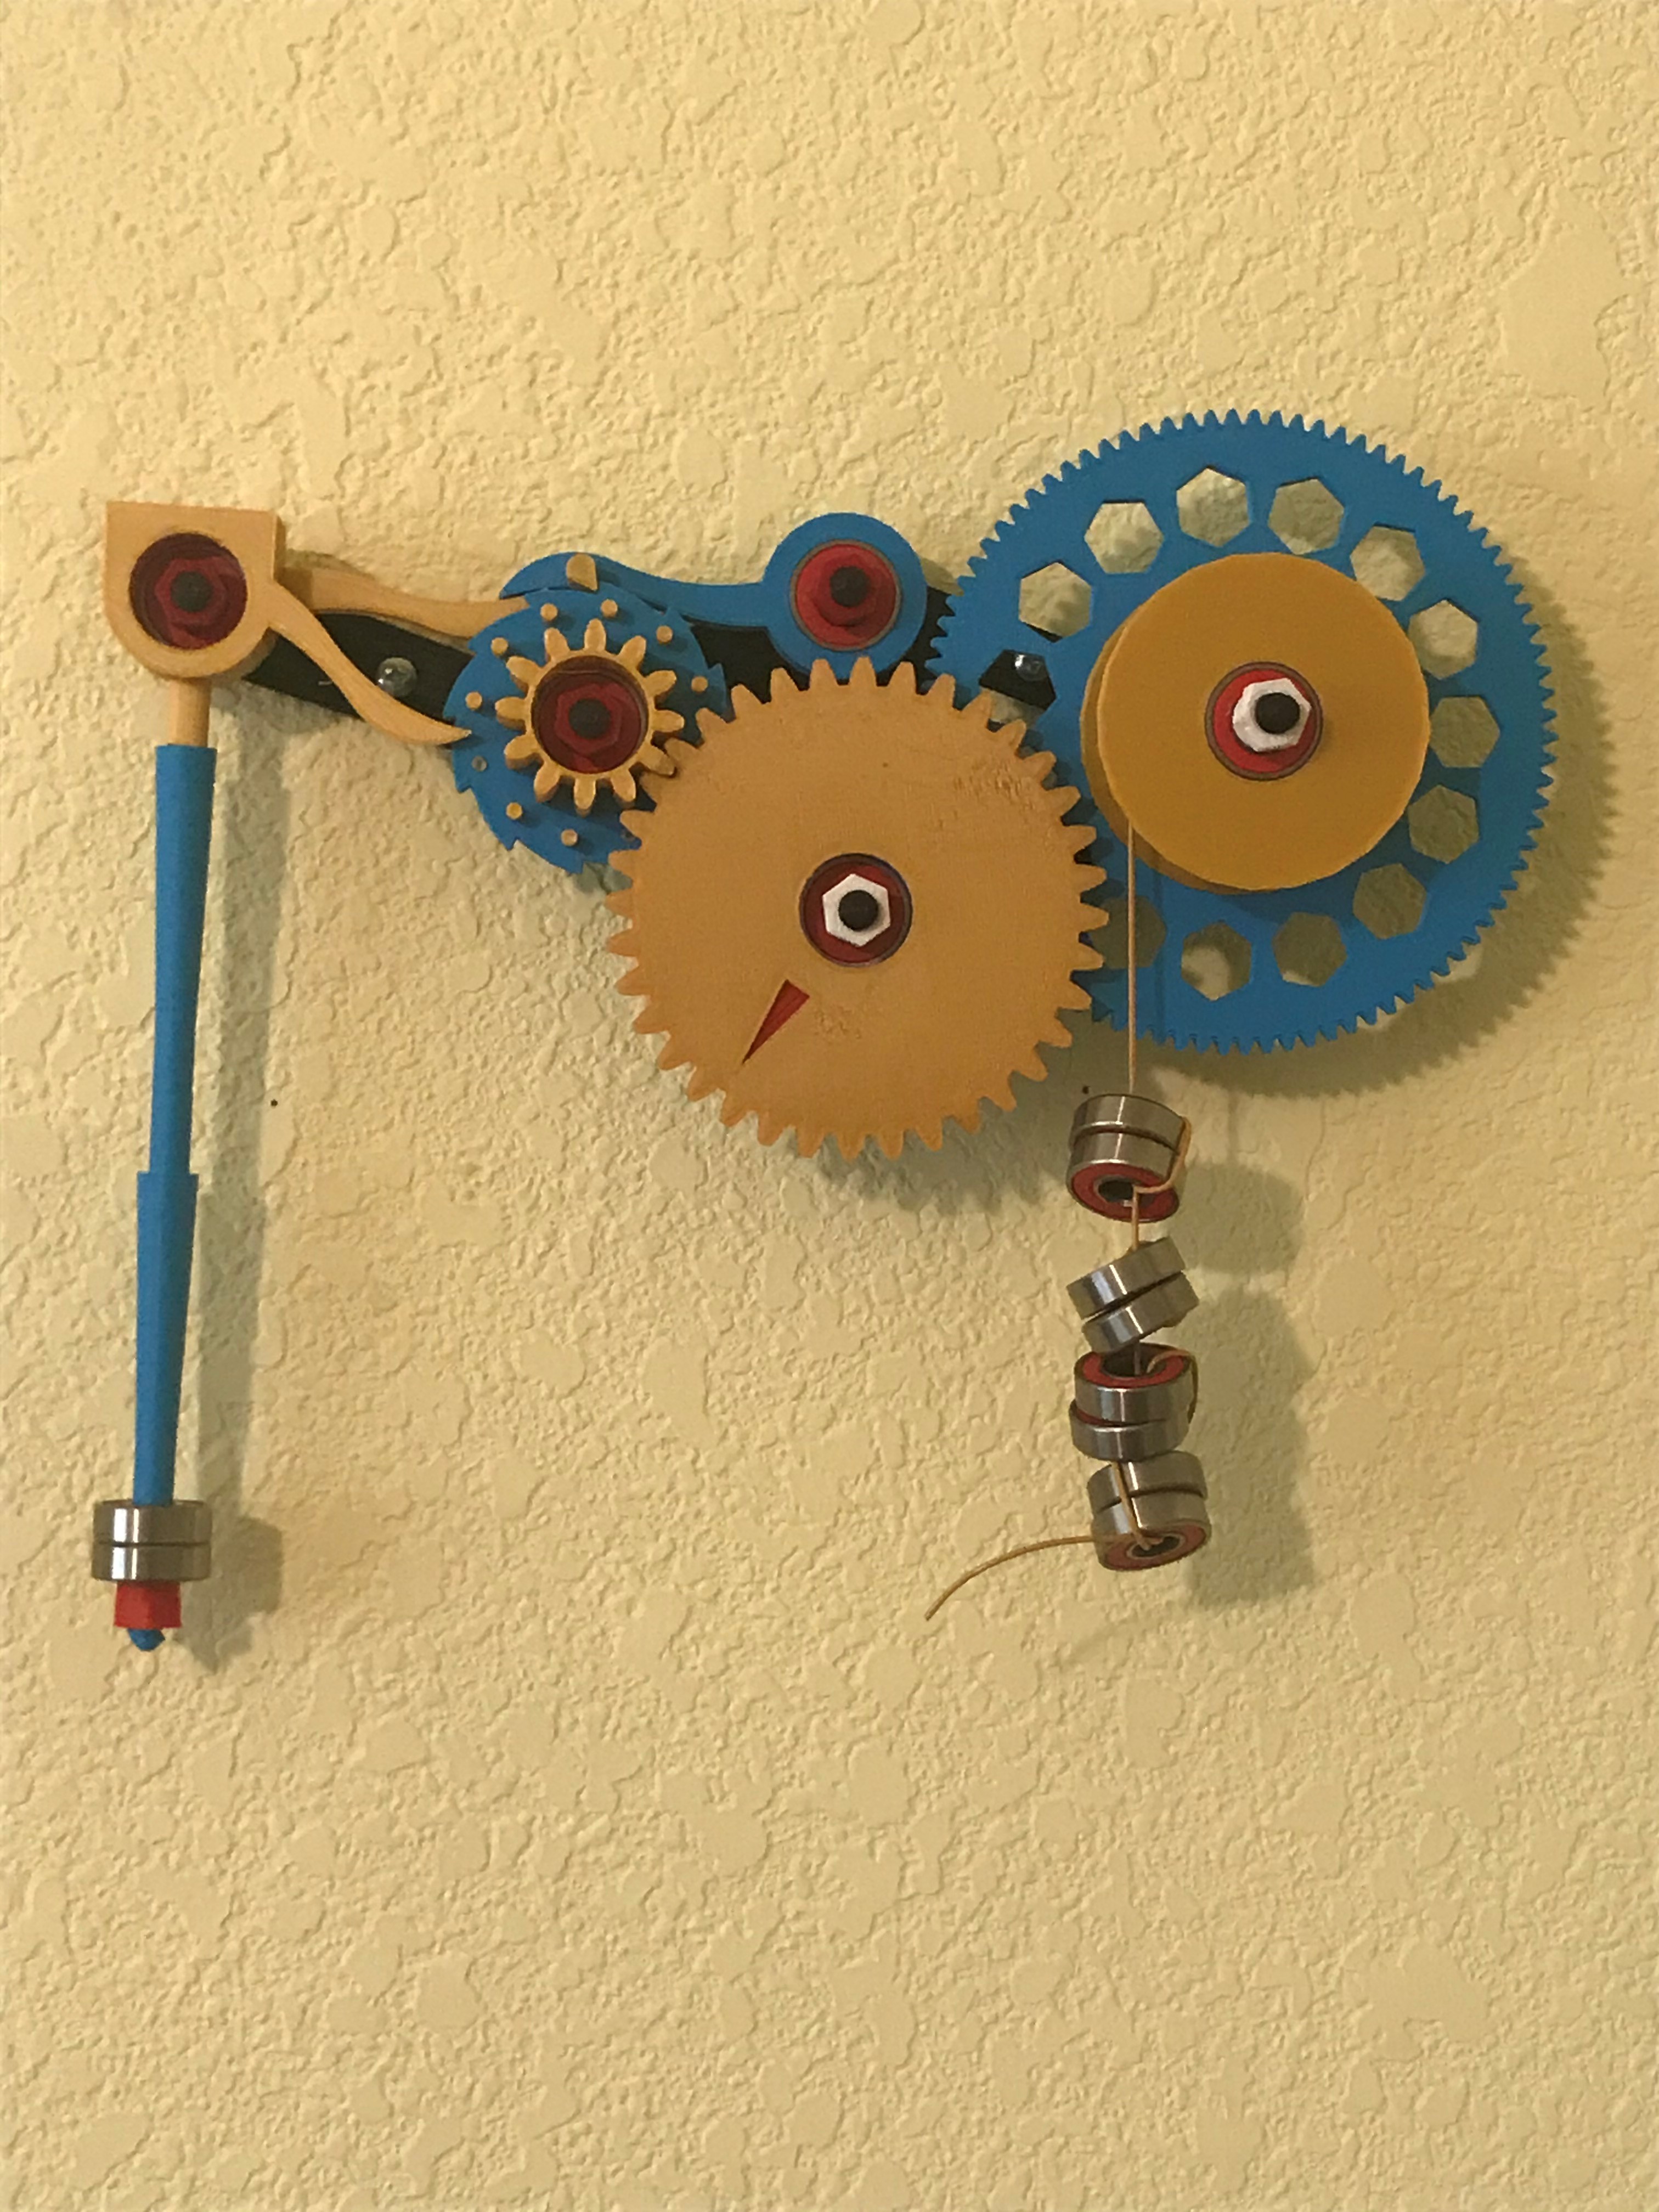
<figure class="media"><oembed url="https://vimeo.com/566869934"></oembed></figure><p>Tick-tock, tick-tock, tick-tock. What lies between the beats of time? Rythme. Satisfying to build, watch and listen. </p><p>I was having a lot of trouble seeing the proper angles for designing a deadbeat escapement from scratch, so I started to research. I came across a picture of Galileo's pendulum clock: <a href="https://upload.wikimedia.org/wikipedia/commons/8/8c/Galileo_Pendulum_Clock.jpg">https://upload.wikimedia.org/wikipedia/commons/8/8c/Galileo_Pendulum_Clock.jpg</a> and became enamored with its escapement design. It's really a simple, clever device and I wanted to try it out. </p><p>It should be noted that Galileo's design is just an idea and was not fully completed. There really is no point for me to remake the model part for part; it's been done before. Instead, I decided to make my own clock and use Galileo's escapement as inspiration. The result is a working demostration of how a pendulum can be used to regulate drive into moments of time. </p><p>This was a great learning experience. I tried to make things as simple as possible while keeping the seperate parts distinguishable. The primary color scheme is a bit much, but I wanted all the functions to show. </p><p><strong>Hardware Needed:</strong></p><ul><li>15x Standard 608 Bearings (from skateboards and fidget spinners). Bearings are used as pivot points and weights. You can substitute something else for the eight [8] bearings used as drive weight.</li><li>Fishing Line, string or maybe a thin chain. Floss would even probably work. This will be the drive line.</li></ul><p><strong>Build Notes:</strong></p><ul><li>The models should be relatively easy to print if you don't have bed adhesion and level problems.</li><li>In a couple interations, the nut/bushing seemed a little too tight at the top of the hole (bottom of the print). I think it's elephant footing. I reamed the bushings with a utility knife and then they all work smoothly.</li><li>There is no cleareance for the 22mm diameter bearings, so you may need to tap them on the ground with a blunt object. Just a few light taps to work it in. It's fun to hit stuff. </li><li>The drive wheel has a bearing on each side, all the other gears have one bearing, pressed into the back side. </li><li>The pendulum base is the only part that needs support. It prints on its side (as the stl is currently placed)</li><li>I included the gcode for all prints with stops for color changes.</li><li>Print the pendulum pieces straight up one or two at a time. These are the hardest to print because of its height and small base. Totally do-able though. </li></ul><p><strong>Update 23/6/21</strong> - I finished printing all the parts this morning and it works! It works well too. Finally, time to publish. It's a little loud and I broke a couple pegs letting the drive wheel run freely but it's alive. It's awesome. It just keeps ticking away without a motor or anything. The time wheel currently rotates about once every 20 seconds, so it's a 20 second timer I guess. I'll print a new escape wheel and embed a video soon. Then some build notes. </p><p><strong>Update 24/6/21</strong> - Adding or subtracting to the length of the pendulum makes the clock run slower or faster. This can be used to tune the clock. I find I can get just about 30 secs for a full rotation of the time indicator gear by using four [4] pieces of pendulum connected together and one bearing on the bottom.</p>
With this file you will be able to print Clockwork using Galileo's Escapement with your 3D printer. Click on the button and save the file on your computer to work, edit or customize your design. You can also find more 3D designs for printers on Clockwork using Galileo's Escapement.