Coca-Cola Electrolysis
thingiverse
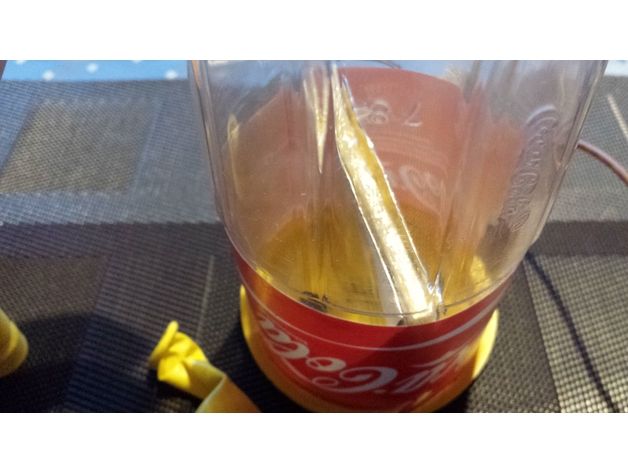
Uses a 1 liter Coca-Cola bottle as container. Cut it above the label and glue the printed pieces together. Add electrodes, for example graphite on either side and seal the wire holes. Add glue to the sides of the seperator piece and to the surface contact area between the bottle and piece and push it into the cutted bottle. You can fill it with water by using one of the hole pieces and by applying a voltage hydrogen will form at the negative side. DON'T USE ALUMINIUM FOIL! (OH- + Al+ --> AlO) < Print Settings Printer: Prusa i3 Rafts: Doesn't Matter Supports: Doesn't Matter Resolution: 0.2mm Infill: 20-30% Notes: ~60 grams Materials Needed Materials: Coca-Cola 1 liter bottle Electrodes (f.e. aluminium foil or razor blades) Water Salt or better sodium/potassium hydroxide (if you don't want to produce chlorine gas...) Timelapse
With this file you will be able to print Coca-Cola Electrolysis with your 3D printer. Click on the button and save the file on your computer to work, edit or customize your design. You can also find more 3D designs for printers on Coca-Cola Electrolysis.