Coil Jig for different rod sizes V2
thingiverse
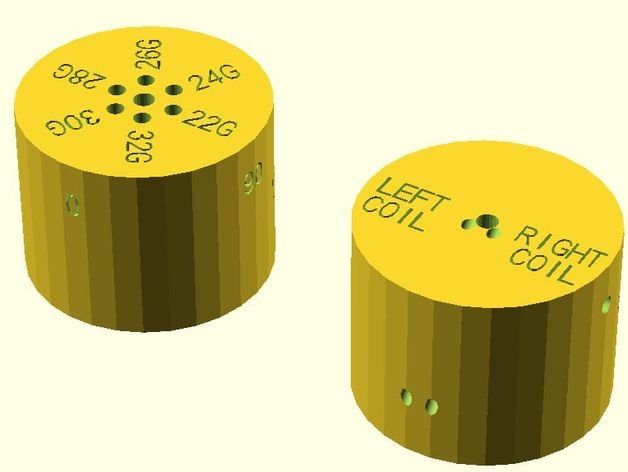
This is a coil Jig design enhancement. You can create coils of Kanthal or Nickle wire easily with this jig. Insert a M3 machine screw in one of the holes for the wire guage size on one cylinder. Insert the center smooth rod, and fix it with grub screw on the other cylinder. Insert wire thru the hole opening next to the rod. Hold the end of wire (that comes out of the cylinder) with your thumb, and rotate it once around the center smooth rod to start the coil. Insert the protruding center smooth rod thru the center axial hole in the second cylinder, and start rotating it to make a coil. The machine screw will keep the wire in place while rotating so that you will make a good coil easily. The angles are marked on the cylinder in case you are coiling a stiff wire. (0deg, 90deg, 180deg,270deg). If you start at 0deg reference mark, it will be your reference to end your coil at 0deg or 180deg reference marks. Twist it 90degrees more than the end point in case of a stiff wire. The screw holes for the machine screw are not threaded, so they may require some force to get the screws in the first time. They are configured so that the machine screw will press the coil to the center rod for the selected guage wire hole. I added the left side hole for Left Hand (clockwise) coils as an enhancement from the previous design. I also increased the wire hole for better prints. NOTE: I am yet to print and test this design out. You are welcome to try and let me know if any fixes are required.
With this file you will be able to print Coil Jig for different rod sizes V2 with your 3D printer. Click on the button and save the file on your computer to work, edit or customize your design. You can also find more 3D designs for printers on Coil Jig for different rod sizes V2.