Coil Jig - Vape Tool
thingiverse
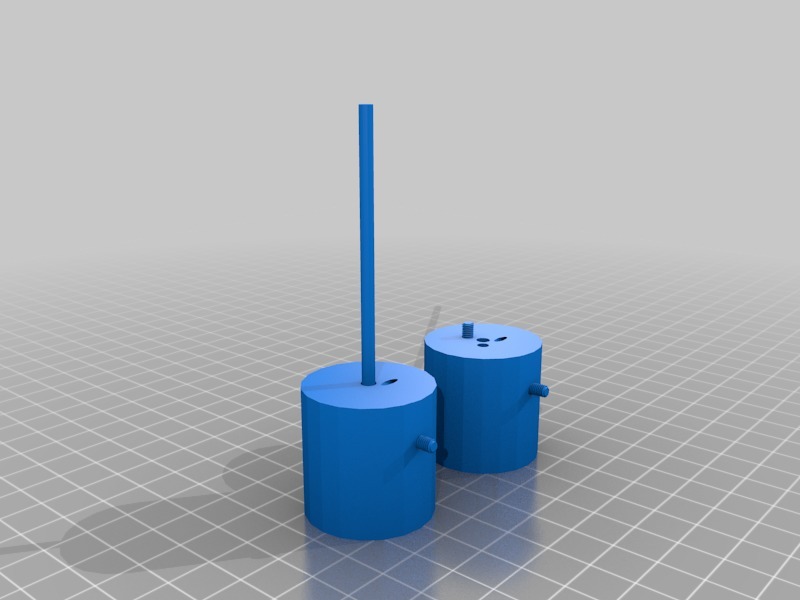
Dopo aver stampato le due parti sarà necessario inserire, in quella senza fori superiori, l'asta d'acciaio (dove saranno create le coil) e fissarla con due viti tramite i fori laterali. Tali viti serviranno anche per tenere il conto dei giri. Servirà anche una ulteriore vite da inserire nella parte superiore dell'altro componente, sarà quella che farà girare il filo attorno all'asta d'acciaio. After having printed the two parts it will be necessary to insert, in the one without upper holes, the steel rod (where the coils will be created) and fix it with two screws through the side holes. These screws will also be used to keep the lap count. It will also serve an additional screw to be inserted at the top of the other component, it will be the one that will turn the wire around the steel rod. Il disegno "NO PRINT example.." è solo a titolo di esempio finale del risultato , non è valido per la stampa! The design "NO PRINT example .." is only a final example of the result, it is not valid for printing!
With this file you will be able to print Coil Jig - Vape Tool with your 3D printer. Click on the button and save the file on your computer to work, edit or customize your design. You can also find more 3D designs for printers on Coil Jig - Vape Tool.