Coin Photography Stand
thingiverse
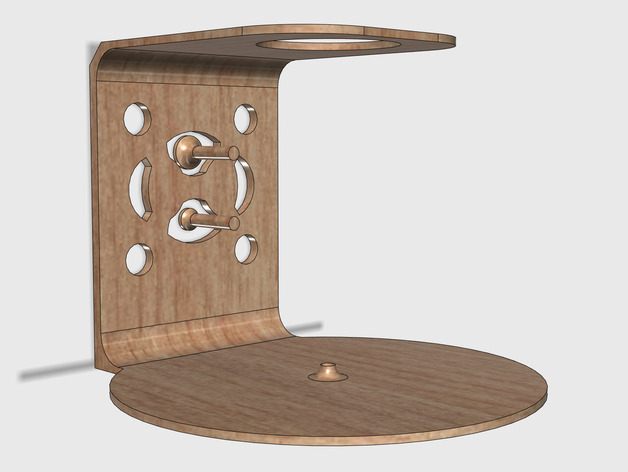
This Coin Photography Stand, or CPS, is created with the minimum focusing distance of the Sony HX90compact camera and a lot of other common compact camera's in mind. The camera can be placed on the top of the stand and one of the two provided coin stands can be placed in the adapter hole. The small (10mm) coin stand is for the smaller coins while the bigger coin stand (15mm) can be used for all larger coins. The adapter hole is 6mm in width to accommodate a lot of other adapters as well, if wanted. The top hole in the stand is exactly the same size as the lens barrel of the Sony HX90v camera. This means that the camera points with the lens to the exact center of the coin. If another camera is used, place it's lens in the middel of the hole. Print Settings Printer: Da Vinci 1.0 Pro Rafts: Yes Supports: No Resolution: 0.2 Infill: 25% Notes: I use ABS for strength. Temperature settings 225C for the nozzle and 90C for the bed. Post-Printing After printing, make sure the adapter hole is exactly round and 6mm diameter. If this is not the case, the adapters won't fit. Use a 6mm drill to finish the hole perfectly. This can be done manualy, with the drill in the hand, without a machine. How I Designed This Minimum focusing distance The get the biggest image on the sensor of the camera, the camera must make a photo with the subject as close as possible to the lens, this is called the minimum focusing distance. Exact centre of the lens To make the best photo of a coin, you need to make the photo at a perfect angle of 90 degrees with the center of the lens exactly above the center of the coin. Free from the background To create the best possible photo, the coin must be separated from it's background. If you lay the coin on a flat surface, there will be shadow and we don't want that. Therefore the coin is placed on a special adapter to separate it about 30mm from the background. Project: Small Things Photography, like coins of medallions. Objectives The objective of this project is to learn that there are a lot of things to consider when making product shots of small things. You can use a cheap camera, but must always be aware of the physical elements such as how the light hits the object and has the ability to set the object free from it's background, what the minimum focusing distance of the used lens is, and how to get the subject as big as possible on the photo, resulting in the best picture quality. Searching for the minimum focussing distance before drawing the holder in 123Ddesign Audiences This project is great for novice photography students, as well as physics students, studying light breaking through lenses. Preparation Make sure you have the following items at hand: The Coin Photography Stand A Coin (preferably more coins) A Compact Camera (preferably the Sony HX90) A Memory card for the camera A Room with enough light (near a window for example) If you have a smartphone which can be connected to the camera as a smart remote, this can be handy. Though for this project it is not needed. Steps Place the stand near a window so there is enough light. place the camera on top of the holder with the lens mounted through the opening at the top of the holder. Insert the appropriate adapter (10mm or 15mm top surface) in the mounting hole. Place a coin on top of the adapter. Turn the camera on. If you have a smartphone to use as a remote, connect it now. Set the correct values in the Manual mode of the camera. The values are: ISO 100, Aperture F/3.5, Shutter speed to suit your lighting condition. With the lens all the way to the wide-angle possition, focus on the coin and make the photo. Congratulations, You made the photo, but now try to explain the physics. Results Why is this photo so nice and what happens if the coin is placed without the adapter? Do you see the noticeable difference in the quality of the photo when the coin is placed on the adapter, and when it's not? Try to see what happens when you shine a little light right under the coin while maintaining the same exposure settings. Can you see you now don't have a background anymore (assuming you did print the stand in White plastic). Try looking at the results as if you are the manager of a jewelry store. Would you like to have photographs like you should have made before you knew this, or do you like it more the way you learned now? Keep this secret !!! There are a lot of tools out there in the shops to make great macro photography. You can buy stands and packshot creators for as high as 10.000 Euro's or Dollars. This coin stand is based on simple physics and costs around 3 Euro's of plastic and electricity. Use it and be sure not to say a word to your customers buying your expensive photo's of their coins :-) Enjoy !!!
With this file you will be able to print Coin Photography Stand with your 3D printer. Click on the button and save the file on your computer to work, edit or customize your design. You can also find more 3D designs for printers on Coin Photography Stand.