Colbert Collision - Football Helmets and Concussions
thingiverse
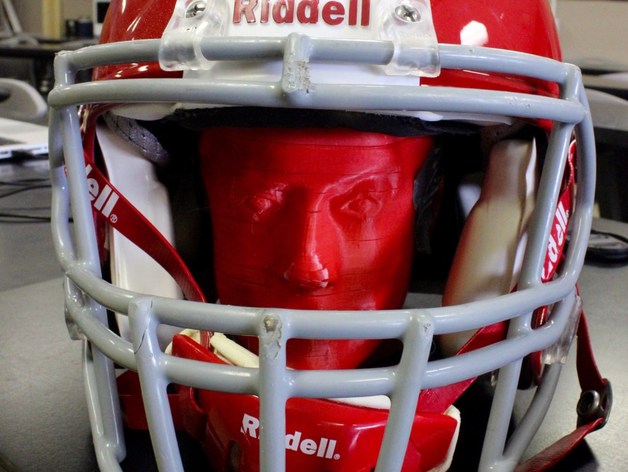
This was the final project of a couple students in my Electronics class. They investigated how the amount of air pumped into a football helmet might affect the force felt by the brain during a collision. We chose the head of Stephen Colbert because it made us laugh. It only took a little editing in Tinkercad to allow it to accommodate the sensor. In retrospect this was not the best head to print as Colbert’s hair when 3D printed doesn’t squish the way real hair would. For this project it worked out fine, but for a side impact would not be ideal. I'll let Jack explain what he and Ian did for their project below. Print Settings Printer Brand: MakerBot Printer: MakerBot Replicator Rafts: No Supports: No Resolution: 0.3 Notes: This is a pretty big print. You may have to scale it a bit to make it fit the helmet you are using. If you print in ABS it will warp. At least ours did. Standards NGSS Overview and Background In this project students will investigate factors that contribute to the occurrence of concussions in sports. The focus will be on sports that they or their friends participate in. Right now there is a lot of doom and gloom as well as a fair share of denial when it comes to the reporting on the risks of traumatic brain injury and participation in sports. The best way students can be enabled to come to their own conclusions is to work to understand the science for themselves so they can make truly informed decisions. Objectives Students will be able to extract meaning from peer reviewed literature Students will be able to collaborate to design and conduct an experiment Students will be able to summarize and present results Audiences This project is aimed at a high school physics students. However, some aspects could be adapted to other classes or levels. I could see simplified questions being investigated by students in a physical science class. Subjects Primarily Physics Anatomy or Biology Skills/Standards NGSS Scientific and Engineering Practices Developing and using models Analyzing and interpreting data Using mathematical and computational thinking NGSS Crosscutting Concepts Patterns - Analyzing data to determine rates of change. In this case, the constant rate of change in velocity and the varying rate of change in position. Scale, proportion, and quantity - A small acceleration can result in very large velocities given enough time. NGSS Core Idea PS2.A: Forces and Motion Lesson Plan and Activity Distribute articles related to concussions and TBI found from credible, but not peer reviewed, internet based sources. Students assigned to read the articles. Lead in class discussion of the articles. Focusing on details/keywords that might be helpful when looking for relevant peer reviewed journal articles. As a class search for and find two - three relevant articles. Read one of these a week and spend at least one class period dissecting each article. What was the driving question? What were the independent and dependent variables? How was the experiment conducted? What do the graphs/figures show? What are the conclusions? Are they fully supported by the data presented? Students given the project handout. PDF in the files section. Students select a relevent article from a peer reviewed journal Students summarizes their articles Students, working in groups, bring their articles together in a coherent synthesis Student groups share the conclusions of their syntheses with the class Student groups design experiments building on the base provided by their syntheses Student groups carry out experiments Duration This will take many class periods spread out over some time: I would recommend one or two class periods discussing how to read popular articles An additional three on reading and extracting meaning from peer reviewed articles. These should be spaced out, no more than one a week. One class period for student groups to discuss their article summaries and begin work on their synthesis. One class period designing an experiment Two to three class periods conducting their experiments References Acceleration-Deceleration Sport-Related Concussion: The Gravity of It All Where g-force and grey matter meet Football Physics: The Anatomy of a Hit Continued Jack explains their project I really like this project because it gave my students a chance to investigate something of interest to them that is also very topical. As football players, this was of direct interest to them and something with wider potential impact as well. When they finished it I immediately wanted to share this project with other physics teachers. It would be cool to see other teachers working with their own students to do similar projects. However, whenever I try to show teachers how to use Arduinos to collect data, their eyes start glaze over as soon as the code hits the screen. I decided to attempt to meet my physics colleagues where they are rather than where I am. Most of the physics teachers I know have access to either Vernier or Pasco interfaces and sensors. At our school we have Vernier, so that’s what I used. I assume you could do something very similar with Pasco equipment. Vernier sells a cable you can use to make your own analog probeware. Assemble your Sensor For this project Jack and Ian used a +-250 g accelerometer from SparkFun Electronics. This is an analog sensor making it very easy to use. The Sensor - Ignore the wire colors they do not match the BTA cable* This sensor was attached to an Analog BTA Cable. The Black Wire goes to GND, the Orange Wire is +5V so goes to the VCC, and the Red Wire attaches to OUT. The other wires were not used. All you need to do is solder these three wires to the sensor and plug it into a LabQuest or LabPro. This is something pretty much anybody can do. However, if you’ve never soldered before I recommend this tutorial from SparkFun Electronics. Using the Sensor Since our accelerometer is an analog sensor we can read it easily with a Vernier LabQuest treating it as a voltage meter. Nerd Alert: If you need to know, basically we are using it as a voltage comparator. On the LabQuest (or LabPro) you need to identify your sensor. Select Voltage - Raw Voltage (0 – 5V). For our sensor, zero volts corresponds to -250 g’s, five volts with 250 g’s, and at 2.5 V we have zero g’s. In reality the 5 V wire gave me 5.2 V (the USB standard is 5 V but can be up to 5.25 V or as low as 4.4 V), so zero g’s was at 2.6 V and 250 g’s would be 5.2 V. Since the output from this sensor is linear, I used the LoggerPro program to convert the voltage readings to g’s by creating a “New Calculated Column”. I ended up with a slope of (500 g’s)/(5.2 V) and a y-intercept of -250 g’s. Next you'll need to set up "Data Collection" from the Experiment menu. In the "Collection" tab you'll want to dramatically increase the sampling rate. The first generation LabQuest lets you collect 100,000 samples/second. So that's what I recommend. I also decreased the duration to 0.2 s. This will necessitate setting up Triggering. You can see my settings below. You may find you need to edit them slightly for best results. Results and Final Words The graph of the calculated column resulted in a graph of force vs. time. In the example graph below, the hit lasted for about 0.003 s and reached a peak of just over 63 g’s. Based on readings from the literature, a hit of this magnitude and duration would be unlikely to cause a concussion. With the growth of the Maker Movement there are now a lot of cheap sensors out there that can be interfaced in exactly the same way. Adafruit makes a 200g 3-axis accelerometer that looks promising, but you’d need 3 Vernier cables to read all thee axises simultaneously (also true with Vernier’s 3-Axis Accelerometer). I’ve also been thinking about using some flexiforce pressure sensors to measure the force/area actually applied to the head in a collision. This would be a simple modification of this lesson on the Vernier site.
With this file you will be able to print Colbert Collision - Football Helmets and Concussions with your 3D printer. Click on the button and save the file on your computer to work, edit or customize your design. You can also find more 3D designs for printers on Colbert Collision - Football Helmets and Concussions.