Color Coded Filament Path / Filament Buffer enhancement
prusaprinters
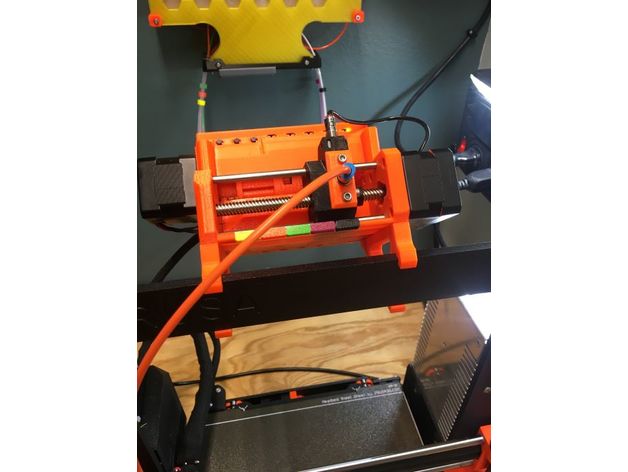
<p>Color coding the filament path is simple and with just a glance you can see which filament is being extruded. This saves time and helps prevent printing mistakes.</p> <h3>History</h3> <p>One of the issues I have always seen is filament pushing through the coiling device back to the spool. The Filament Buffer is a much better coiling solution but some filaments seem to always push back to the spool without coiling.</p> <h3>Solution</h3> <p>I created a small sleeve with a slightly twisted path that adds a very small amount of resistance. This helps stop the filament from pushing back through to the spool and it coils in the buffer like it should.</p> <h3>Color Coding</h3> <p>I decided to use different colors for printing the five resistor as an identifier. I created a sleeve that slide over the bowden tube between the buffer and MMU to identify the tube and put a second sleeve on the tube next to the MMU as well.</p> <p>The color coding made loading filaments easier but the MMU sleeves were only visible from the back so I created small panels that attach to the MMU.</p> <h3>Final Results</h3> <ul> <li>The Resistor encourages coiling in the buffer and is a significant improvement</li> <li>The color coding at the top and bottom of the buffer assist in filament loading</li> <li>The color coding from Spool to Extruder makes it visually clear which filament goes to which extruder</li> </ul> <h3>Summary</h3> <p>If you are using the Filament Buffer and have experienced the filament pushing through the buffer then you will appreciate the difference the Resistor makes. If you don't want to use the Resistor, use a sleeve instead.</p> <p>Working with five filaments at once requires careful coordination and color coding the filament helps a lot.</p> <h3>Print instructions</h3><p><strong>Printer Settings -></strong> Original Prusa i3 MK3S MMU2S Single</p> <p><strong>Print Settings -></strong> 0.20mm - Quality MK3<br/> <strong>Perimeters:</strong> 3<br/> <strong>Solid layers - Top:</strong> 5 <strong>Bottom</strong> 4<br/> <strong>Fill density:</strong> 15%<br/> <strong>Fill pattern:</strong> Gyroid<br/> <strong>Top/bottom fill pattern:</strong> Rectilinear<br/> <strong>Rafts:</strong> No<br/> <strong>Supports:</strong> No</p> <p><strong>Filament Type -></strong> Generic PET (modified)<br/> <strong>First Layer:</strong> 232<br/> <strong>Other Layers:</strong> 234</p> <h3>Installation</h3> <ul> <li><p>Put the 10mm spacer panel on the MMU and push it all the way to the left. Repeat for all five filament colors.<img alt="" src="https://cdn.thingiverse.com/renders/98/68/11/fa/8c/e2d7dd770402dd7a617d192dec722d08_preview_featured.JPG"/></p> </li> <li><p>Remove the short feeder tube and work the tube through the Resistor about 25mm (1 inch). Replace the feeder tube and secure with buffer screw.<img alt="" src="https://cdn.thingiverse.com/renders/54/6b/56/50/79/770d4dca100c00bfc206dd84e452e6f8_preview_featured.JPG"/></p> </li> <li><p>Remove the tube from the printer side of the filament buffer that matches, slide two sleeves on it, and return it to it's place. <img alt="" src="https://cdn.thingiverse.com/renders/31/d7/11/7f/5b/c774f9f4c60444799de2928a24884401_preview_featured.jpg"/><br/> Slide one of the sleeves to the MMU side.<img alt="" src="https://cdn.thingiverse.com/renders/f1/ea/44/a9/38/f2a65b84e163d9e42c44facb4cd25cc1_preview_featured.jpg"/></p> </li> </ul> <p>Visual the Path<br/> <img alt="" src="https://cdn.thingiverse.com/renders/1c/ce/e5/44/f4/53b172b47f15d3ecc304c33d48bc31e3_preview_featured.jpg"/></p>
With this file you will be able to print Color Coded Filament Path / Filament Buffer enhancement with your 3D printer. Click on the button and save the file on your computer to work, edit or customize your design. You can also find more 3D designs for printers on Color Coded Filament Path / Filament Buffer enhancement.