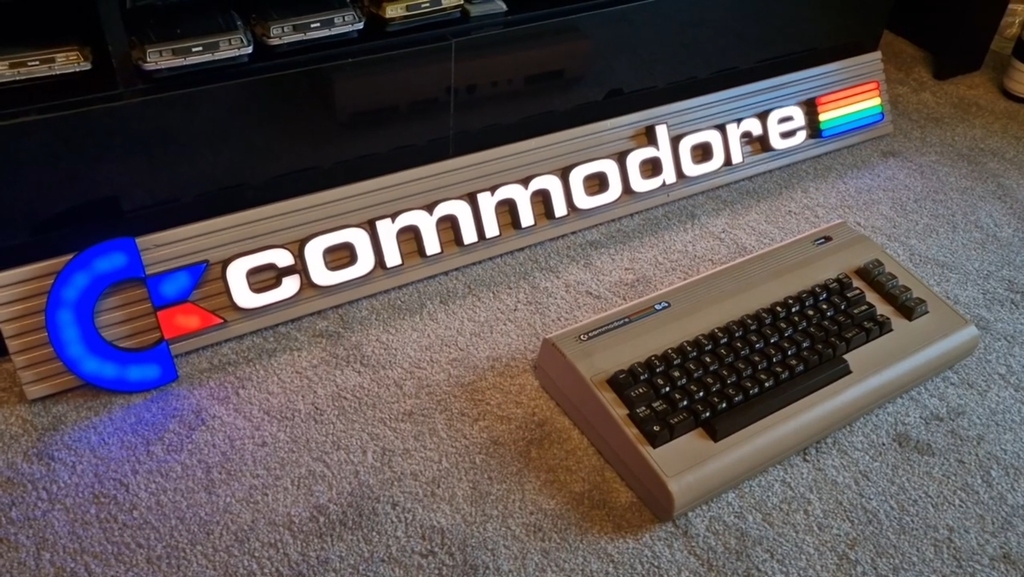
Commodore LED Logo
thingiverse
This is an illuminated Commodore sign using WS2812B addressable LED's. My choice of controller for this project is an ESP32 using the WLED software. Alternatively you could use any other controller such and Arduino, Arduino Nano etc. I've stuck with the ESP32, as it's so easy to use and customize. The Chicken Lips Logo and the Colour Bars both have passthrough holes for feeding the continuing wires to the next LED's. However, there are no holes in the bases of these models as that will be down to you where you want to feed the wires out of the back of your models. I'll not lie, this project is a pain to complete. It's taken me roughly an hour to complete the soldering for each letter. An hour and a half each for the letter 'M's and well over two hours for the colour bars. The Chicken Lips logo was the easiest, as there's plenty of space. The main issue is having a red hot soldering iron in a tight spot next to PLA! It's a tough and painfully slow process. But it's worth it :) Although it a long job, please don't rush. Take your time planning out where your LED's meet up and in what order. Also take in to consideration the wire joints between split LED's It's easier to pre-solder your pads and wires to one side before placing in to the model. The less time the soldering iron is near the model the better. Once all your LED's are in place and tested, you may need to use your clippers to take a small notch out of the white inner piece model (Depending on where your wires obstruct below) Test fit your white insert before applying any hot glue. When all is good, add just one drop of hot glue to either side of the base model in the edge before sliding in your inner piece. Don't add the glue to the inner piece. You will make an awful mess and it will probably get stuck before its firmly depressed in place. Once all your letters are done, place the on a board of your choice. I picked a piece of decking that matched the lines on the Commodore 64. Place all your character out and mark the exit spots for the wires on the board with a pencil or sharpie. Drill those points through with a 5mm drill bit. For cable management on the back, I decide to link up all the holes with a Router - leading all the way back to the ESP32. You may have to find your own STL for your chosen controller. There's loads out there. Place each character in place and feed the wires through the holes. Hot glue each letter in place preferably using a shim to keep everything square and equally spaced. I printed my own, but it may not be to your requirements depending on the board size you're using. Power: There should be roughly 129 LED's used in total. At 5V, that requires a good bit of current. I bought a 5V 6Amp PSU from Amazon for about £10. This should be ample, even if all are set to white on full brightness, I added a 1000uF Cap over the main rail to smooth out the draw. Highly recommended that you do this. Have a decent gauge Positive / Negative wire running end to end for your models to feed from, and simply link each data-out of every model, to the data-in of the next. Program or setup your controller and off you go. The decking board BTW, I sanded, undercoated and sprayed with the same pantone colour match as the Breadbin C64. The pantone number is RAL1019 Grey/Beige I had to order mine from Germany, but I'm sure many other places will stock it. This project took me about two months to complete around work and home commitments. Enjoy. Video Here: https://youtu.be/rPWW4pzoojA Paul. EDIT: Here are the LED counts for each display. It should make it a bit easier to program each display knowing this: LED's are numbered 0 to 129 (130 LED's total) Top Lip 0 - 2 Red Bottom Lip 2 -4 Chicken Lips 'C' 4 - 15 C 15 - 23 O 23 - 31 M 31 - 42 M 42 - 53 O 53 - 61 D 61 - 71 O 71 - 79 R 79 -84 E 84 - 94 COLOUR BAR1 (TOP) 94 - 101 COLOUR BAR2 101 - 108 COLOUR BAR3 108 - 115 COLOUR BAR4 115 - 122 COLOUR BAR5 122 - 129
With this file you will be able to print Commodore LED Logo with your 3D printer. Click on the button and save the file on your computer to work, edit or customize your design. You can also find more 3D designs for printers on Commodore LED Logo.
