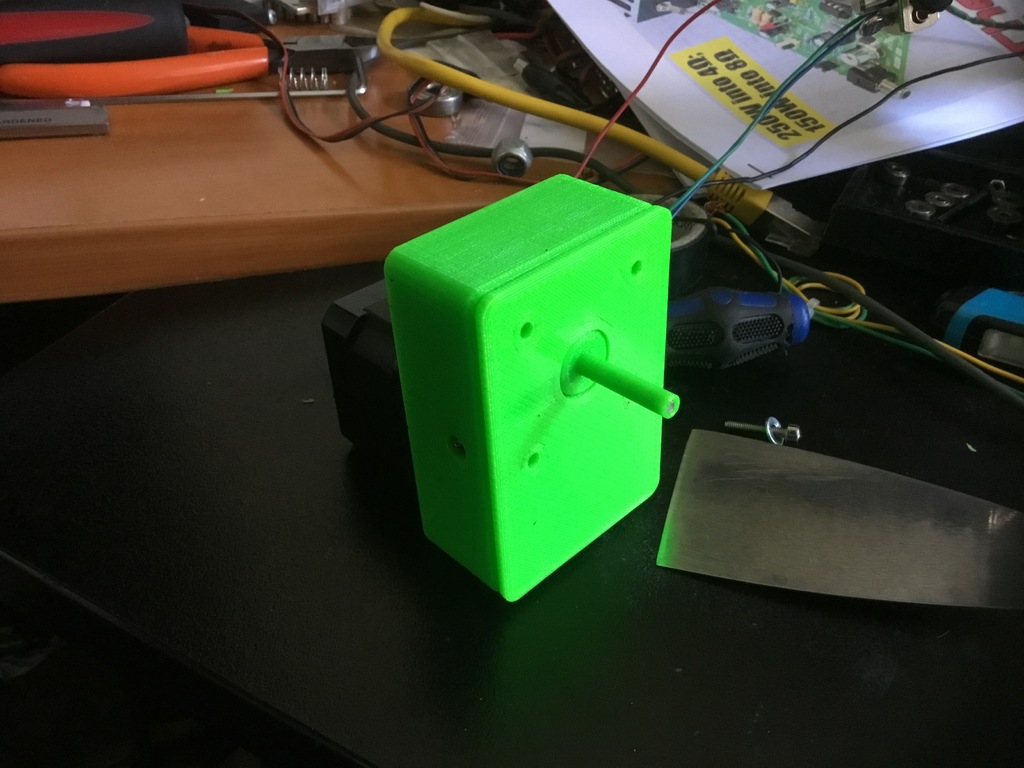
Compact Nema 17 Gearbox 6.5 to 1 Ratio
prusaprinters
<p>BudgeProjects had a good concept but the design needed cleaning up instead of modifying his files, I rebuilt the gearbox from the ground up.</p> <p>Now to correct his gear ratio is not 16 to 1, it is 7.5 to 1, gearboxes like this are calculated using the following simple equation (Driven Gear / Driving Gear)<em>Number of stages. So therefore his gearbox is calculated as (30/12)</em>3 = 7.5</p> <p>With my gearbox I have a ratio of 6.5 to 1, as my driven gear is only 26 teeth. I have also used herringbone gears as they are quieter and a more positive engagement. I use different bearings, on the main output side I have used 623 bearings.</p> <p>BOM</p> <p>3D Printed Parts</p> <p>1 x Nema 17 with 21mm shaft</p> <p>3 x 623 Flange Bearings</p> <p>1 x 623 Bearing</p> <p>1 x 6802 Bearing</p> <p>6 x M3 x 6mm Socket Cap Screws</p> <p>1 x M3 x 50mm Socket Cap Screw</p> <p>4 x M3 Nuts</p> <p>My Gearbox design is much more compact than BudgeProjects, apart from a different gear ratio I have much improved on his design and the looks, the use of the nuts is more hidden and the general appearance is better.</p> <p>Although my output shaft is 3D printed it has a M3 Screw core for strength.</p> <p>I currently have the gearbox on the printer, once printed I'll upload some pictures of the assembly and how to assemble the gearbox.</p> <p>Update: I have changed the gearbox as I made a measurement error which meant the M3 axle was unable to be fitted, and a few other minor changes, but I now have an increased gear ratio too.</p> <p>(31/12)*3=7.75 So now the gearbox is a 7.75 to 1</p> <p>Update 2: After assembly, and checking operation, I put a PTFE grease lubricant over all the gears and ran the motor back a forth multiple times, this worked all the gears into place and got it working, initial operation of the gearbox would need to be done with the lid off to get the lubricant on all gears and get the gears settled down and into position, put lubricant on the inside of the lid to allow the gears to slide on the surface, as the lid is also used to constrain the gear position, continue running the gearbox in both direction multiple times until the operation is quiet, and then it is ready for use.</p> <h3>Print Settings</h3> <p><strong>Printer:</strong></p> <p>CR-10</p> <p class="detail-setting rafts"><strong>Rafts: </strong> <div><p>Yes</p></div> <p><strong>Supports:</strong></p> <p>No</p> <p class="detail-setting resolution"><strong>Resolution: </strong> <div><p>0.2mm</p></div> <p><strong>Infill:</strong></p> <p>30%</p> <p><strong>Filament:</strong></p> Polymaker PETG <p>Green</p> <p><br/> <p class="detail-setting notes"><strong>Notes: </strong></p> </p><div><p>Please take important note, all parts have been designed with a 0.3mm offset between working parts or parts that fit together, so please ensure you turn off in your slicing software this compensation setting, in Simplify 3D this is known as Horizontal Size Compensation.</p></div> Custom Section ============== <p><strong>Assembly Instructions</strong></p> <div><p>Print All parts and get bearings and screw required</p></div> <p class="detail-image"><img src="https://cdn.thingiverse.com/assets/b2/39/61/15/06/IMG_0181.jpeg"/></p> <div><p>Press fit 623 Flange bearing into Gearbox Body</p></div> <p class="detail-image"><img src="https://cdn.thingiverse.com/assets/74/82/d0/58/32/IMG_0182.jpeg"/></p> <div><p>Press fit 6802 Bearing in to gearbox lid</p></div> <p class="detail-image"><img src="https://cdn.thingiverse.com/assets/d1/dc/f5/34/6c/IMG_0183.jpeg"/></p> <div><p>Attached Gearbox body to stepper motor using the M3 x 6 screws</p></div> <p class="detail-image"><img src="https://cdn.thingiverse.com/assets/e3/a9/fa/e7/b0/IMG_0184.jpeg"/></p> <div><p>Press fit Stepper gear onto stepper shaft ensure you line up the flat on the stepper gear with the flat on the shaft</p> Ensure all gears get a film of lubricating grease to help with initial operation <p>Press fit the 623 flange bearing into the first stage gear</p> <p>Press fit the 623 bearing into the other side of the first stage gear</p> <p>Fit the first stage gear into the gearbox you may need to rotate it to get the herringbone gears to mesh</p> <p>Fit the second stage gear to the gearbox using the stepper shaft as a lay shaft for the gear, you may need to turn it to fit and mesh with the first stage gear</p> <p>Press fit a 623 Flange bearing to the output gear and shaft</p> <p>Fit the output gear and shaft to the gearbox, you may need to twist the gear slightly to align the teeth.</p> <p>Fit the M3 x 50mm screw to the gearbox aligning and securing the gears on the right and strengthening the output shaft, do up screw until it is just under the top surface of the output shaft the screw must be firm on the gears not tight still allowing the gears to freely move. Without being sloppy</p> <p>Press fit 4 M3 nuts into the lid, this is needed so it can be attached to what ever the gearbox is being used for</p> <p>Press the lid onto the gearbox body, is a press fit and should go together with a little pressure</p> <p>Put the remaining 2 M3 x 6mm screws in to ensure the gearbox stays together</p> <p>Your gearbox is now assembled just check its operation to make sure its moving easily and add any oil if needed.</p> </div></p></p> Category: 3D Printer Parts
With this file you will be able to print Compact Nema 17 Gearbox 6.5 to 1 Ratio with your 3D printer. Click on the button and save the file on your computer to work, edit or customize your design. You can also find more 3D designs for printers on Compact Nema 17 Gearbox 6.5 to 1 Ratio.
