Compact Orbiter Extruder And Filament Sensor for Prusa MK3S and Mosquito Hotend
prusaprinters
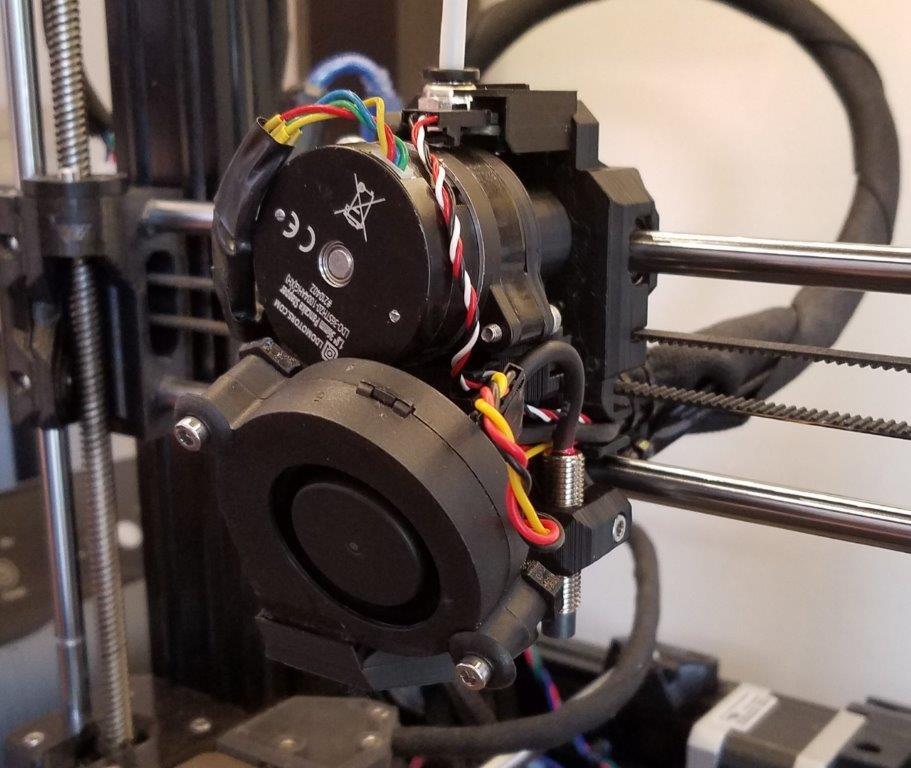
<p>This is a quick remix of my previous Mosquito hotend extruder design to allow for mounting a more compact Orbiter housing using the parts from the Orbiter v1.5. I used one of the upper mounting holes in the Bear X-Carriage to mount the Prusa IR filament sensor from the MK3S. I have been using the filament sensor for a couple weeks now and it works well even with flexible filaments. It adds less than 5g to the total extruder weight of 190g and requires no custom parts other than half of a pen spring.</p><p>This design had a few goals:</p><ul><li>Invert the gears to make the extruder housing closer to the x-axis</li><li>Make a stricter filament path for better flexible filament compatibility</li><li>Add an easily maintained and lightweight (<5g) filament sensor. This should work with the MMU2S as it triggers when filament is loaded between the gears.</li><li>Works with stock Prusa firmware</li><li>Easily FDM printable (only the housing needs supports on the build plate)</li><li>Use the upcoming Orbiter 2.0 mounting holes to hopefully be a drop-in replacement when it is available, these were copied from the F2.85 version of the Orbiter</li></ul><p>Assembly:</p><ol><li>The assembly is pretty straight forward, start by printing all the parts in a good filament, I use PC-ABS by protopasta for its lightness, stiffness and temp resistance but good PETG should work too. Pick which housing you want (heatset nut or square nut for the latch) and print it in the uploaded orientation with supports on the build plate only.</li><li>Disassemble your existing Orbiter housing. You will need all the hardware to reuse on the new housing including the idler latch.</li><li>Clean up the new housing by drilling out the necessary screw and latch holes and clearing the filament path with a 2mm or 5/64" drill bit.</li><li>Assemble the new housing by adding the front bearing first from the side then sliding in the gear and spider shaft assembly from the back. Note the gear indents on the inside to reduce any damage to the housing. You also need to invert the idler gear on the latch.</li><li>Re-use the brass tube for the idler latch dowel, this may be tricky to insert without clearing out the hole or bending the tube</li><li>Use the 22.5mm PTFE cutter to prepare a tube for the extruder. You should ease the opening of the top tube with a blade to allow easier for filament entry.</li><li>Begin installing the extruder back with a 12mm screw in the center from behind the carriage. This is the only hex nut used in the extruder besides the print fan support.</li><li>You can use two 50mm screws to keep the back aligned while you install the pinda probe, mosquito hotend and 40mm extruder fan. Make sure you are carefully routing wires during this step.</li><li>Insert the extruder front and use the previous 50mm screws to tighten the whole assembly. You can now complete mounting the hotend and 40mm extruder fan.</li><li>Mount the Orbiter housing on top using two 12mm screws but make sure you insert the PTFE tube all the way first. If you can source button head screws your latch will open further down.</li><li>You will need a shorter spring and/or thumbscrew for the latch because the original one will hit the trap nut screw on the X Motor mount (see last picture)</li><li>This is a good time to preheat and test the extruder to make sure everything is moving smoothly and there is little resistance on the extruder assembly.</li><li>Mount the fan duct and support followed by the print fan.</li><li>Assemble the Filament sensor by using half of a regular pen spring and a 12mm M3 screw to mount it to the Bear carriage.</li><li>Plug in the filament sensor with the cable upside down. Take your time to make sure the sensor is reading filament loads using the 'Sensor Info' option in the Support section of the printer. You may need to extend or trim the filament sensor arm depending on your printer's tolerances. The length I used and uploaded here works for me with soft filaments like Ninjaflex.</li><li>Enjoy!</li></ol><p>A few notes:</p><ul><li>I am not a designer and I make designs through TinkerCAD so I don't have any source files to share, but feel free to use these designs to inspire better ones in more capable software</li><li>You must use the Bear X-Carriage for this design</li><li>You will need a shorter spring and/or thumbscrew because the original one will hit the trap nut screw on the X Motor mount</li><li>There are two versions of the housing with different thumbscrew nuts, one with room for a square nut (normal file) and the other has a heatset brass nut hole (heatset file)</li><li>Make sure to pre-thread everything and clean out holes with a drill before assembly. All screws used are M3 unless otherwise stated. All nuts used are M3 squares unless otherwise stated.</li><li>The +1mm fan duct is for use with longer non-standard m6 nozzles</li><li>Use the following commands to use with stock Prusa firmware: M92 E690, M500</li><li>You may need to adjust the extruder motor current using M907 but that depends on your motor model</li></ul><p>Category: 3D Printer Extruders</p>
With this file you will be able to print Compact Orbiter Extruder And Filament Sensor for Prusa MK3S and Mosquito Hotend with your 3D printer. Click on the button and save the file on your computer to work, edit or customize your design. You can also find more 3D designs for printers on Compact Orbiter Extruder And Filament Sensor for Prusa MK3S and Mosquito Hotend.