Compact Temperature Controller with Completely Printed Case
thingiverse
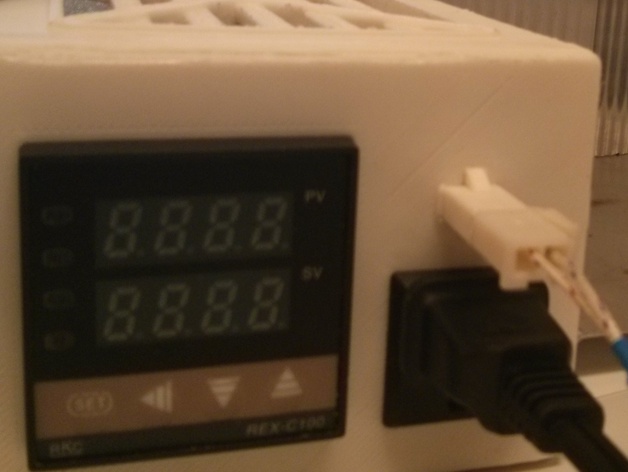
An update to my previous open source temperature controller case has been made available. This design is smaller and includes a spot to mount a standard solid state relay. To ensure that the components, especially the relay, do not overheat, there are ventilation grills on the top and bottom, and the SSR mounts to the side with a hole for a heatsink on the side of the case. The front Case is the complete front panel and sides, with smaller grills. I had trouble printing the grills, so a new part was created:Front Faceplate and Case Sides which snap fit together to form the front of the case, and make it easier to assemble. They have very tight tolerances, and are designed to be a permanent snap fit, but worked well in white PLA after a bit of filing on the lip of the case sides. Autodesk Inventor files used to create this design are included, as well as Blank Faceplate which only has the hole for the PID controller, and Plug Only Faceplate which includes the hole for the power plug socket, but not the temperature probe. Instructions 1) Purchase a standard PID controller, SSR, and temperature probe of your choice. I used these: PID Controller, SSR, and Thermocouple (Amazon.ca). You will also need a fused plug for the back, a socket for the front, and the plug for the temperature probe. 2) Print the parts, either case sides and front faceplate, or case front. Don't snap the front onto the body if you print the faceplate. The front panel is designed to snap fit into the case very tightly, while the back panel screws in. You will need some compatible screws and/or bolts to assemble the system. The SSR nut holder is designed to capture a nut for a 1" x 8-32 countersunk bolt, which then holds it onto the side of the case. 3) Install the PID controller and other parts and wire them up. I recommend using automotive crimp connectors with blade quick disconnects for easy assembly, but soldering is fine too. Make sure to match the wire gauge you use to the current rating of the device you will be controlling! 4) Snap the front panel onto the body and connect all of the wires, then screw the back panel on. 5) Plug it in and (cross your fingers) Enjoy! I haven't added feet yet, but I may do so in the future. I would recommend printing some feet from ninjaflex or other rubber filament to prevent slipping.
With this file you will be able to print Compact Temperature Controller with Completely Printed Case with your 3D printer. Click on the button and save the file on your computer to work, edit or customize your design. You can also find more 3D designs for printers on Compact Temperature Controller with Completely Printed Case.