Compact Tourbillon mechanism
prusaprinters
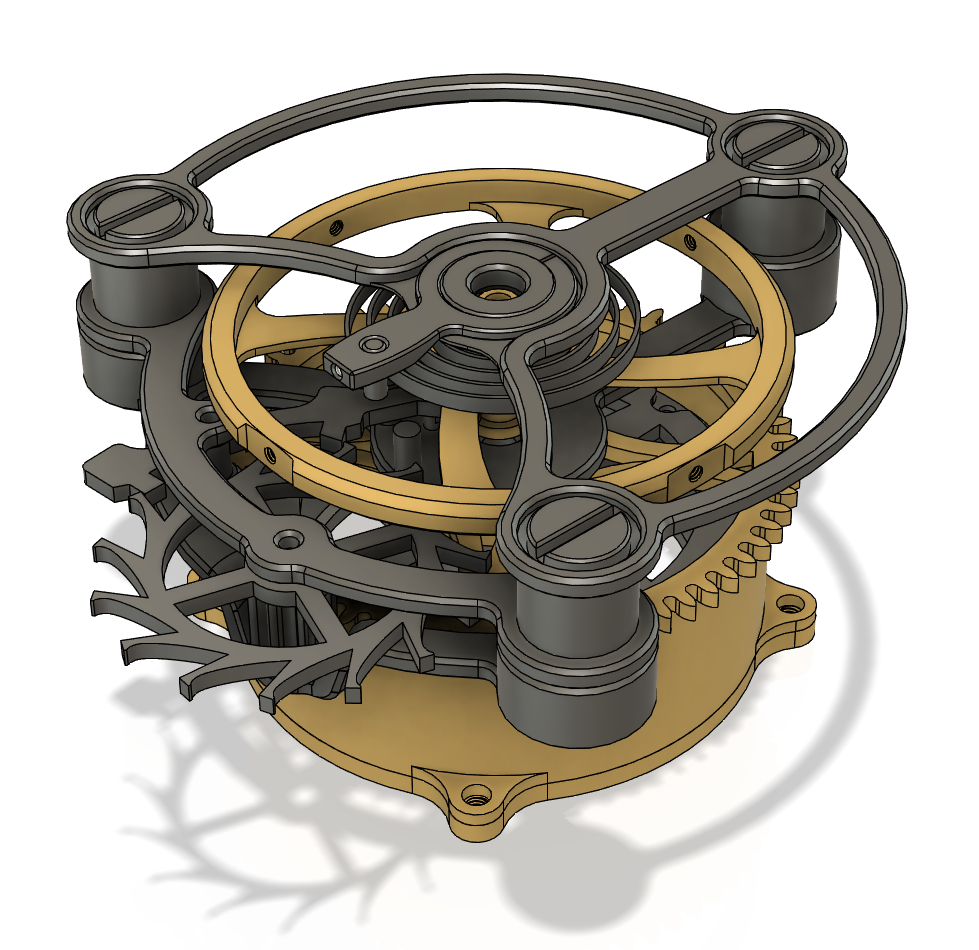
<p>(Original Thingiverse link: https://www.thingiverse.com/thing:4226922)</p><p>Small and compact windup tourbillon design based on the Blancpain Tourbillon Carrousel, less than a 100mm at its widest. I had to go through several design iterations and prototypes before i landed on a result i was happy with posting online.<br>It lasts about 3 minutes on 1 wind</p><figure class="media"><oembed url="https://www.youtube.com/watch?v=zj2x6IsGiTs"></oembed></figure><p>Note: Mainspring must not be printed in PLA. PETG or ABS is preferred.<br>Parts may need to be reoriented before printing.</p><p>Tools and parts required:</p><p>A printer well calibrated for accuracy<br>0.25MM nozzle<br>Needle or diamond files<br>Cutting broaches, 1.5 to 3mm in size ( [Example](https://www.amazon.com/Cutting-broach-set-1-2-3-0mm/dp/B003LS2H7C/ref=sr_1_112?qid=1584415456&sr=8-112&srs=8181165011) )<br>1x 688(ZZ) bearing (8x16x5)<br>2x MR63ZZ bearing (6x3x2.5)<br>5x M3 x 4MM screws (correct length is critical), preferably din 98 cheese head screws<br>4x M2 screws, max 8MM length<br>2MM metal rod<br>3MM metal rod<br>(optional) 1.6M x 4MM screw</p><p>Assembly:</p><p>Escapement:<br>Cut 2 pieces of the 2MM rod to a length of 17.5MM and 10.5MM (+0 -1 tolerance).<br>Press the 17.5MM rod into the escape wheel along with a bearing spacer.<br>Press the 10.5MM rod into the escape pallet along with a bearing spacer.<br>This should be an interference fit, use cutting broach if necessary.<br>Make sure that the metal rod sticks out by 2-2.5mm on both sides.</p><p>Frame:<br>Use cutting broach to enlarge the 2MM holes for the escapement on the mid and bottom frame til a running fit is achieved.<br>Press the 6MM bearings into their respective holes in the tourbillon frame.<br>Press the 16MM bearing into the stud on the bottom of the frame.<br>fitting a 1.6M screw to the regulator is optional, a light press fit with the hairspring stud works just as well.</p><p>Balance Wheel:<br>cut a piece of 3MM rod to a length of 22MM and press it into the balance wheel along with the balance wheel arbor/staff.<br>It is critical that the small notches on the the wheel and arbor/staff are lined up.<img class="image_resized" style="width:100%;" src="https://media.printables.com/media/prints/179150/rich_content/9d197027-63c0-4190-a113-51dc2f231a67/large_display_skjermbilde3.png#%7B%22uuid%22%3A%224c3d7ee4-b94f-4d24-a65c-11f820e052ff%22%2C%22w%22%3A1024%2C%22h%22%3A654%7D"><br>fit the hairspring to the small hexagonal part on the balance wheel, making sure the cutout. and notch are lined up to ensure orientation.</p><figure class="image image_resized" style="width:100%;"><img src="https://media.printables.com/media/prints/179150/rich_content/9815b4d6-feac-4de9-a3cb-8e7d151f5b75/large_display_skjermbilde4.png#%7B%22uuid%22%3A%22ec37478d-18f9-4a8f-be7d-011858498beb%22%2C%22w%22%3A1024%2C%22h%22%3A694%7D"></figure><p>Rejoice! the difficult part of the assembly is now over! and with it i will leave the rest of the assembly up to you.</p>
With this file you will be able to print Compact Tourbillon mechanism with your 3D printer. Click on the button and save the file on your computer to work, edit or customize your design. You can also find more 3D designs for printers on Compact Tourbillon mechanism.