Compact Trifan Ender 3 / Pro Extruder Housing
thingiverse
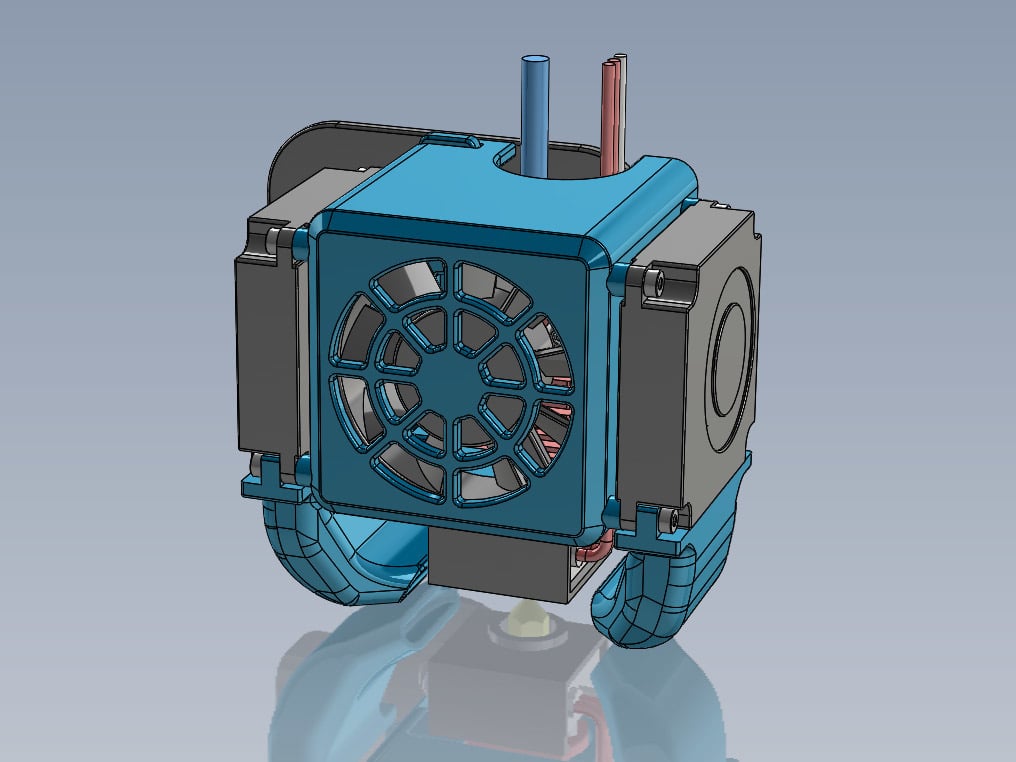
I made this design and have been using it for over a year now. I could have uploaded it sooner but there were so many other options already, that I didn't think another one would matter much. However, this one has been working so well, I thought I would share it anyway. This mod will fit the Ender-3 and Ender-3 Pro. It was pointed out by a fellow Thingverse contributor that this design will not fit the newer Ender3 V2, due to different extruder housing screw mounting positions. If one was to re-drill the V2 Backing Plate using the Ender3/Pro extruder housing mounting positions, it should work fine. My main reason for designing this was to allow a better view of the nozzle while printing, and have true cooling fan isolation for printing materials like ABS and Polycarbonate. Also, the lightest possible and compact three fan system was part of the design criteria. The standard metal extruder housing is mounted so low that it is very difficult to see what is happening at the extruder nozzle. Also, the standard extruder housing, as well as most other replacement designs, do not isolate the extruder fan from the printed part. Even if the cooling fan ducts are turned off in the software, the extruder fan will usually still blow air out the bottom of the housing and on to the part. By isolating the extruder fan exhaust from reaching the part, vastly superior results are achieved for any filament that requires no cooling while being printed. This Compact Trifan Extruder Housing Uses both stock extruder fans and adds one additional stock side mounted 4010 cooling fan. Slightly longer screws are required for the each cooling fan, due to more thread engagement required in the plastic mounting holes. Not only is this Trifan extruder extemely compact and lightweight, but it works the way any proper extruder should. By providing excellent nozzle viewing as well as complete control over cooling air flow. I have included two versions of the Compact Trifan Extruder. Since the housing wraps around the extruder to isolate the air flow, the Locking Tab Plate and Standard Housing have a contour to fit the stock extruder. The standard housing will also fit the Micro Swiss (and Clones) extruder, with the addition of a dedicated Micro Swiss Locking Tab Plate. As an option, I also covered the bottom surface of these two parts with a reflective aluminum foil insulating tape that comes in small two inch wide rolls. This was primarily a failsafe addition, but is probably necessary for longer prints at higher temperatures. It is a simple and easy add-on to the lower surface of the housing and locking tab. I printed these parts in PTEG at 80% fill and .20 resolution. This material seems to hold up to the extruder heat just fine, especially with the aluminized heat shield tape on the lower surfaces. If more heat tolerance is necessary, they can be printed in Polycarbonate or ABS, in which case I would first print them in PTEG so that the cooling fan isolation features of this Trifan Extruder Housing can be utilized. I included some screen shots of the parts as printed in Cura, to show the orientation of the parts on the build surface as well as the type of supports required. The main fan housing should be placed with the fan grill opening face down on the build plate. Normal supports from everywhere and basic skirt adhesion. The Locking Tab should be placed with the backside face down on the build surface with the same settings as the housing. The right and left fan ducts need to be placed with the lower duct opening touching the build surface with a slight angle tilted forward (see screen shot). Use tree supports from the build plate surface and basic skirt adhesion. These parts are a bit tricky to print, but this method seemed to get them to print pretty well consistently. Parts List 1. One extra 24VDC Winsinn 40mm 4010 dual bearing brushless turbine blower fan. 2. Four (4) M2 x 6mm Hex Socket Head Cap Screws for the upper mounting screws for both 4010 side mounted blower fans. These will self tap into the printed mounting holes. I used black oxide screws to match the black parts. 3. Four (4) M2 x 10mm Hex Socket Head Cap Screws for the lower mounting positions of the side mounted blower fans, which also retains the Fan Ducts. These also self tap into the printed mounting holes. Again, black oxide screws. 4. Four (4) M3 x 12mm Hex Socket Button Head Cap Screws for the inside mounted stock extruder fan. These are slightly longer than the stock button head screws and self tap into the printed mounting holes. 5. HMFC 2in x 16ft Aluminum Fiberglass reinforced Adhesive Backed Heat Barrier Tape. This is used on the bottom surface of the Locking Tab Plate and Main Housing. I was able to find a pair of Winsinn blower fans and an assortment of M2 socket head cap screws, as well as an assortment on M3 Button Head socket screws on Amazon at a reasonable price. Also, the Heat Barrier Tape was found at Amazon as well. The Extruder will need to be temporarily unmounted to install the Locking Tab Plate. Simply remove the two extruder mounting screws and slide the Locking Tab Plate over the extruder body and install the single stock screw for the Locking Tab Plate and reinstall both extruder mounting screws. The extra side mounted blower fan is spliced into the power lines of the original side mounted blower fan. There is a cutout on each side of the new housing that will retain the wires for the side mounted fans. I recommend using some epoxy on the fan body where the wires enter the side of these fans as a strain relief. These are very delicate solder joints and can break if handled too much. I used JB Weld Black Plastic Bonder and applied a small amount to hold the wires in place. When mounting the main Housing, be sure to slide it over both tabs on the fixed Locking Tab Plate. This will provide a secure three point mount with the two tabs on the Locking Tab Plate and the single screw on the Main Housing. Update 1: I had a request to extend the housing enough to fit a Noctua 40x20 fan instead of the stock 40x10 fan. This new housing, Extruder_Fan_Housing_Noctua.STL, will also work with the standard and MicroSwiss extruders, as well as both Locking Tab Plates. It is only .15 inch deeper than the Standard Housing for the stock 40x10 fan. It can be used with either the stock or Noctua extruder fan. Update 2: There was some interest in adding a mount for the BLTouch sensor. I was able to get it to fit and also used the .15" deeper housing to fit either the stock or Noctua extruder fan. I do not have a BLTouch to verify full functionality, but I did find all the dimensions necessary directly from the BLTouch website. Update 3: The stock Creality and Micro Swiss hot ends are basically the same overall height. The original fan ducts I posted will work for either of these. However, some Micro Swiss clones, like the early version Gulfcoast Robotics all metal hot end has a shorter overall height than the Micro Swiss. The original fan ducts will be too close to the part and may interfere with the nozzle path. I provided a revised version of the fan ducts that are .050" shorter in height, which work with a shorter Micro Swiss clone hot end. Note- the current version Gulfcoast Robotics clone hot end is the same size as stock and can use the original version fan ducts. Update 4: I just purchased another new Gulfcoast Robotics micro swiss clone. They made some changes over the early version I have. The overall height is now the same as the stock and Micro Swiss hot ends. Therefore, the original full height Fan_Duct_Left_Alt_1.STL and Fan_Duct_Right_Alt_1.STL ducts can be used with the current version micro swiss style Gulfcoast Robotics all metal hot end. Also, the chamfer cuts are larger on the new version. I made a new Locking_Tab_Micro_Swiss_2.STL that allows the hot end to be oriented with the chamfers and heatbreak set screw facing forward. This locking tab can be used with any version Micro Swiss and clones hot ends. With this setup I have been able to make great ABS prints with no warping with the Bowden setup and the Creality glass bed (part cooling fans off).
With this file you will be able to print Compact Trifan Ender 3 / Pro Extruder Housing with your 3D printer. Click on the button and save the file on your computer to work, edit or customize your design. You can also find more 3D designs for printers on Compact Trifan Ender 3 / Pro Extruder Housing.