Compact Wade's extruder and X Carriage.
thingiverse
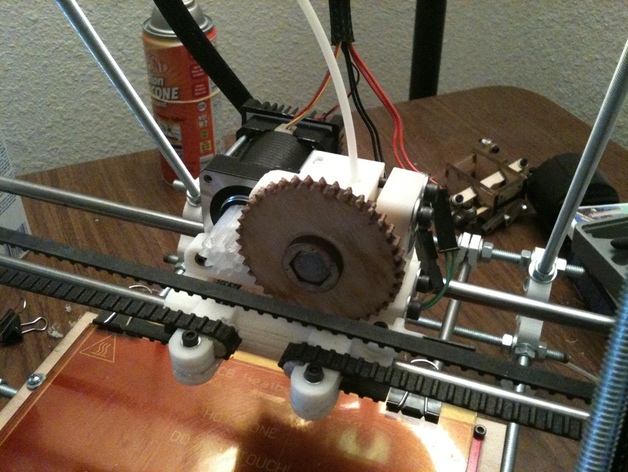
This initial extruder wasn't the one I sought; for Prusa i3 fans, check out http://www.thingiverse.com/thing:24219. After adding http://www.thingiverse.com/thing:12538, I faced a Z-axis issue with the drive motor clashing with the printer frame (Z > 30, X < 10). Back to the drawing board - requirements included support for LM8UU bearings, tangential x-axis mounting, adjustable belt tension, optical end-stop flag mounting, hot-end clearance, minimal print area reduction, and a removable hot-end. Additional goals were easy hot-end removal without dismantling the printer and low overall assembly height. Although point 5 was compromised due to combined carriage/extruder design and higher hot-end placement, points 6 and 8 were successfully achieved (89mm long, 95mm high when assembled). Anchors in .scad can help keep the carriage stuck to the printbed. Be cautious with bridges during printing for optimal results. Acknowledgments to Wade Bortz, Josef Prusa, and Greg Frost for their inspiring designs. Print the revised design, remove anchors and support structures. Note that ABS tends to shrink and creep, so pre-fill nut traps and zip-tie holes on the bottom layer. Insert nuts into nut traps for installation.
With this file you will be able to print Compact Wade's extruder and X Carriage. with your 3D printer. Click on the button and save the file on your computer to work, edit or customize your design. You can also find more 3D designs for printers on Compact Wade's extruder and X Carriage..